Create a new map and learn basic tools
Once your account is set up, it’s time to create some maps! But first, let’s get acquainted with the GIS Cloud platform.
Your go-to app will be GIS Cloud Manager from where you can access Map Editor, Mobile Data Collection Portal, or manage your users and their subscriptions. It is important to note that it’s necessary to assign licenses to yourself or other users before starting to use the apps. No matter if you just bought the license, you still have to assign it to one of the users. Learn more about assigning licenses here.
The process of creating a map is divided into following sections
Here’s a quick video tutorial to get you started on the basics.
Here’s a quick video tutorial to get you started on the basics.
Create a new map
To create a new map and start working with your data, open Map Editor. Map is created in the following way:
- Open Map Editor and login with your GIS Cloud credentials.
- From the Home tab select Create New Map.
- Write the Map name and select one of the available basemaps.
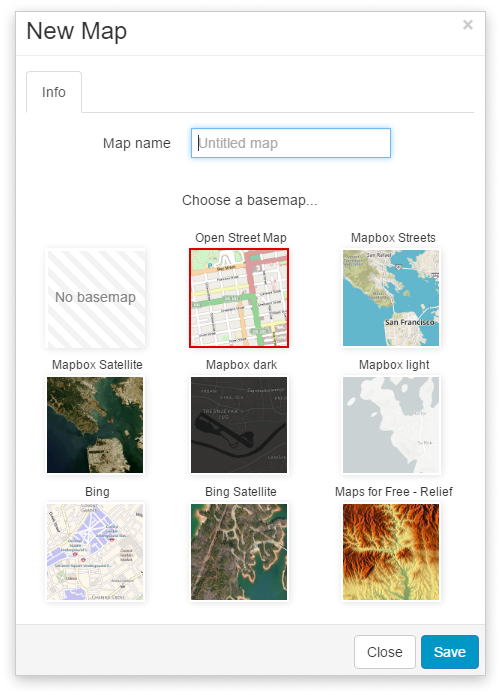
Note: Mapbox basemaps are available only for Premium users. Contact us info@giscloud.com for more info about available plans.
Additional information about the map can be accessed and edited through the Map Properties. To check it out, click here.
Import data to Database
Now it’s time to add some data on the map. The data on the map is represented in layers and each layer and the table connected to it can be additionally edited to represent the data the way you want. But first, check out supported types of data.
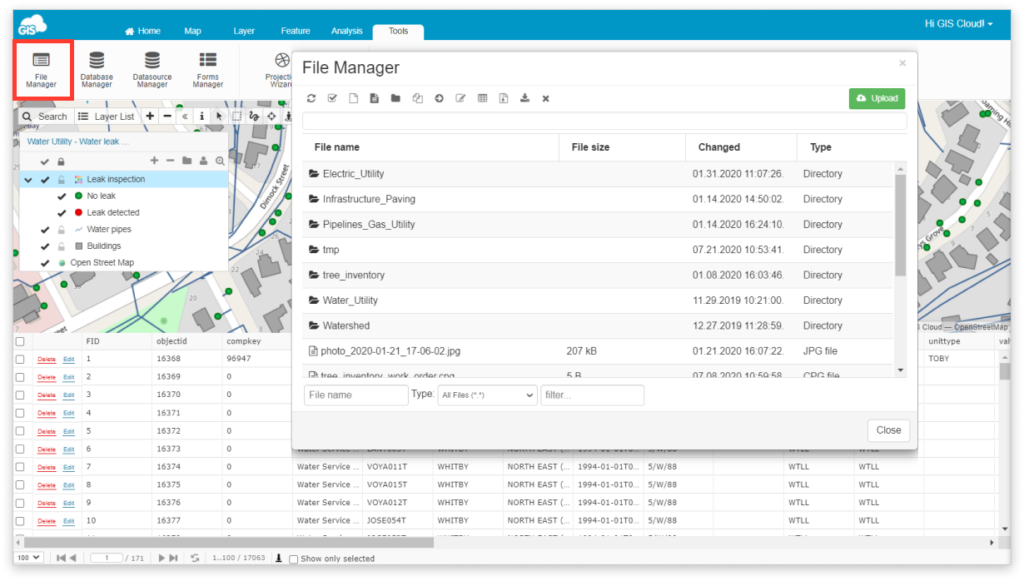
All data (including media files) has to be stored in the File Manager.
- Go to Tools toolbar and open File Manager.
- Click on the Upload button
- Select data you wish to upload with Add Files or Drag & Drop option
Please note that the data in File Manager is only subject to appearance changes.
If you wish to edit the data or perform data analysis, then it is needed to import it to Database Manager.
Note: Once you import the data to Database Manager, you can delete it from File Manager to save some space!
- Navigate to Tools toolbar and open Database Manager
- Click on Import Geospatial File
- Select the layer you want to import
- Click on the Select button
- Write table name
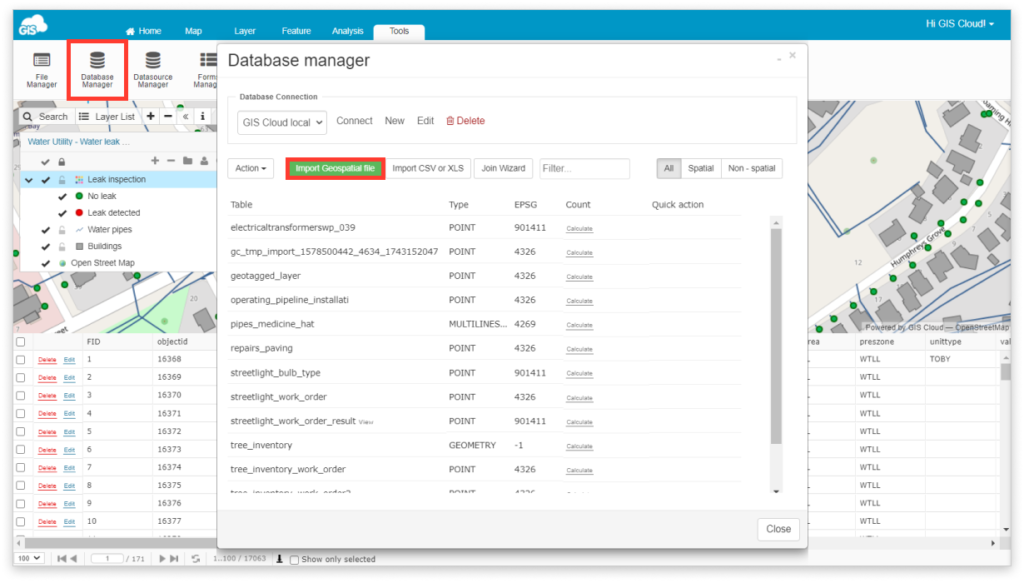
Note: When naming a table make sure to – start with a letter or an underscore (_), use only English alphabet letters, digits and underscores and use only lower case
To find out more about adding data, check out this guide.
Add and manage layers on the map
Once everything is set up and the data is added in File Manager or Database, then you can add it on the map.
- Click on Add New Layer under the Layer toolbar.
- Choose a layer you wish to add from the Source Browser
- Click on Select.
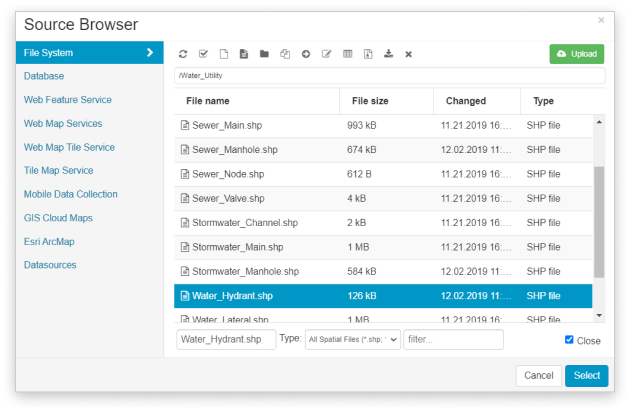
A newly added layer will appear in the Layer List on the upper left corner of the screen. By pressing and holding the layer and moving it up or down you can change its order in the Layer List, which will result in different visibility on the map.
To check the source of your layer, just hover over it – “pg” stands for Database, and “file” stands for File Manager.
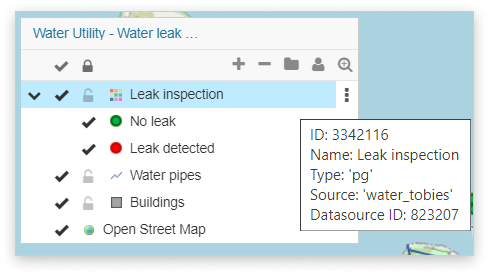
However, if you have to work with a lot of layers, the best way to manage them is to put them in folders. To create folders, click on Create New Folder in the Layer List and drag & drop some layers into it.
Also, for easier management of the layers, it is possible to turn off the visibility of the layer by clicking on the visibility button.
Learn more about data management here.
Create new layers
You can even create your own datasets either by drawing the geometry through Map Editor or collecting it from the field using our MDC app.
To make a new dataset in Map Editor by yourself:
- Navigate to the Layer toolbar and click on Create New Layer
- Insert a name, choose one geometry type, projection and add some attributes
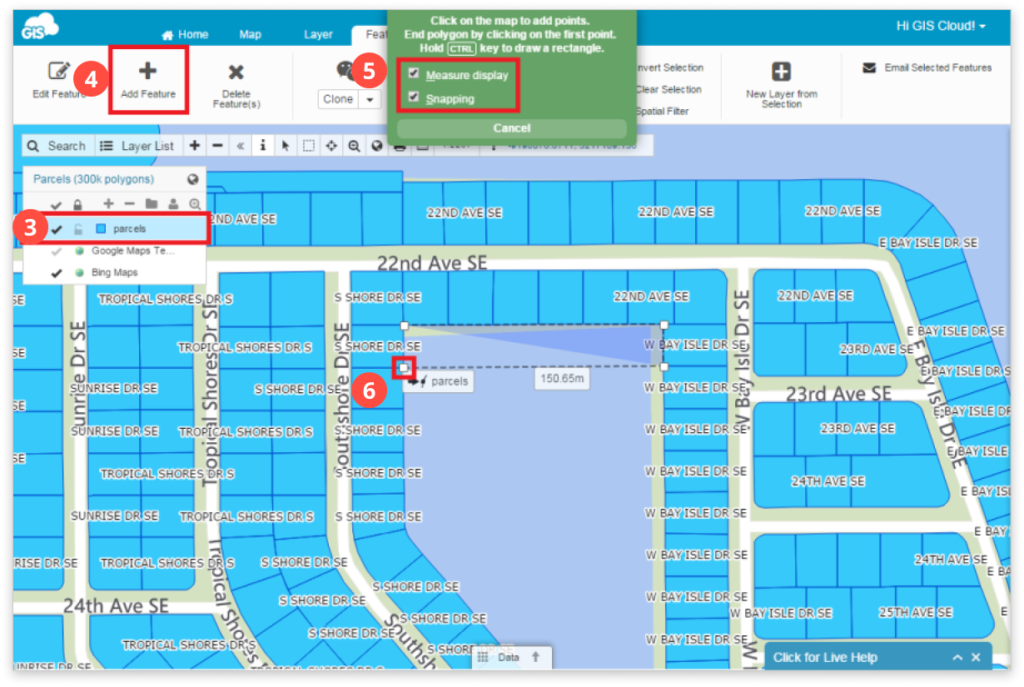
- Click on the layer in the layer list
- Go to the Feature toolbar, click on Add Feature
- Turn on Measure display and/or Snapping (optional)
- Start placing points of your new feature
- Once you want to finish your new feature, just click on the last-placed point and the feature will be finished
To check more information about custom datasets, click here.
Customize your map
Map Editor also offers plenty of possibilities to customize and classify data based on some attributes. To change the appearance of features:
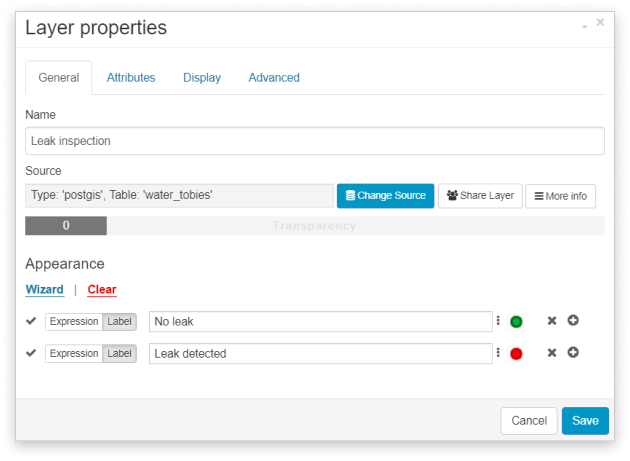
- Open Layer Properties by double-clicking on the layer in Layer List
- Use the Wizard to classify data on distinct or continuous values
- Change the symbology by clicking on the square on the right for better differentiation of layers.
- Choose different colors, symbols (or add your custom symbols), line width…
Detailed information about customizing maps with custom icons can be found in this guide.
Export map
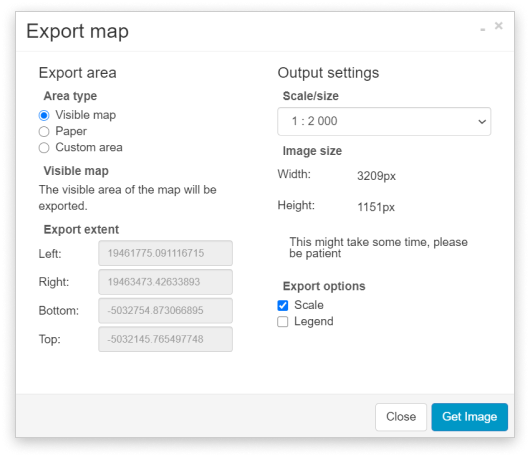
Learn more about exporting data by clicking here.
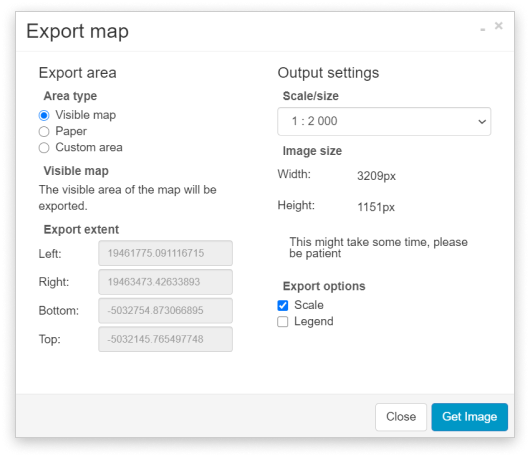
The maps in GIS Cloud can be exported to PNG format.
- Navigate to the Map tab.
- Select the Export Map option.
- Define the export area, output settings and additional options for getting the image you’d prefer.
- Click Get Image to generate the exported map.
- When the exported map is generated, you can choose between:
- Show Image – the exported map will open in a new tab in the web browser.
- Download Image – the exported map will be saved locally on your computer.
