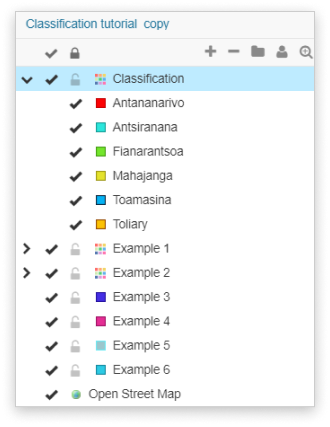
Classification examples
You can modify the display of a layer based on the values of its attributes. Operations can be performed based on distinct or continuous values.
Here are some examples of classification based on distinct values.
To perform Classification on tutorial data click here to download data. As an example in this guide, we used the MDG_adm2 shapefile.
Table of Contents
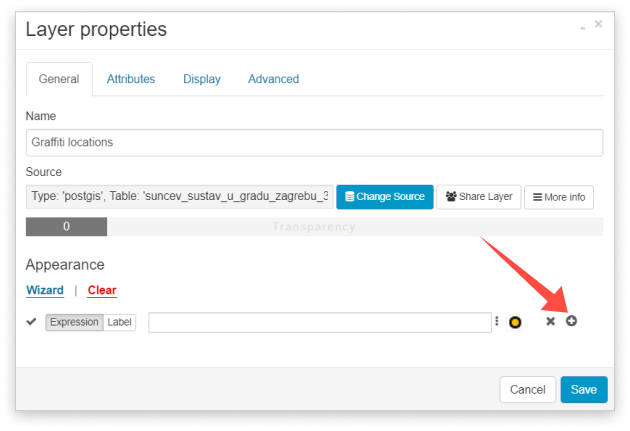
Set a label and classification expression
The expression is an automatically generated field that contains rules to display objects on the map. While editing expression values, make sure that you type the exact value as written in the Data Grid. Note that features that don’t satisfy any condition will not be visible on the map.
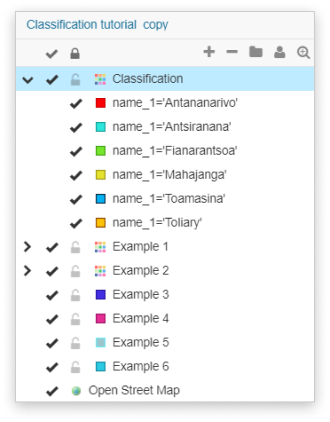
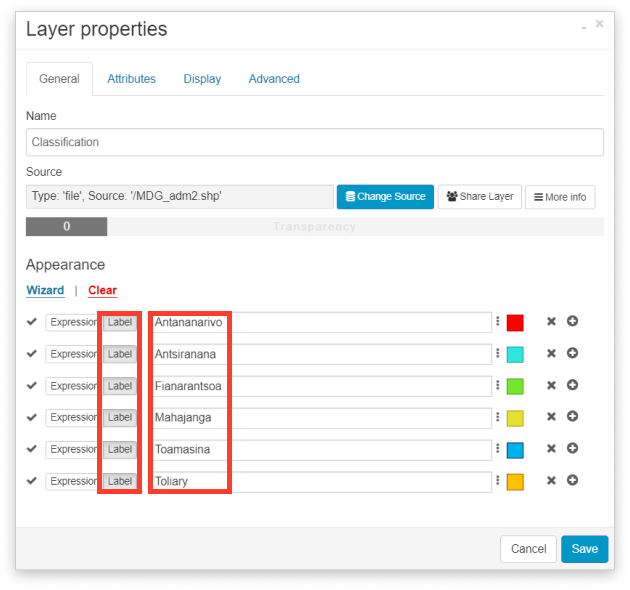
If you want to rename a class, you can do it by clicking the Label button in the Layer Properties. The label is the class name visible in the Layer List. While renaming a class make sure that you are not in the “Expression” mode.
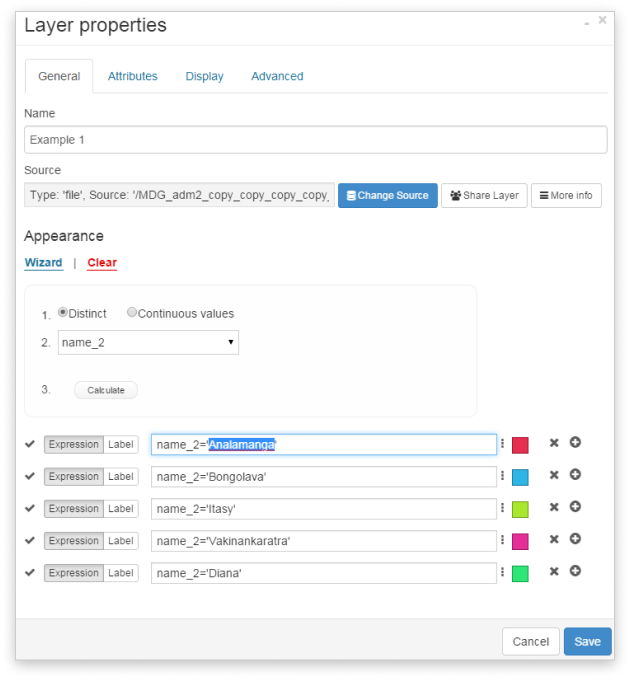
Example 1. Change the value of one class
- Open a Layer Properties (Layer tab-Edit layer).
- Click the Wizard button.
- Select the Distinct radio button.
- Select the field whose values will define the layer display.
- Click the Calculate button.
- Change the value of the expression.
- Click Save.
Note: Values are case sensitive.
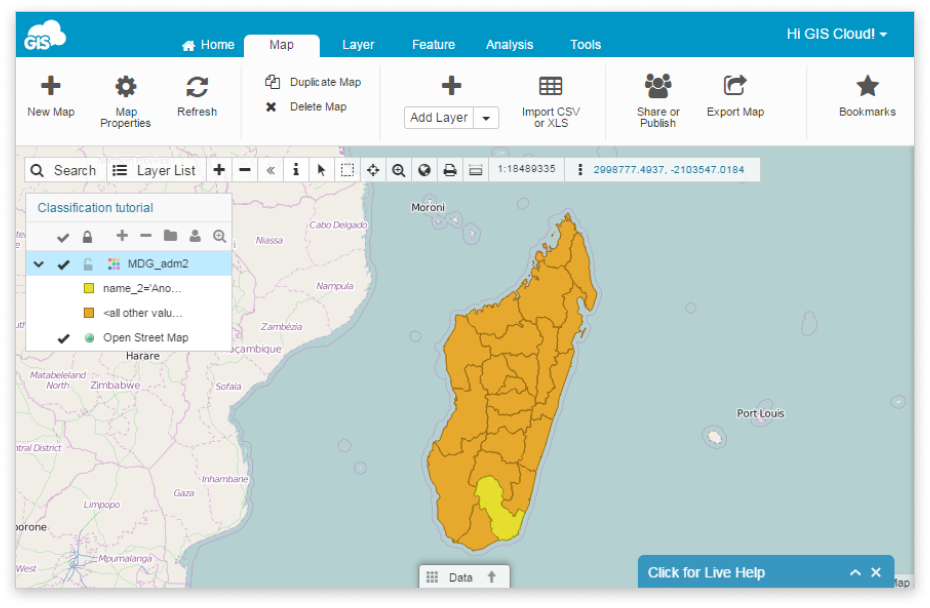
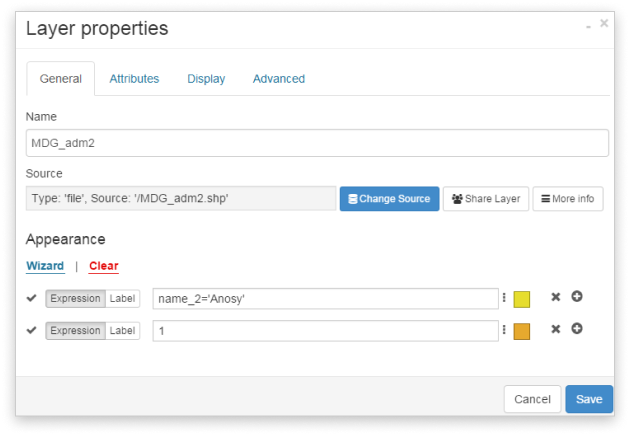
Example 2. Extract one class and put all other data into another class
It is possible to extract one class and put all other values into another class.
- Open a Layer Properties (Layer tab-Edit layer).
- Click the Wizard button.
- Select the Distinct radio button.
- Select the field whose values will define the layer display.
- Click the Calculate button.
- In the first expression box, write the value that you want to extract (name_2=’Anosy’).
- In the second expression box, enter 1.
- Click the Save button.
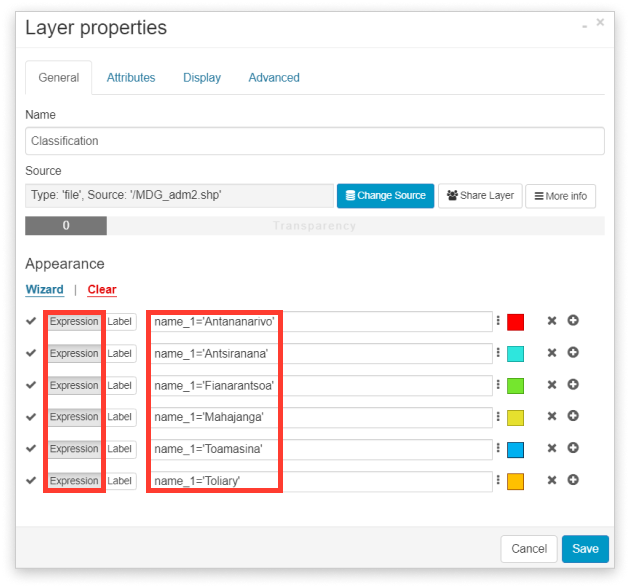
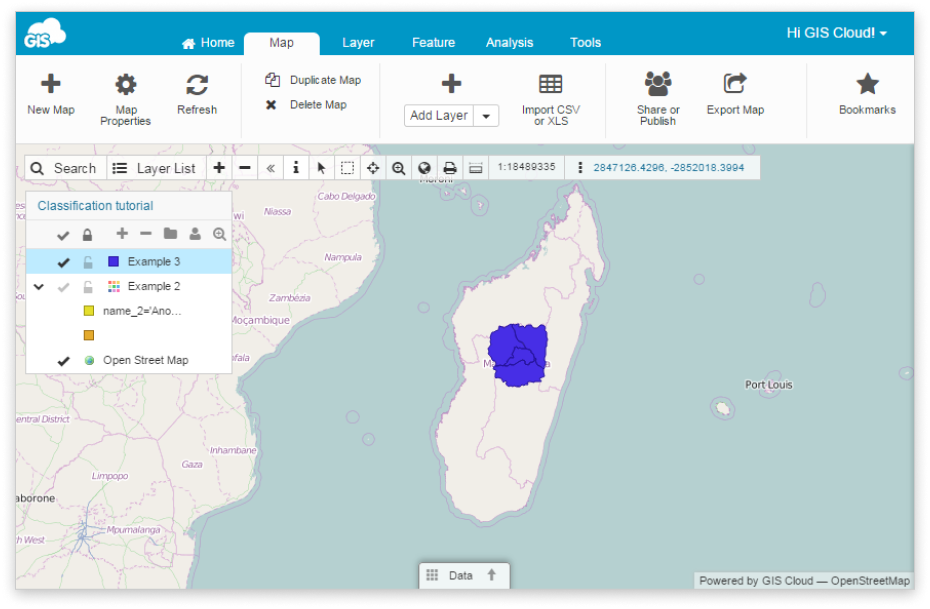
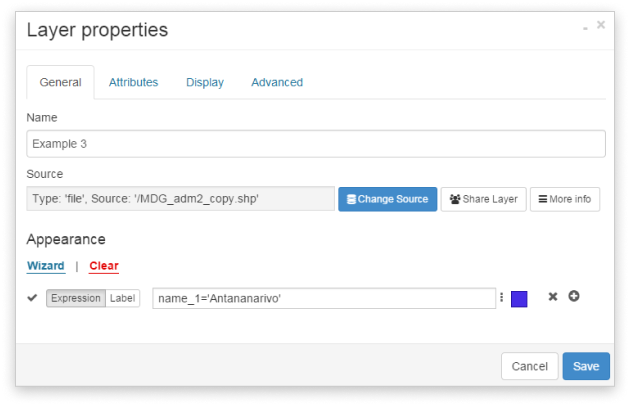
Example 3. Display values of one class
- Open a Layer Properties (Layer tab-Edit layer).
- Click the Wizard button.
- Select the Distinct radio button.
- Select the field whose values will define the layer display.
- Click the Calculate button.
- In the expression box, enter the value that you want to extract (name_1=’Antananarivo’).
- Delete all other classes.
- Click Save.
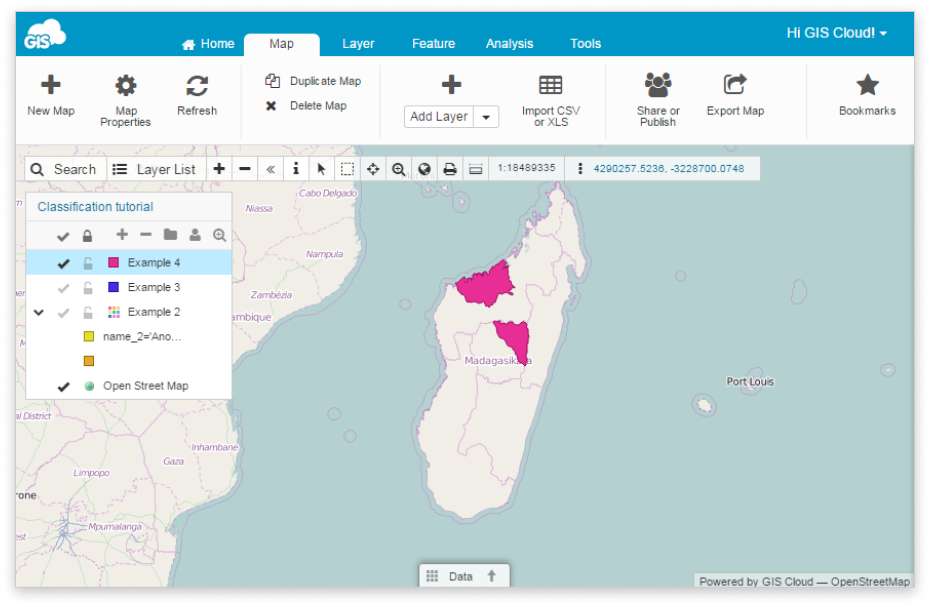
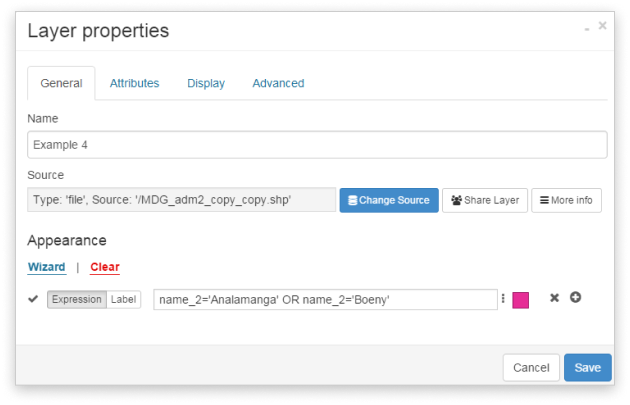
Example 4. Display more values in one class
You can display more values in one class using the operator ‘OR’.
- Open a Layer Properties (Layer tab-Edit layer).
- Click the Wizard button.
- Select the Distinct radio button.
- Select the field whose values will define the layer display.
- Click the Calculate button.
- In the expression box, write the first expression (name_2=’Analamanga’).
- In the same expression box, write OR.
- Write the second expression (name_2=’Boeny’).
- Click Save.
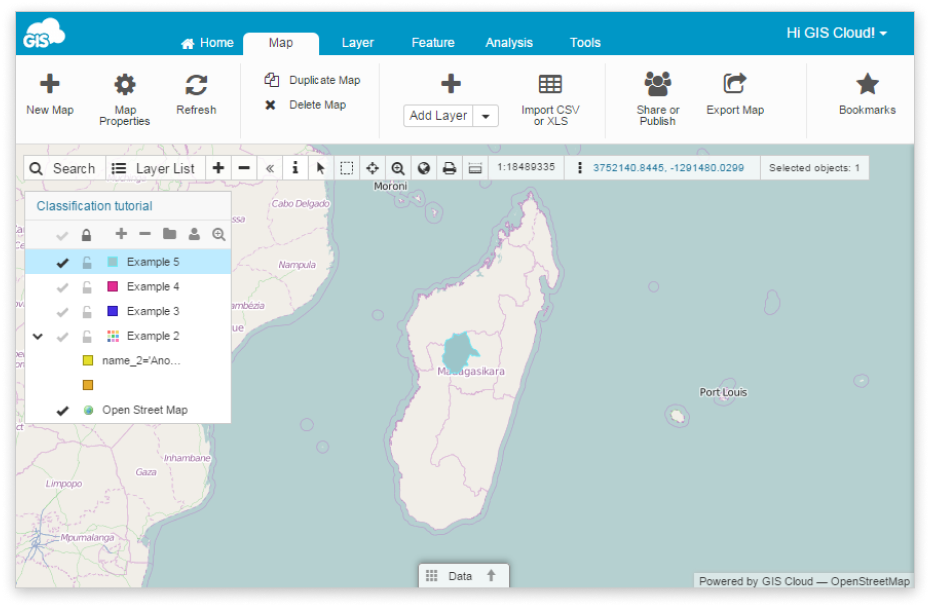
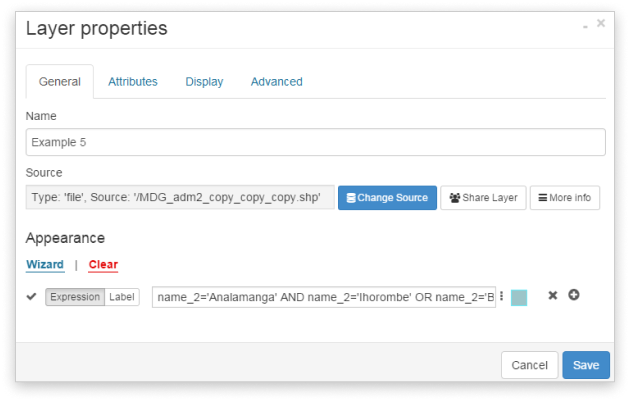
Example 5. More complex expression
Display features that contain value Analamanga and Ihorombe, or if this feature doesn’t exist, display features with value Bongolava.
- Open a Layer Properties (Layer tab-Edit layer).
- Click the Wizard button.
- Select the Distinct radio button.
- Select the field whose values will define the layer display.
- Click the Calculate button.
- In the expression box, write the first expression (name_2=’Analamanga’).
- Write operator AND.
- In the expression box, write the second expression (name_2=’Ihorombe’).
- Write operator OR.
- In the expression box, write the third expression (name_2=’Bongolava’).
- Click the Save button.
Example 6. Display all classes except one
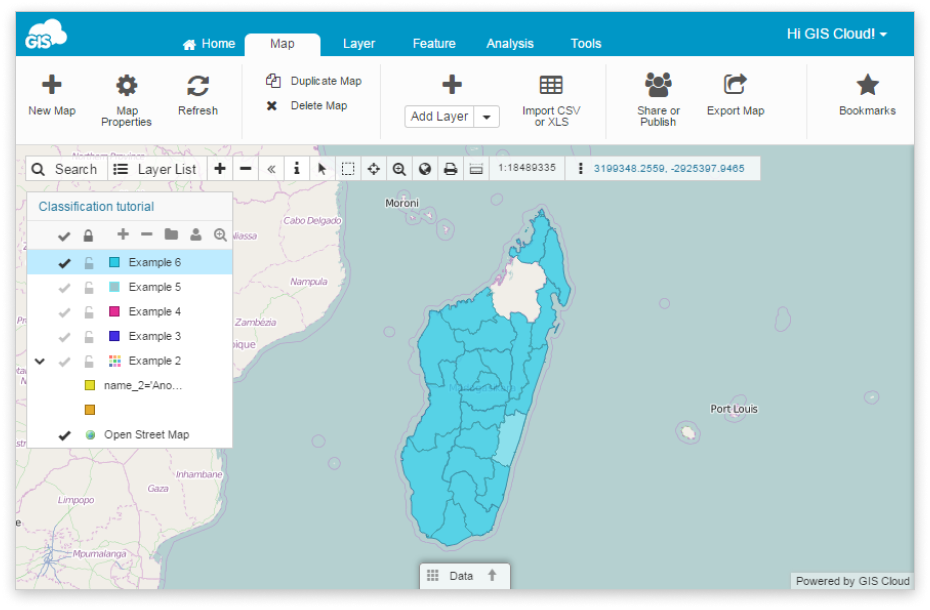
- Open a Layer Properties (Layer tab-Edit layer).
- Click the Wizard button.
- Select the Distinct radio button.
- Select the field whose values will define the layer display.
- Click the Calculate button.
- In the expression box, write operator AND NOT.
- In the expression box, write the expression that you don’t want to see (name_2=’Sofia’).
- Click Save.
Take a look at all supported operators.
Example 7: Date&Time classification
This guide will explain how to classify layers based on the data from two columns: CREATED & MODIFIED.
CREATED & MODIFIED are two special GIS Cloud columns that record time.
CREATED records the time when the feature was created on the map while MODIFIED records the time the feature was edited.
Now that you know the basics, let’s start with the classification!
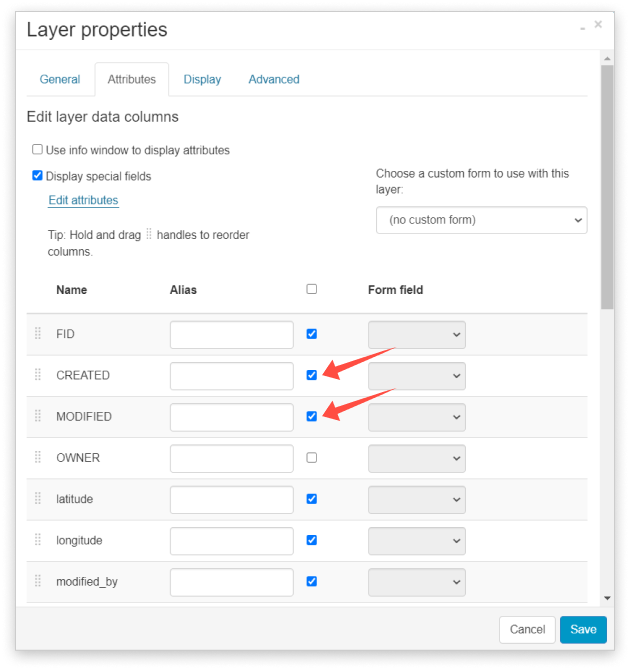
- The first step in this process is to activate those columns in your data grid. To do that, you should double-click the layer >> open Attributes tab >> click on the checkmark next to the wanted column. Click Save.
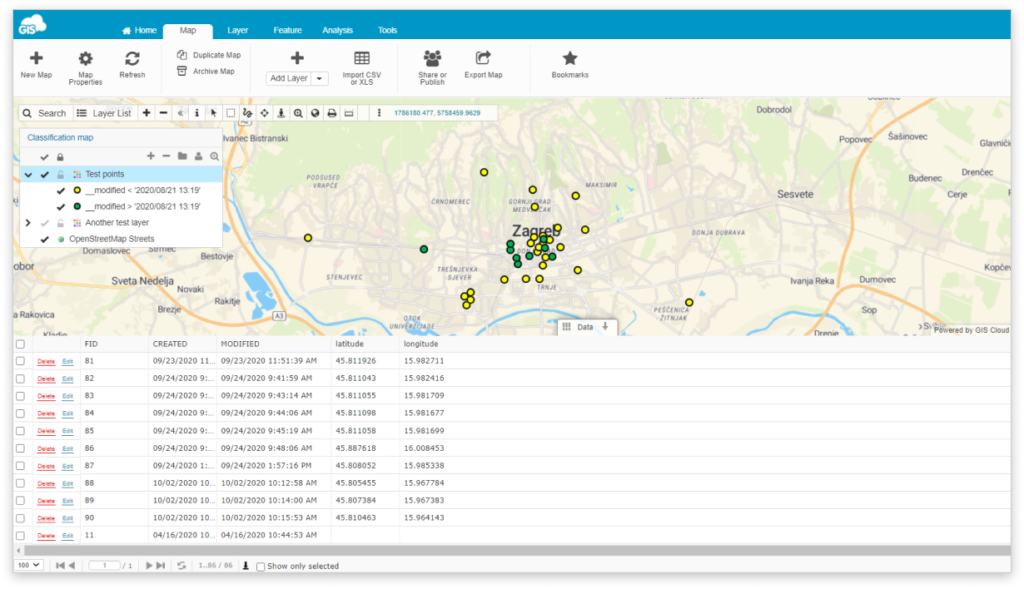
- As an example, we will classify our layer based on the data in the MODIFIED column.
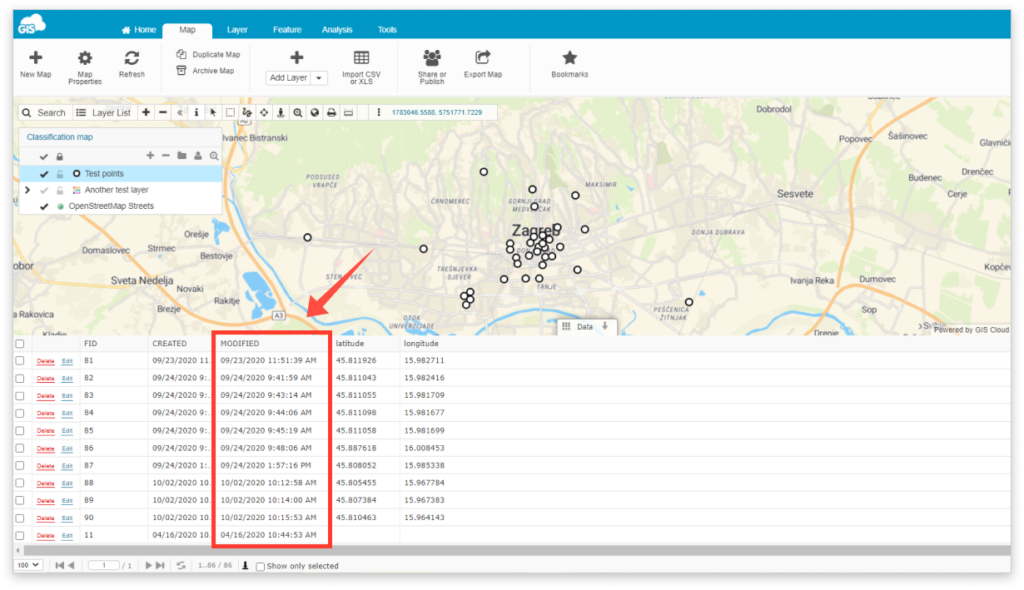
Our location is the city of Zagreb, which is in the timezone UTC/GMT +2.
Our goal is to create two classes: one class that will visualize features modified before the 21st of August 2020 at 15:19 (local time) and the other class for the features modified after that same date.
To do that please follow these instructions:
- Double-click the layer and find the existing class under Appearance in the General tab.
- Since we will have two classes, click on the Add new button next to the existing class.
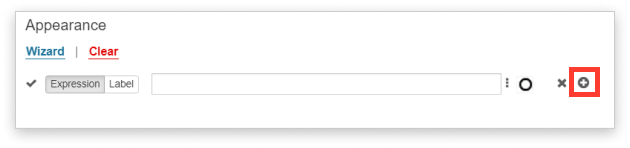
- Time to write the expressions!
Here are some important notes to consider when writing them:
How to write the date?
- The date should be written in this format ‘YYYY/MM/DD HH:MM’.
- The date and time you see in the MODIFIED column in the data grid is written in your local timezone.
However, in the backend, that date is registered in the UTC time, so when writing the date in the expression, you should write the UTC date&time (without the seconds, AM/PM and time zone information).
Time string from the data grid (local time): ‘08/21/2020 15:19:00 PM’
Time string you should write in the expression (UTC): ‘2020/08/21 13:19’
How to write the name of the MODIFIED column?
- “MODIFIED” is just a column alias. In the backend, that column is registered as “__modified” so that is how you should write it in the expression. The same goes for the CREATED column.
How should the expressions look like then?
For the class that visualizes the feature modified before the 21st of August 2020 at 15:19 (local time):
__modified < ‘2020/08/21 13:19’
For the class that visualizes the feature modified after the 21st of August 2020 at 15:19 (local time):
__modified > ‘2020/08/21 13:19’
Save the changes and see the end result below!
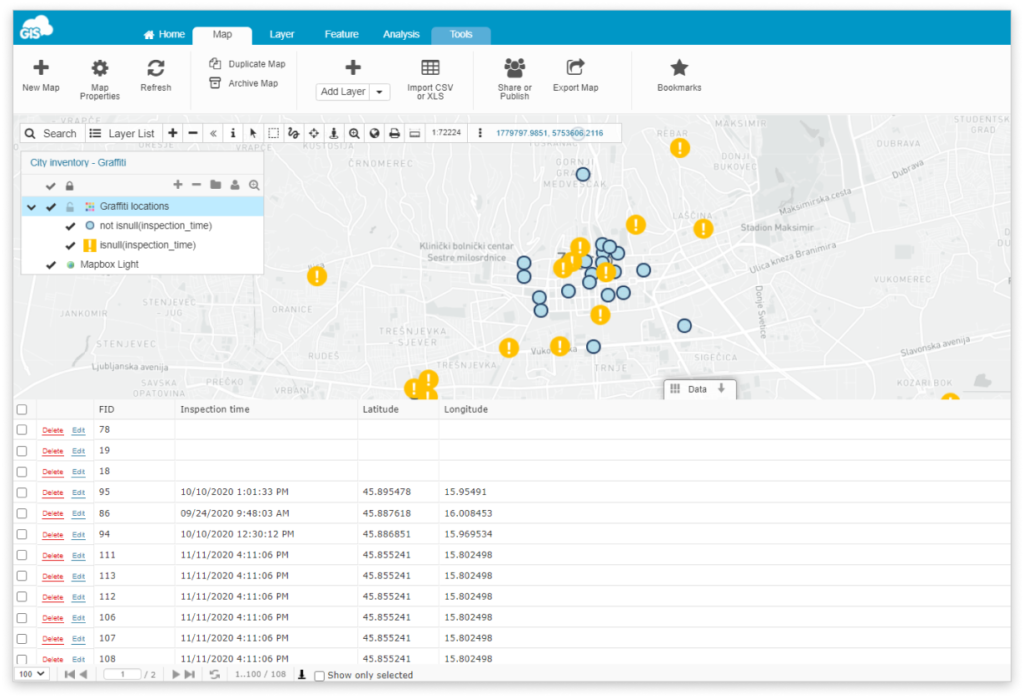
Example 8: Classify features without values
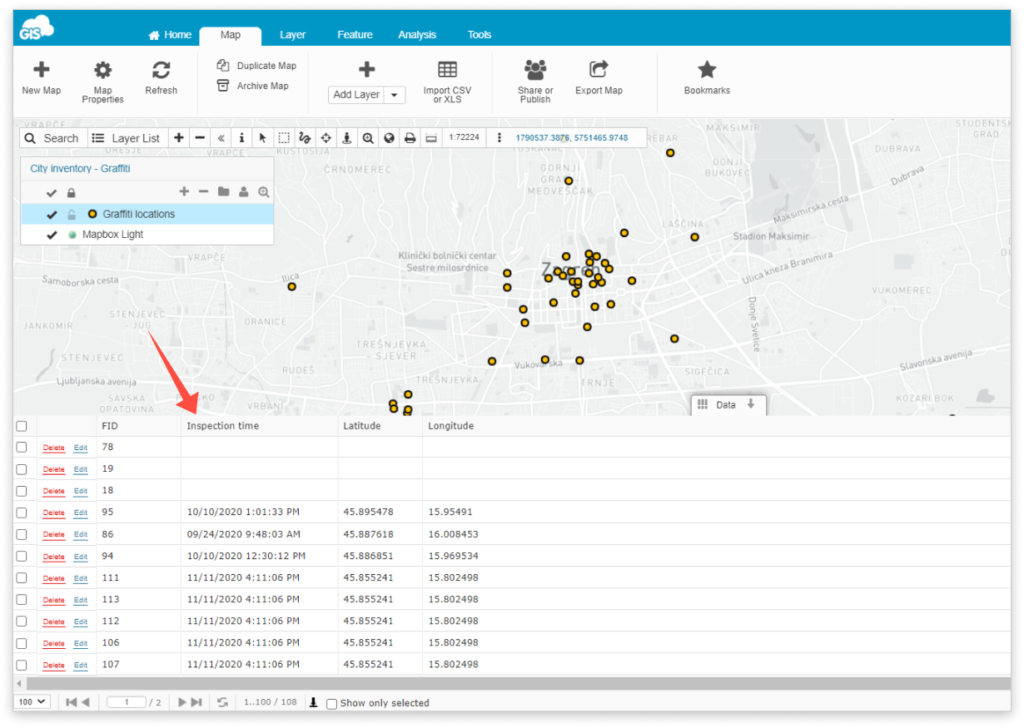
In this guide, we will explain how to classify features without values in a separate class.
The column we will use as an example will be the “Inspection time” column. As you can see in the picture below, some features do not have the inspection time listed in the table.
To classify these features to a separate class, follow these instructions:
- Double-click the layer to open layer properties.
- Click on the plus next to the layer in the Appearance wizard to add a new class.
- Write the appropriate expressions.
In this case, we will use the isnull and not isnull operator.
Note: When writing the expression, make sure you write the column name, not the column alias. Learn more about column aliases.
Alias of this column: Inspection time
Original column name: inspection_time
How expressions should look like:
- For features with values: not isnull(inspection_time)
- For features without values: isnull(inspection_time)
- Choose the appropriate icons for your classes. Learn more about changing icons.

- Click Save!