Collecting photos and videos in the field
One of the ways you can ensure the quality of your data collection projects is to include media – photos and videos – in the data collection process. This ensures that you have the data in a text format and a visual confirmation of the data collection. This can be handy if you need proof of your work or as a helpful addition for quality assurance (for example, provide the office team that validates the fieldwork with a photo or video that they can use to confirm the accuracy of collected data).
Adding photo and video fields through Map Editor or Mobile Data Collection Portal
Add photo and/or video fields to your data collection form. You can do this in Map Editor (in the Forms Manager) and the Mobile Data Collection Portal. For a complete step-by-step tutorial, follow the guides for creating projects in Map Editor and the Mobile Data Collection Portal.
Select the Add new field button, then find the Photos and/or Videos options in the Media section of the drop-down list.
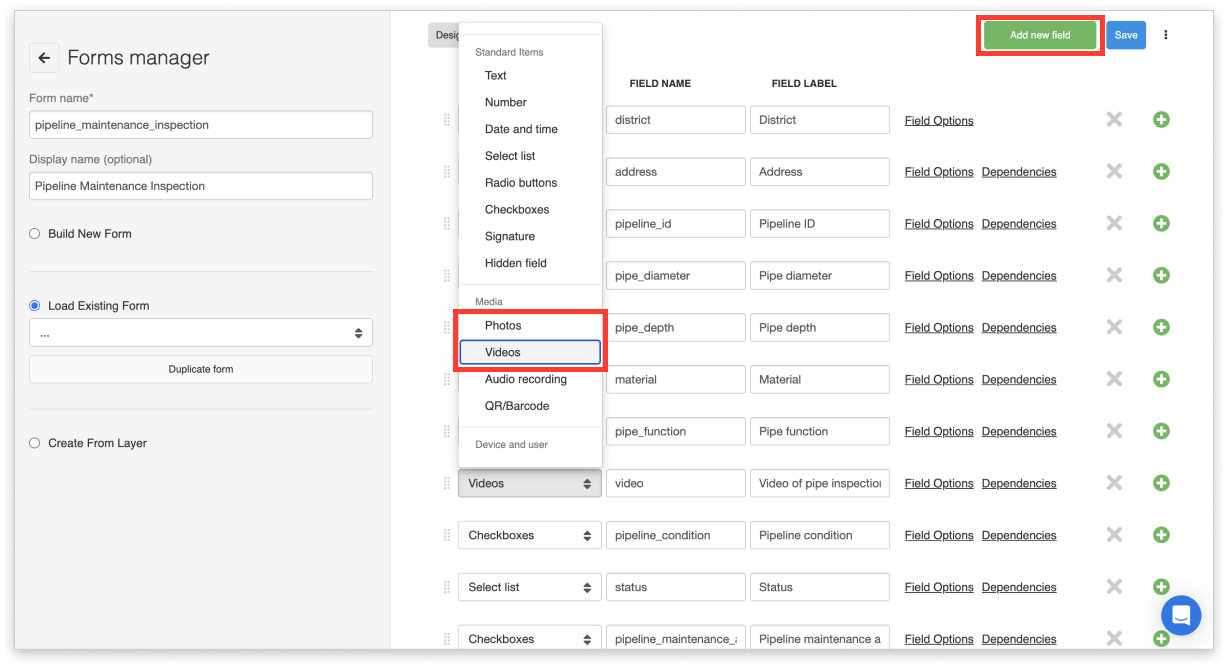
See a list of all other available fields here.
Collecting photos and videos in the Mobile Data Collection app
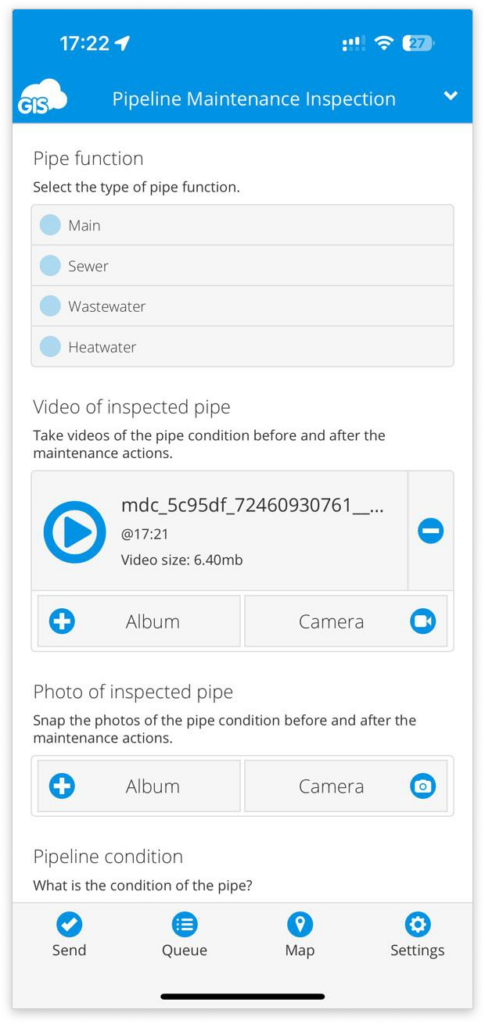
In the Mobile Data Collection (MDC) app, find your form and open it. Once you get to the Photo and/or Video field in the form, you can either take the photo or video directly from the MDC app or browse your library to select a photo or video you took earlier. You might need to allow additional permissions to access your device’s media library. The limit for video files is 50MB.
Learn more about collecting data using the Mobile Data Collection app here.
Adding photos or videos through the Add feature option in Map Editor
Alternatively, you can attach photos and videos when adding new features (or editing existing ones) through the Map Editor. In Map Editor, select your layer, then in the Feature tab, select Add feature. If editing an existing feature, select it, then click on Edit (or Edit attributes in the Info panel). If your layer has a form attached to it, and the form includes photo or video fields, you can directly select the corresponding files to attach them.
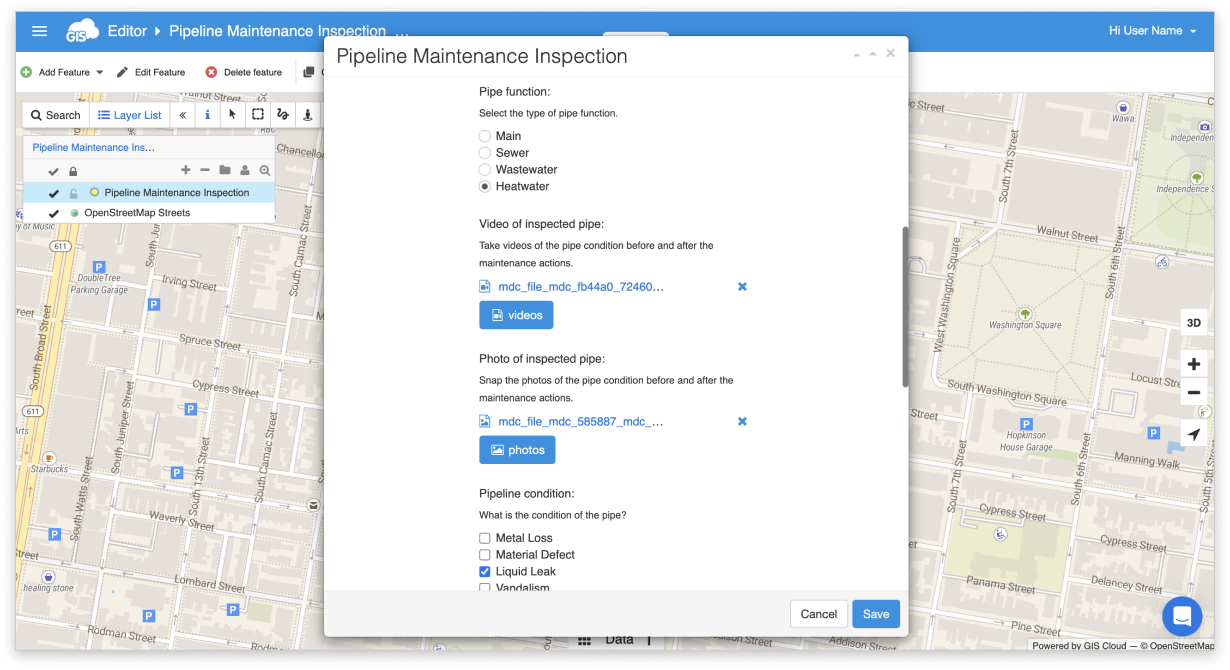
Note that it’s also possible to directly attach any media to a feature through Map Editor even without the form connected to it, but the form item is required when working with the Mobile Data Collection app.