Add shared datasource
Datasource represents the core of a layer, it is the attribute table connected to the features represented on the map. Sharing a layers datasource/table enables you to share and use a layer independently from the owner’s map.
Note: The main difference between sharing a layer and a layers datasource is that with the shared layer user can use the layer only within the shared map which first must be shared with the View permission at least (learn more here) while the shared data source allows using the shared layer in any map, his own or the ones shared to him with edit privileges.
First you need to upload a table into the Datasource Manager:
- Select the Datasource Manager from the Tools tab.
- Click Add Table in the Source Browser.
- Write a Table name and Browse to Select the layer datasource from your database you wish to share.
- Click Save.
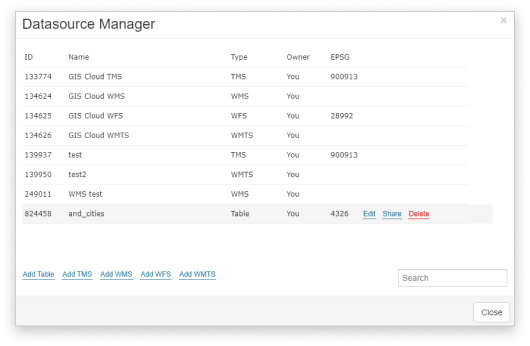
The table is then available in your Datasource Manager, hovering over it shows you three options: Edit, Share, and Delete. The table can be shared with View, Share, Edit and Export as well as with MDC permissions Collect and Update.
Tables shared with you will also be listed in your Datasource Manager (you’ll notice the owner of the original datasource is listed). Apart from tables, you can also add TMS, WMS, WFS, WMTS, and Basemap in Datasource Manager and use it as layers on the map.
Adding a layer
Shared layer datasource is added to a project as shown below:
- Select Add Layer from the Layer tab or Map tab.
- Select Datasources from the left hand menu (bottom of the list).
- Select a table, or another service like WFS, WMS, etc.
- Click the Select button.
Now you have a shared layer available to work with, keeping in mind that the level of your access depends on the permissions given to you by the owner of the layer (and the other way around, of course).