How to manage layer’s attribute table?
Every layer has its table where all the attributes are stored. This attribute table can be customized in a way that you can add more columns to it, rename existing columns, remove columns, give alias names and many more. All you need to know about managing the attribute table is described in this guide.
In this guide you will get more information about:
Overview of column types
String is used to represent text as well as numbers, the most flexible and commonly used field type. It is also mandatory for attaching media files.
Integer is used to represent only whole numbers. For data collecting it is best to use this type for the following location form items: Altitude, Altitude accuracy, Speed and Time.
Real is used to represent all real number values (whole and decimal). It is mandatory for representing latitude and longitude data. For data collecting it is best to use this type for the following location form items: Longitude, Latitude, Accuracy and Heading.
Length is an automatically populated field that displays the length of the line feature.
Area is an automatically populated field that displays the area of the polygon feature.
Date & Timestamp are additional field types commonly found in Shapefile format. However, when connecting the layer with MDC form, it is not recommended to connect it with Date and Timestamp fields. Find more info about it here.
Add or delete columns from the attribute table
If you wish to make structural changes in your attribute table you can easily add new or remove columns from the layer attribute table. You can access the layer structure through the Layer properties:
1. Double click the layer you want to edit or go to the Attributes tab.
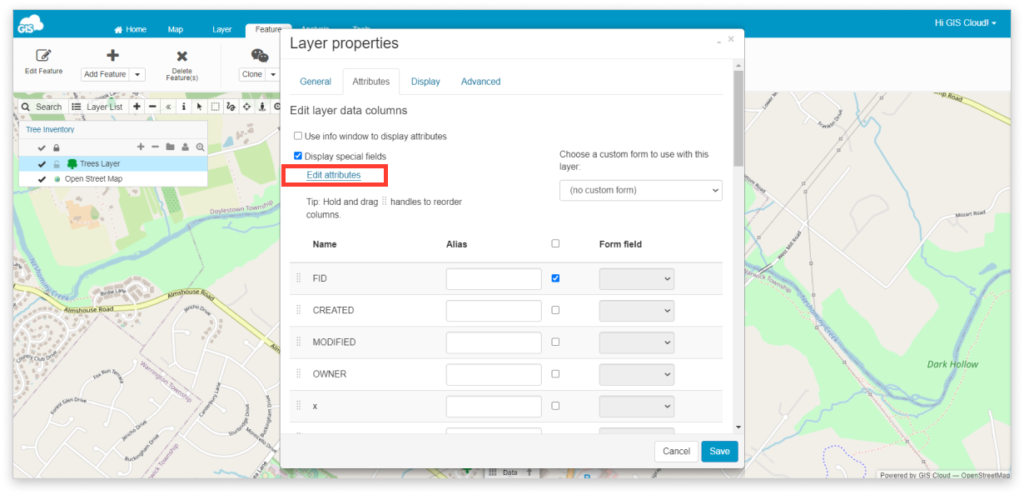
2. In the Attribute tab choose the Edit attributes option.
3. If you want to add a column, set column name and data type and follow the instructions below. If you wish to delete a column, press the Delete button next to it.
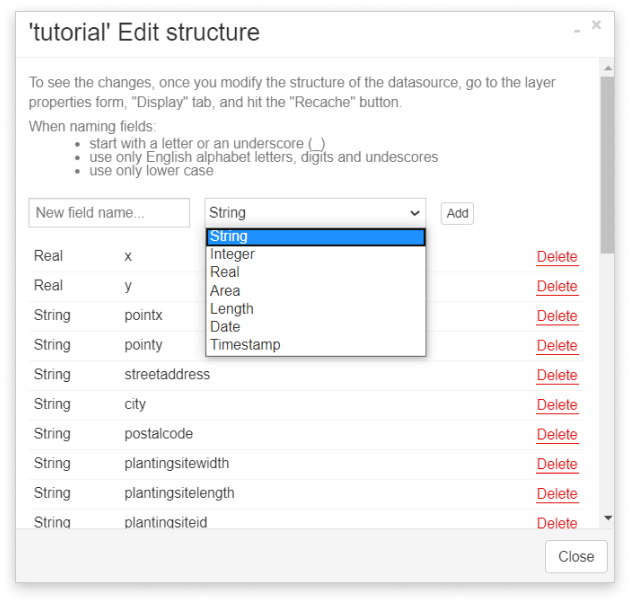
Note: When naming the fields:
- Start with a letter or an underscore (_).
- Use only English alphabet letters, digits and underscores.
- Use only lower case.
4. Click Add button, Close and Save.
Note: If you want to attach photos to the newly created column, set String column type.
If you wish to collect Date and Time data, set the column type to String, Integer or Real.
5. To see the changes in the Data Grid:
- Go under Layer Properties and under Display tab click Clear layer tiles button.
- Click Save.
- Click the Refresh Data Grid button.

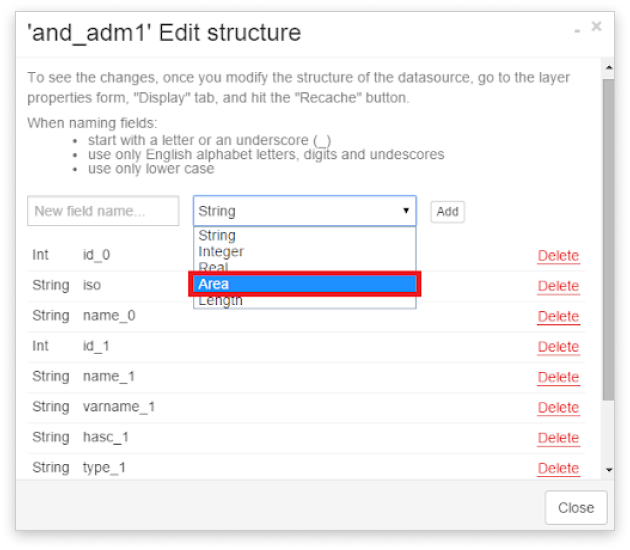
Add Length and Area columns
Length and Area columns are automatically populated fields that display the length of the line feature or area of the polygon feature. Values in those can’t be edited as they are automatically generated.
Values displayed in the data grid use units of the map. If the projection uses meters, the values displayed in the data grid will also be in meters. If the projection of the map uses degrees, the numbers in the columns will also show degree units. Map Projection can be checked in Map Properties, under the Advanced tab.
Area and length units can’t be changed unless the layer is reprojected to the projection with desired units using Projection Wizard. Please note that Area/Length columns have to be first removed from layer (Layer Properties – Attributes tab – Edit Attributes) and added again in order to display the new units.
Note: Only database layers can be edited and calculate the Length and Area fields. Learn how to import a layer to the database.
To add Length column:
- Select a database line layer.
- If needed, change the projection of the layer using Projection Wizard
- Go under the Layer Properties – Attributes tab.
- Click Edit attributes button.
- From the drop-down menu select Length field.
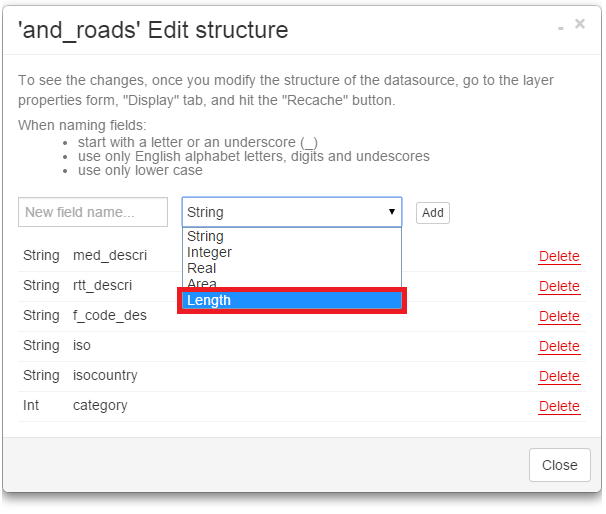
- Click the Add button, Close, and Save.
- To see changes in the Data Grid go under Layer Properties and under the Display tab click the Recache button.
- Click Save.
- Click the Refresh Data Grid button.
To add an Area column, select a database polygon layer and repeat steps above. Select Area from the drop-down menu.
Set alias name for columns
To assign aliases to layers columns, follow these short instructions: double click the layer on the map and open the Attributes tab of Layer properties.
If you have created a column under one name and wish for another name to appear in the data grid, type in the alias which will be visible for the selected column. This simple feature enables you to use simple column names for the table (since the system requires only basic characters and no spaces) and still adjust into a more human-readable format. Keep in mind, when performing certain editing, like classification, you will have to use the original column name.
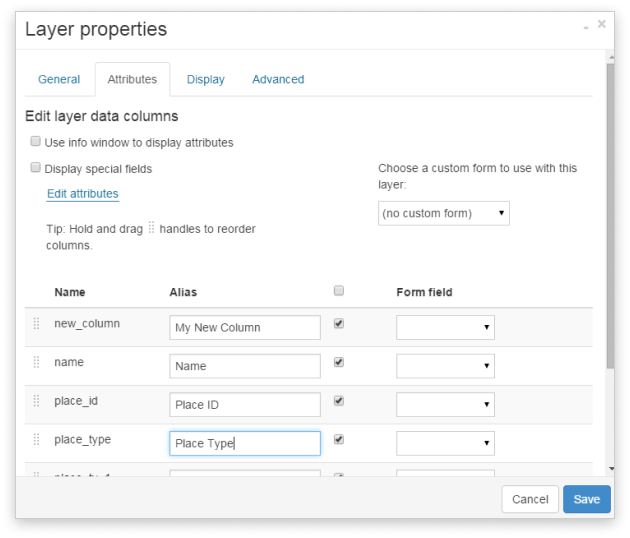
When you’re done, just click Save and refresh Datagrid.
Change the order of columns
To reorder columns order hold and drag the dots next to the layer name.
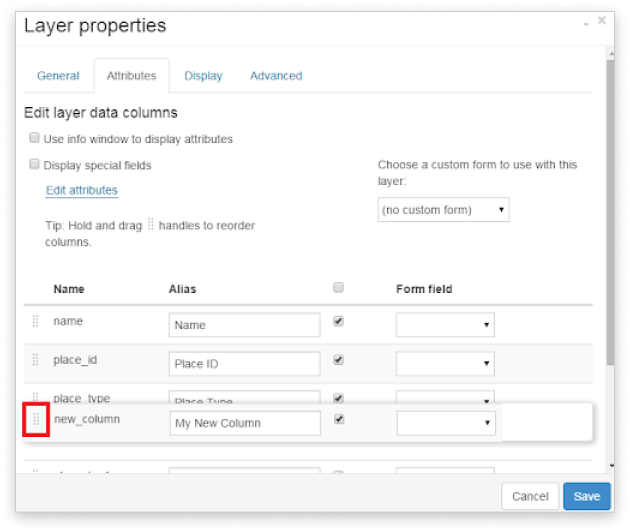
To save the new order, click Save and refresh Datagrid to see changes.
You can also access the database layer structure through the Database Manager.
Under the Tools tab, choose the Database Manager, and it will open the list of all layers imported into the database on your GIS Cloud account.
To make changes on the specific layer, select layer and under the Actions drop-down, select Edit fields. Edit option will guide you to the same panel for structural changes like to one we have entered over the Layer properties.