How to add custom Digital Elevation Models (DEM)?
You can add your own Digital Elevation Models (DEM) to GIS Cloud to further enhance the 3D View. Once you add your custom DEM to the map, the area covered by this raster will use elevation data from the DEM instead of the default global DEM. Before you can set up your custom DEM, you need to upload the raster to the File Manager.
Custom DEM is enabled through the 3D View Options in the Map Properties window, see the screenshot below.
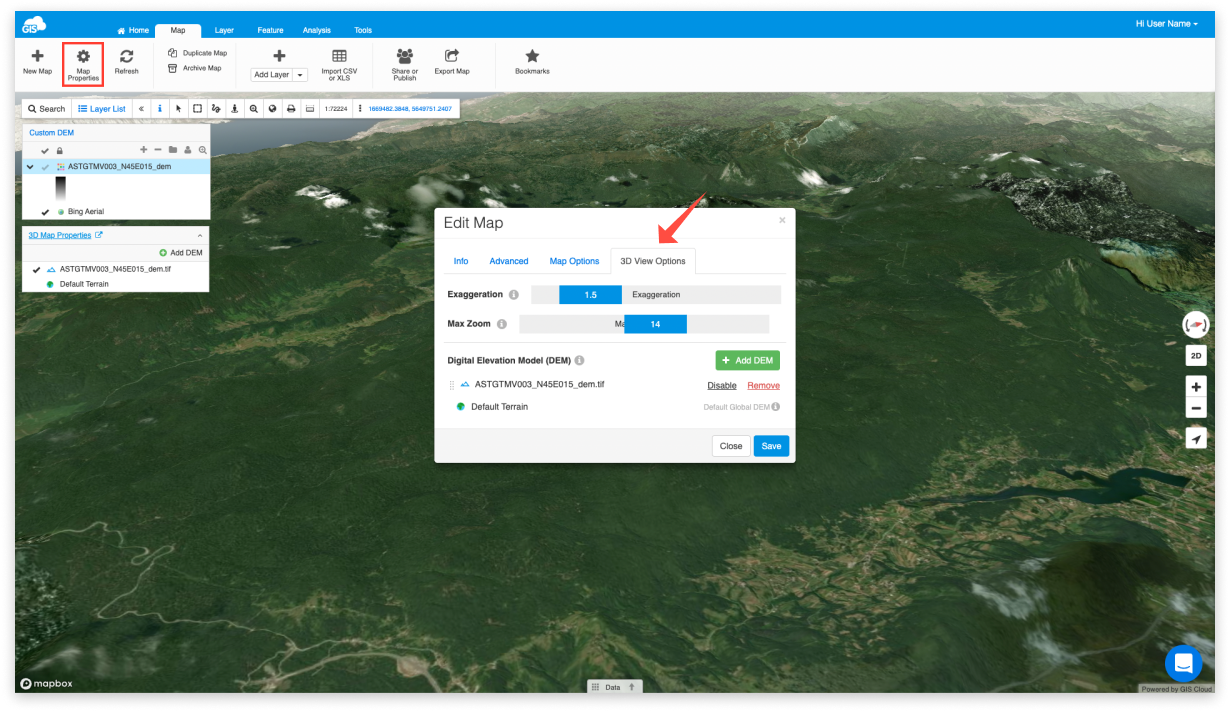
From the 3D View Options tab you can add the DEM and tweak the 3D view.
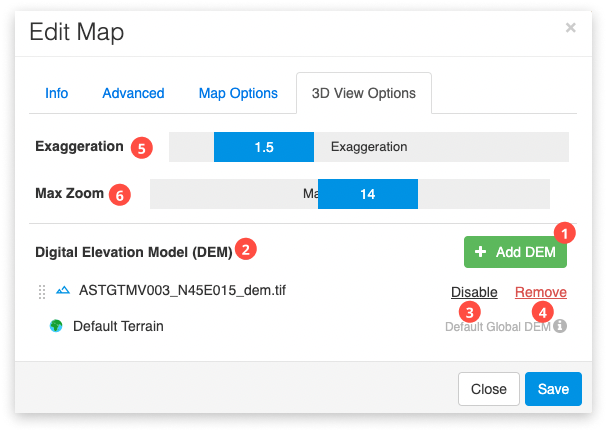
- Add DEM – use this button to select and add the Digital Elevation Model to the 3D View
- Digital Elevation Model (DEM) – here you can find all DEMs that are added to the map. The Default Terrain (Default Global DEM) is used by 3D View.
- Enable/Disable – use this to switch between the custom DEMs and the Default Global DEM.
- Remove – removes the custom DEM from the map.
- Exaggeration – exaggerates the elevation of the terrain by multiplying the data from the DEM with the selected value
- Max Zoom – Maximum zoom level from which the DEM data will be loaded
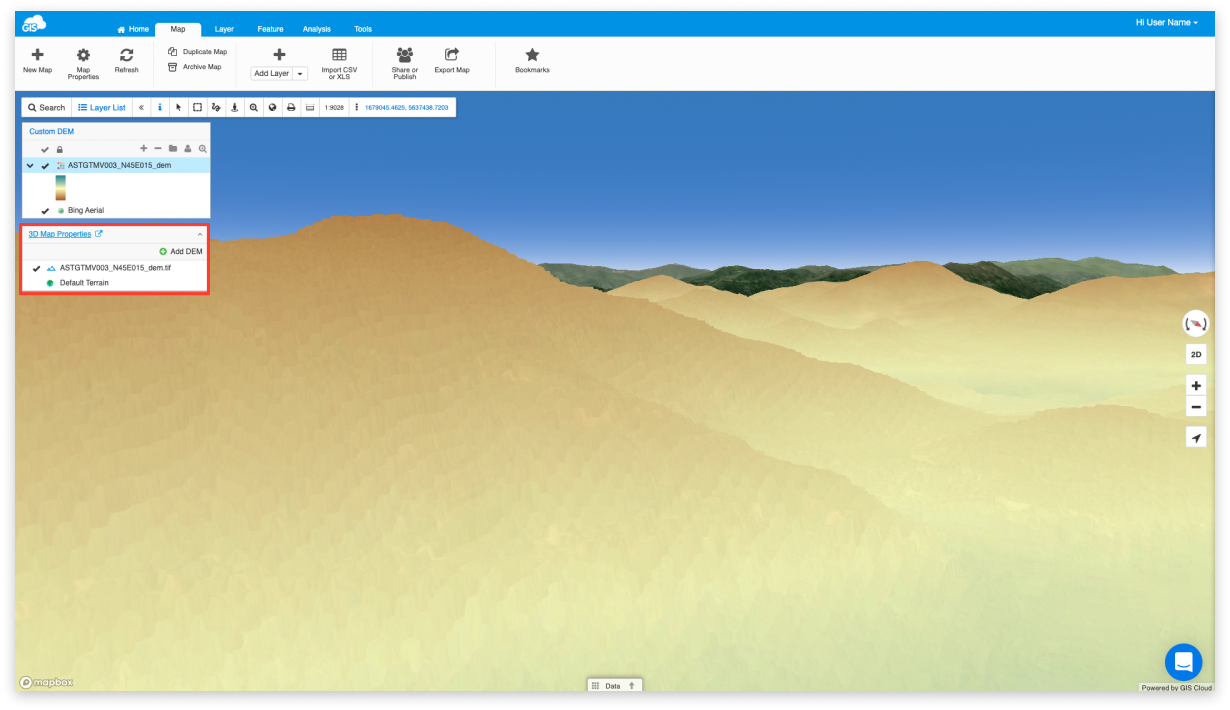
Once you have customised the 3D View don’t forget to click Save. Once the DEM is added to the map a new 3D Map Properties window will appear under the Layer List. From this window you can access the 3D View options, add or remove DEMs from the map and zoom to the layer.