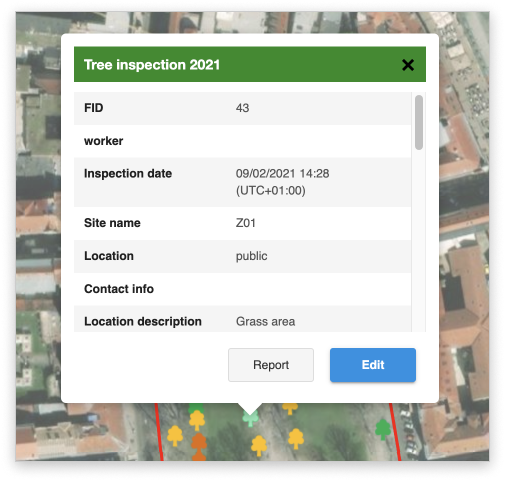
How to customize Info window pop up?
One of many customizable options in GIS Cloud is also an option to modify the colors of Info window pop up on your custom app. First and foremost, Info window pop up needs to be enabled in Layer Properties – Attributes settings. After that, there are few steps that need to be followed in order to be able to customize Info window:
- Prepare your app for customization
- Choose a configuration file and prepare it for customization
- Add a custom CSS file to your app to change the color of the Info window pop up
Prepare your app for customization
First step is to change the default configuration file of the app to a custom one. To do so, follow these steps:
- Open GIS Cloud Manager
- Navigate to Apps tab
- Find the app you would like to customize and click on Edit button
- In App Instance window click on Advanced and click to Create the folder. This folder is where you will put all your customization configuration files.
- After the folder has been created, click on Open app folder
You will see an empty folder in Source Browser, so the next step is to add the configuration file.
Choose a configuration file and prepare it for customization
In Source Browser click on Create new file to add a file named app.json. Once you created a new file, click on it and open it by clicking the Edit text file tool. The file will open in an online text editor, but it will be empty, so it is necessary to fill it with the default configuration.
However, the default configuration is dependent on the app that you want to customize. So, copy the config file from the following links depending if you are creating a custom Map Editor, Map Viewer or Map Portal.
Paste the text into the app.json you have opened in online text editor. Click on Save&Close. Everything is now ready to be customized.
Add a custom CSS file to your app to change the color of the Info window pop up
Your custom app still looks like a regular GIS Cloud app, but with these steps, you created a basis for customization.
Now, it is time to add new CSS file, register it in the app.json file and set CSS rules, so just make sure to follow these steps:
- In Source Browser create a new file and call it custom.css
- Select the app.json file and click on Edit text file to open it in online text editor
- To set up the app to load custom CSS files, we use the styles section of the app.json. Add the styles section to the beginning of the configuration – “styles”: [“custom.css”],
Make sure not to forget the quotes, brackets and comma. In the end click on Save.

Adding custom.css to the styles section will ensure the app loads it together with rest of the source code.
While you are still in the online text editor, click on Open file and select your custom.css. The file is empty, so make sure to copy CSS code from HERE and paste it to the text editor. Lastly, click on Save.
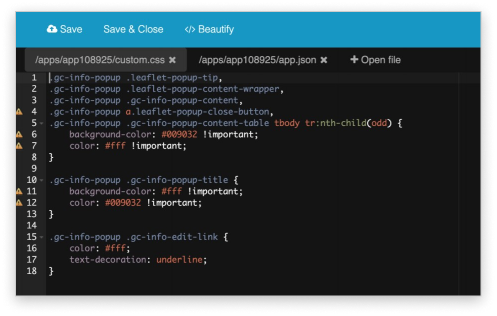
Note: In the rows 6, 7, 11, 12 and 16 of custom.css file you can change HEX color code to change the background and font color in the Info Window. Play around with it and see what looks the best for you.
And this is it! Now you can open your custom app to check out how the new Info window looks like.