How to prepare existing data for collecting in the field?
Table of Contents
To prepare existing data for collecting with MDC:
- Log in into your Map Editor account with your existing GIS Cloud credentials and create a new map or access the map you already created in the past
- Add a database layer on the map if you already haven’t. To import a layer to the Database open the Database Manager found on the Tools tab and click Import Geospatial File. When the Source browser opens select the previously uploaded layer for import.
You can also create a new layer that already resides in the Database go to the Layers tab and select Add layer – Create New Layer. - Once the map and a layer are prepared, you need to create a custom form and connect it to the layer on the map.
A custom form can be created in the Map Editor application using the Forms Manager tool found in the Tools tab. When you add or create a layer in your map, you can choose that layer to be a template for the form creation. In the Create from layer option choose the layer and the form with the attribute fields will automatically appear.
Create a form based on existing layer
- Open the Tools tab.
- Open Forms Manager.
- Click Create from layer button and select a layer from the dropdown list upon which you like to design a form.
- The name of the form will populate automatically, but you can rename it if you need to. Form name will appear in Map Editor, and form title will appear in MDC on the mobile device.
- Form items will auto-populate as well based on the fields you have in your layer. At this point, you can choose and define the columns.
- Click the Save button.
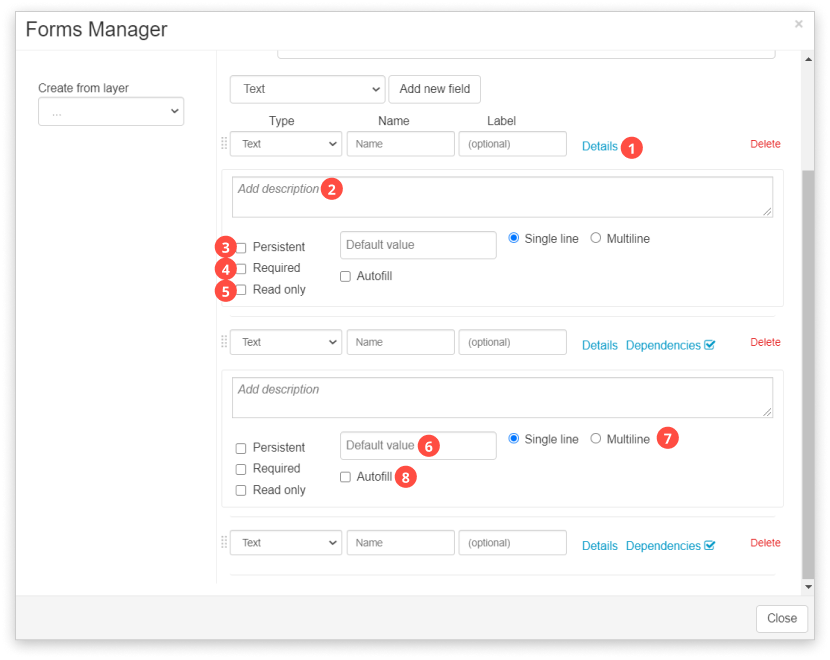
Form field options
For form items you can add the following options:
- Dependencies dependent fields will appear in the form if the rules are satisfied.
- Description provides an additional description of optional length to a particular field
- Persistent which remembers values from the previous submission.
- Required which means that the submission can not be sent unless this field is populated.
- Default value is one of the values in the form or the default value.
- Read Only allow you to add a field that can only be seen, not edited.
- Single line/multiline which allows you to write in a single line/multiple lines (for Text field).
- Autofill auto-populates the field based on previously inserted values.
Connect form and layer
To collect data with the Mobile Data Collection, the database layer has to be connected with the form. To connect a form with the layer, follow these steps:
- Open Layer Properties by clicking on the Layer tab and Edit Layer button.
- Click on the Attributes tab.
- Choose a custom form to use with the layer from the dropdown list.
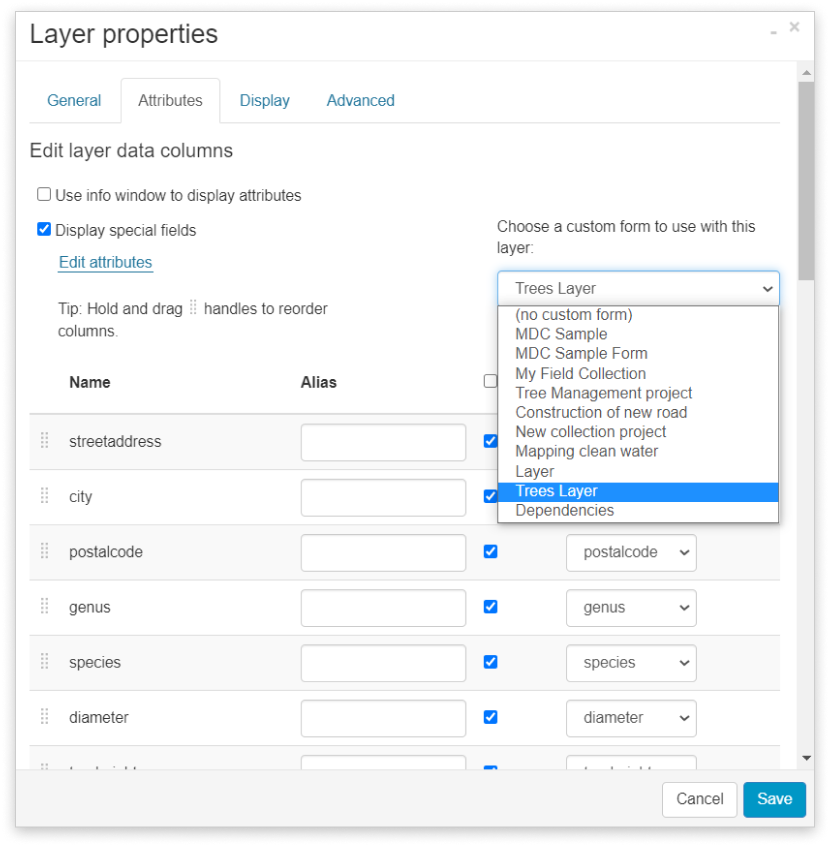
4. Join each column with the corresponding form field if they don’t have the same name. If the name (attribute field name, not the alias) is equal in the form and the layer, you can skip this step.

5. Click Save button.
You can also add some additional fields into the form but note that after that, you need to add these fields in your point layer (this can be done in the Database Manager) and attach it accordingly. Read the article adding a column to the data grid to see detailed instructions.
Note that system fields (FID, Created, Modified, Owner) should not be used to connect form fields to it. Values from these fields are added automatically.
Refresh map and form on your mobile device and start collecting data!