How to add items in bulk to a select list in the Mobile Data Collection form via JSON?
It is possible to add a large number of items to a Mobile Data Collection select list via JSON. Follow the steps below to add multiple items to the select list in your Mobile Data Collection form.
Preparing the data (Excel to JSON)
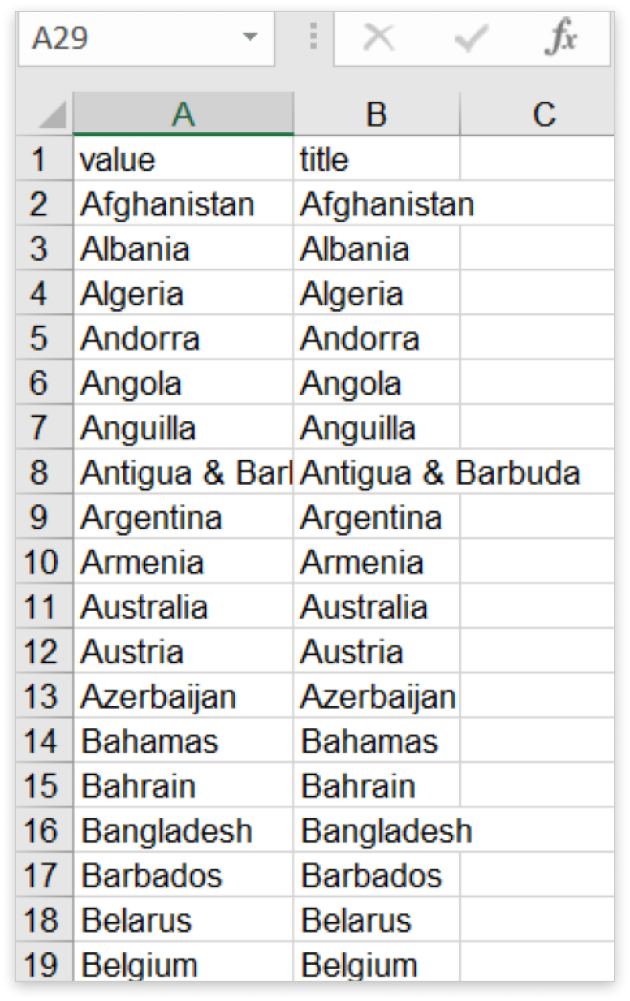
First, you will need to prepare the data you would like to add to a select list. List the items in an Excel spreadsheet in two columns named ‘value’ and ‘title’ as shown in the image below.
The next step is to transform the Excel file to JSON format. For this, you will need a simple online Excel to JSON generator to get the JSON code. The end result of the transformation should look like the example below:
[
                        {
                            "value": "Afganistan",
                            "title": "Afganistan"
                        },
                        {
                            "value": "Albania",
                            "title": "Albania"
                        },
                        {
                            "value": "Algeria",
                            "title": "Algeria"
                        },
                        {
                            "value": "Andorra",
                            "title": "Andorra"
                        }
]
Loading the form in Map Editor
Now that the JSON code is ready, log in to the Map Editor and open the desired map. Navigate to the Tools tab and open the Forms Manager. From the Forms Manager, you can create a new form or load an existing one.
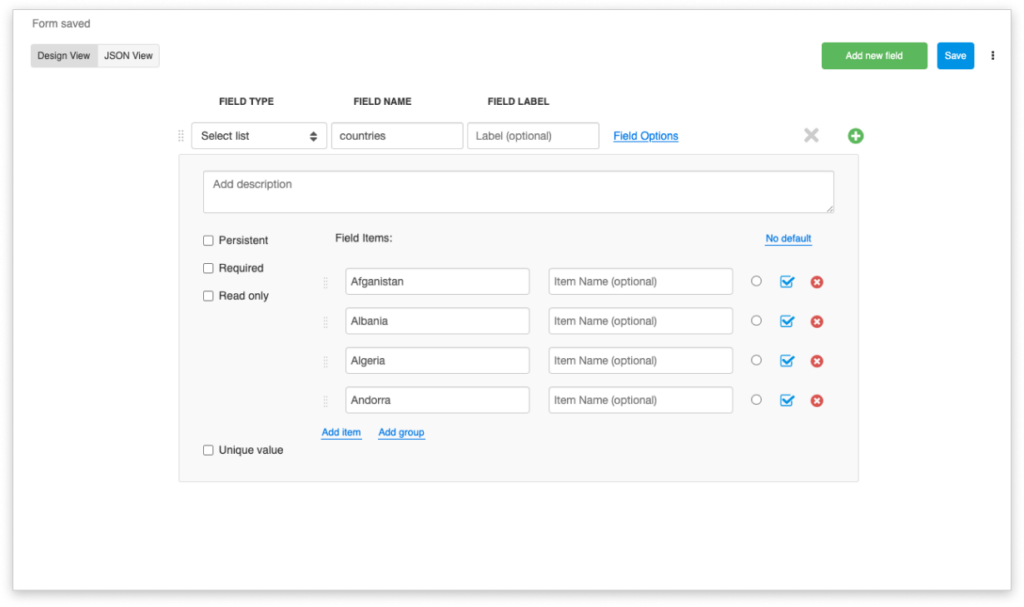
After you’ve created a new form or loaded an existing form, click ‘Add new field’ and choose ‘Select list’ as the field type.
Add JSON code to a select list
Now that the form contains the select list, click ‘Switch to JSON view’ and locate the select list part of the code. It should look like this:
{
            "type": "select",
            "uuid": "833a6c7c-7c84-473e-b35e-c664c8035bc5",
            "name": "countries",
            "persistent": false,
            "required": false,
            "readOnly": false,
            "title": "",
            "description": "",
            "options": []
}
Find the “options”: [ ] and delete the square brackets. Now, paste your JSON code where you deleted the square brackets. The code should look like this:
{
            "type": "select",
            "uuid": "833a6c7c-7c84-473e-b35e-c664c8035bc5",
            "name": "countries",
            "persistent": false,
            "required": false,
            "readOnly": false,
            "title": "",
            "description": "",
            "options": [
                {
                    "title": "Afganistan",
                    "value": "Afganistan"
                },
                {
                    "title": "Albania",
                    "value": "Albania"
                },
                {
                    "title": "Algeria",
                    "value": "Algeria"
                },
                {
                    "title": "Andorra",
                    "value": "Andorra"
                }
            ]
        }
Click ‘Save’ and switch back to the design view of the form. Find and open the select list and all of your items will now be listed.