Share Layer
When you create a map, you can share it with other users, but apart from that, you can set up additional sharing options for each layer individually.
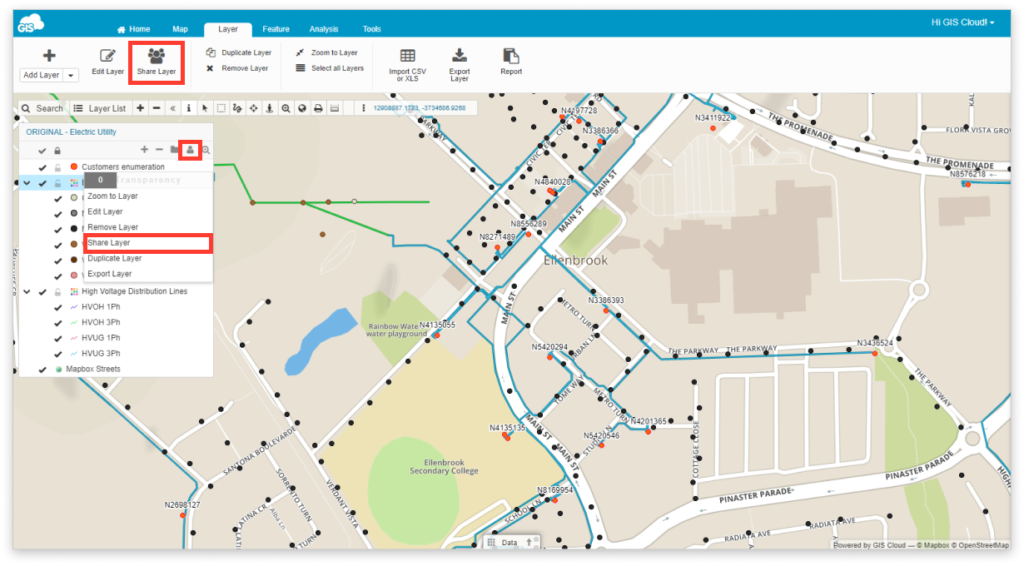
Find the Share Layer tool in three ways:
- Navigate to the Layer tab and choose the Share Layer tool
- Select the Share Layer function from the dropdown menu
- Select the layer and click on the icon on top of the Layer List
Choose a layer you want to set up additional sharing options, and after clicking the button, the Sharing settings window will open.
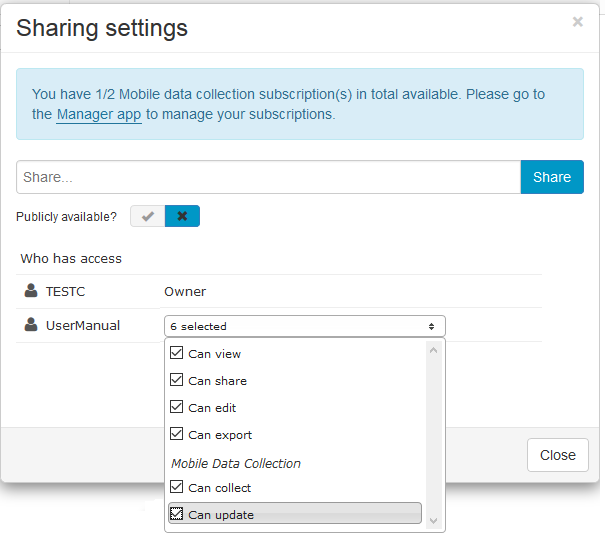
To share a layer, follow these steps:
- In the empty field, type in the username of the user you want to share the layer with and hit Enter.
- The user will appear in the list, so set the user’s sharing permissions.
- Can view – will allow the person you have shared your map with only viewing privileges of the specified layer, without the possibility to edit or export it. This is added by default when you’ve shared a map, and cannot be removed unless you remove the same permission from the map.
- Can share – will provide sharing privileges to the person you have shared your layer with. E.g., If you gave view privileges to the map but want to enable other users to share a layer with another user. A person with share privileges can share a layer with another user and assign them the same permissions he got from the layer owner.
- Can edit – will provide the person you have shared your map with complete editing privileges of the specified layer. E.g., If you give users view privileges to the map, but want them to be able to edit only a specific layer.
- Can export – will allow the person to export specific layers from the map you have shared with them. E.g., If you give users view privileges to the map, but want them to be able to export a specific layer.
- Can collect – will allow the person in the field to send new data to a specific layer, but without the possibility to make changes to existing data or the data that they already sent through the Mobile Data Collection application.
- Can update – will allow the person in the field to make attribute and geometry changes for features in a specific layer, but without the possibility of sending new data through the Mobile Data Collection application.
By ticking the mark on Publicly available, it is possible to make the layer publicly available for all GIS Cloud users. After making the layer public, it’s also possible to choose between view, edit, and/or export privileges.
Learn more about sharing your maps & data with other GIS Cloud users in our user guides.