Editing attribute data in an external application
In case you’re working with a lot of data that must be updated and filled out, and you’re used to using another software for this purpose (e.g., Excel, Open Office Calc) you can always export your data from GIS Cloud in a CSV format and re-import it back when it’s done.
In this guide you will find out the easiest ways to edit data from GIS Cloud in an external application.
Table of Contents
Edit point features in an external application
To edit the point features, we recommend exporting the layer as a CSV.
To do that follow the instructions below.
There are three ways to export data as a CSV.
- Export from the Layer List. To do that, click on the 3 dots next to your layers’ name and click on the Export Layer option. Select CSV as an output format and download the data.
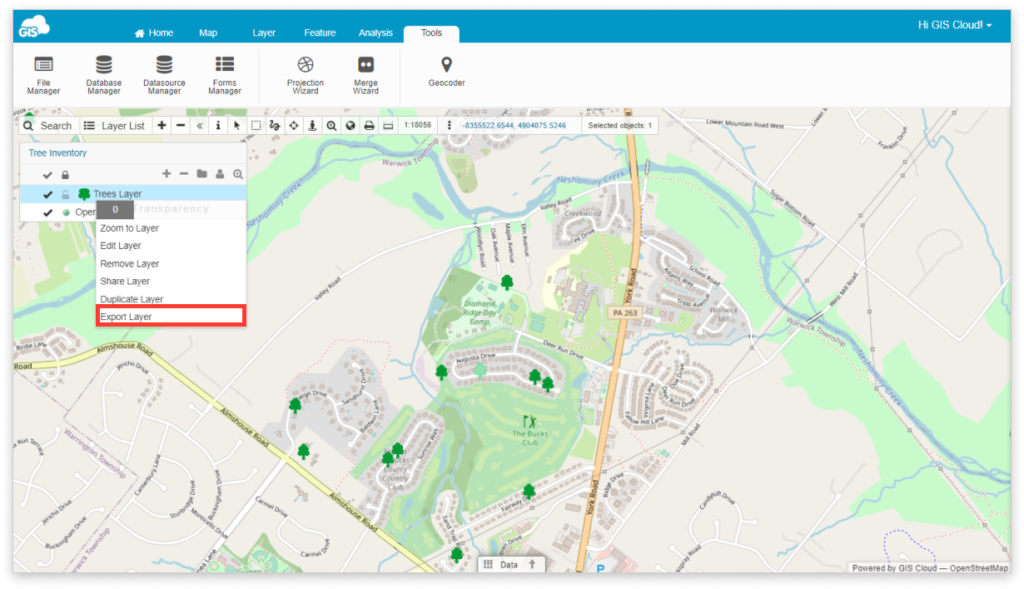
Note: When exporting through the Layer list, FID, X and Y coordinates will be exported as well.
- Export layer from the Layer tab.
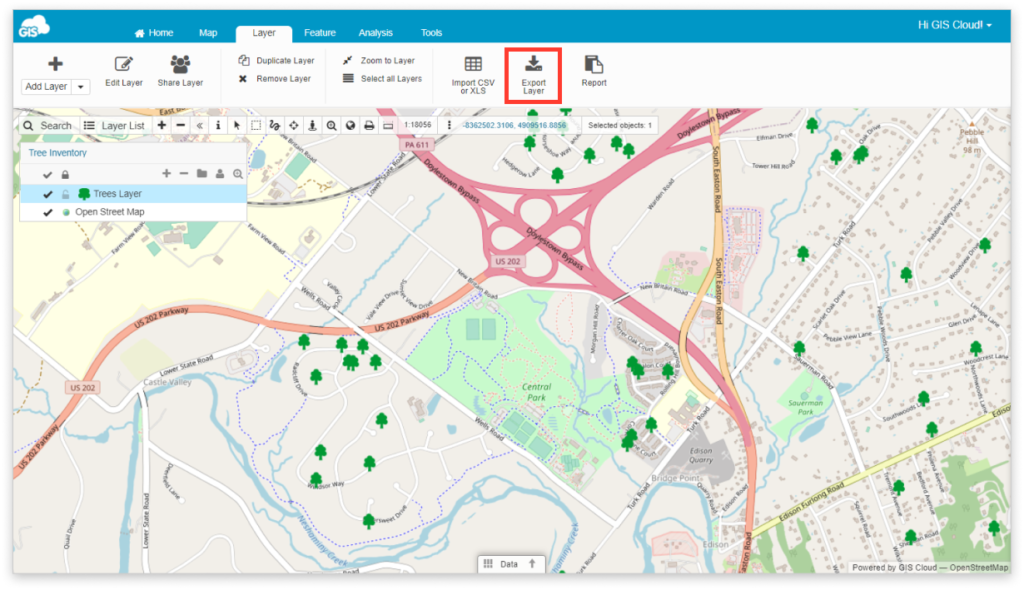
Note: When exporting through the Layer tab, FID, X and Y coordinates will be exported as well.
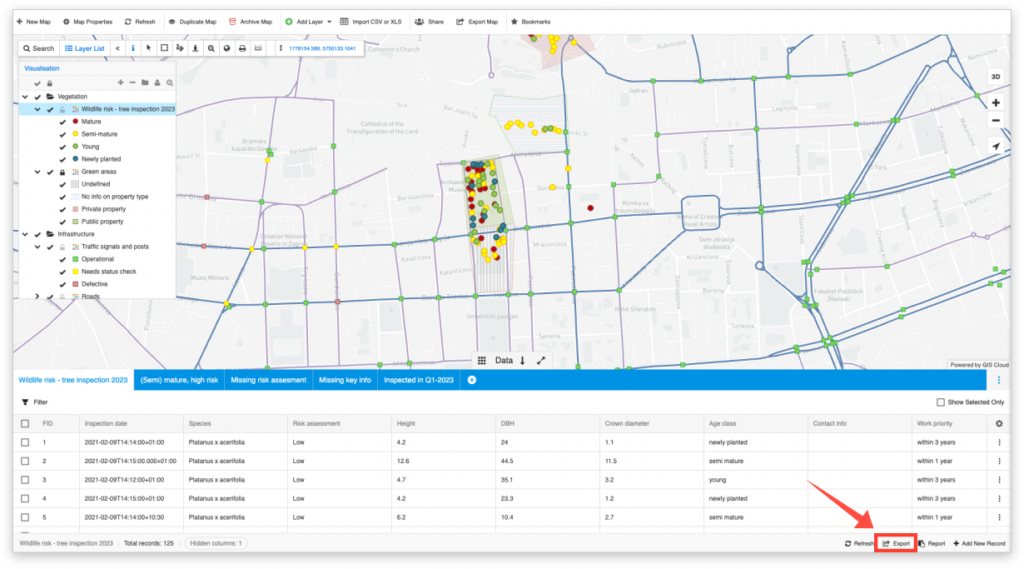
- Export from the Datagrid.

Note: When exporting data from the Datagrid, the FID column will be exported as well.
Open the exported file in an external software of your choice to edit your data. Make the wanted changes and save the file.
Now you can upload it to GIS Cloud again. You can either create a new table (new table name) or overwrite the existing one by writing its name in the Table name field. Learn more about how to upload a CSV to GIS Cloud.
Edit line and polygon features in an external application
In case you’re working with line or polygon features, there are two efficient ways you can edit data externally.
Export layer as a shapefile
- Export layer as a shapefile from the Layer List or Layer tab.
- Find the .dbf part of your shapefile and open it in the chosen external software.
- Edit the data and save it.
- Upload the shapefile back to GIS Cloud to File Manager or to the Database.
- The last step is to open the map with the old layer and update it by changing the layers’ source.
Note: Shapefiles have a column name limit of 10 characters. When exporting it in the shapefile format, please note that any column that has a longer name will automatically be shortened. When you upload that shapefile back to GIS Cloud, you can alter the column names by double-clicking the layer on the map >> open Attributes tab >> click Edit attributes.
Export layer as a CSV
In case you’re working with line or polygon features, X and Y coordinates is not an option. Still, you can export the table as a CSV. To get the FID in your output, export the data from the Datagrid.
Edit it in an external software of your choice and import it back into GIS Cloud as a non-spatial table. Learn more about importing a CSV to GIS Cloud.
Then connect it with the existing spatial table (containing the feature’s geometry) by joining them using our Join Wizard. Use the FID as a primary key and choose the attribute columns from the non-spatial table, which you filled out in external software.