How to edit a tracked Unit?
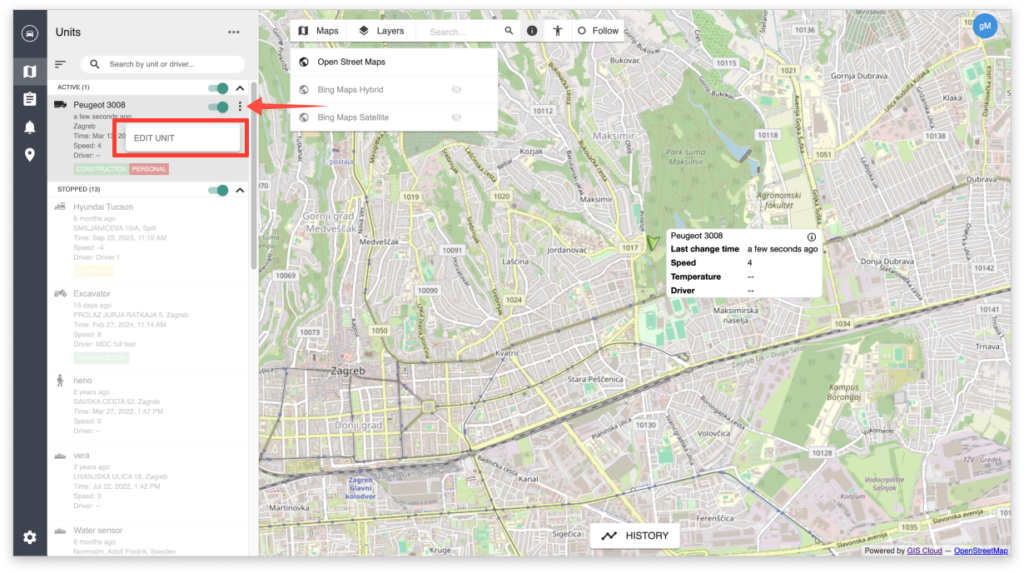
To start editing a Unit, first, select a Unit from the list while your map is opened. After selecting a Unit, click on three dots next to the name of the Unit and click on Edit Unit, just like in the screenshot below.
You can edit things like unit names, labels, and types, as well as set maintenance alerts, track fuel usage, etc.
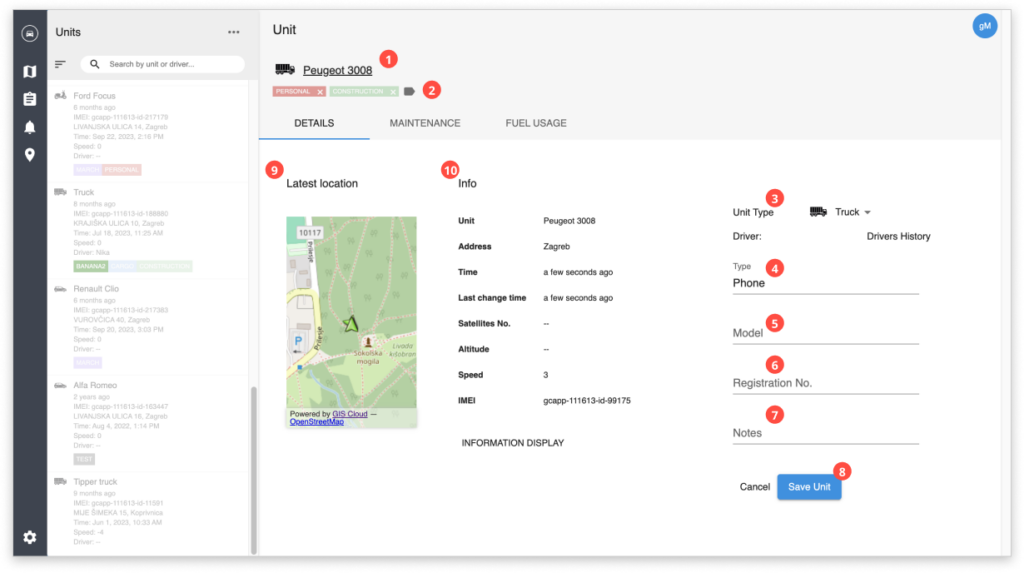
Clicking on Edit Unit opens the Details tab. Below you can find a breakdown of editable items and additional information windows in the Details tab:
- Unit name – change the name of the selected unit
- Label – change or select a new label for the unit. From here you can also access editing labels
- Unit type – select the type of your unit from a wide range of options from pedestrian to various vehicles
- Type – define what kind of asset you are tracking (for example a mobile device, automobile etc.)
- Model – model of the device you are tracking
- Registration Number
- Notes – add additional notes or comments about the tracked asset
- Save Unit – click here to save Unit information
- Latest Location – window which shows the latest location of the tracked asset on the map
- Info – Information display about the tracked unit
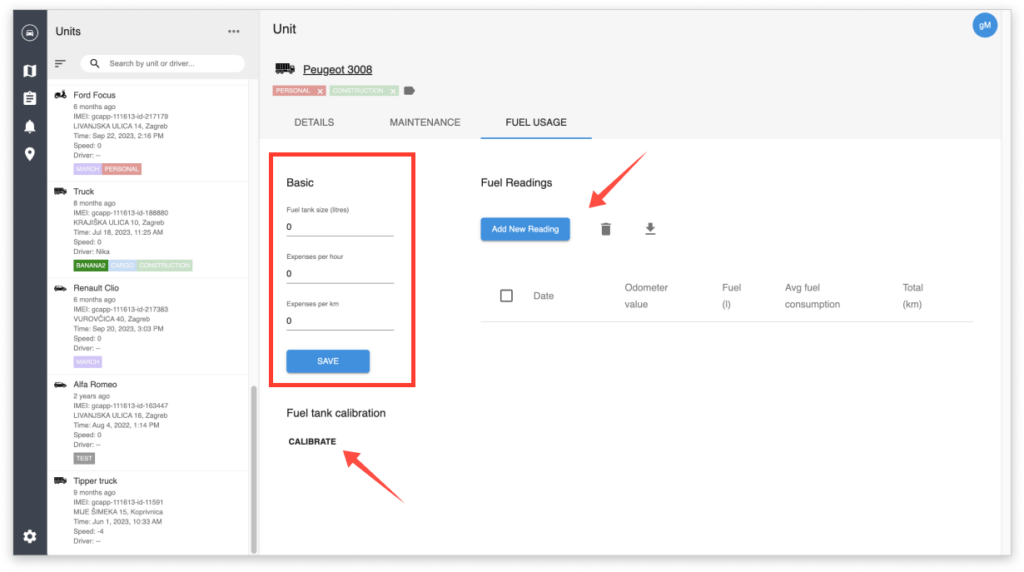
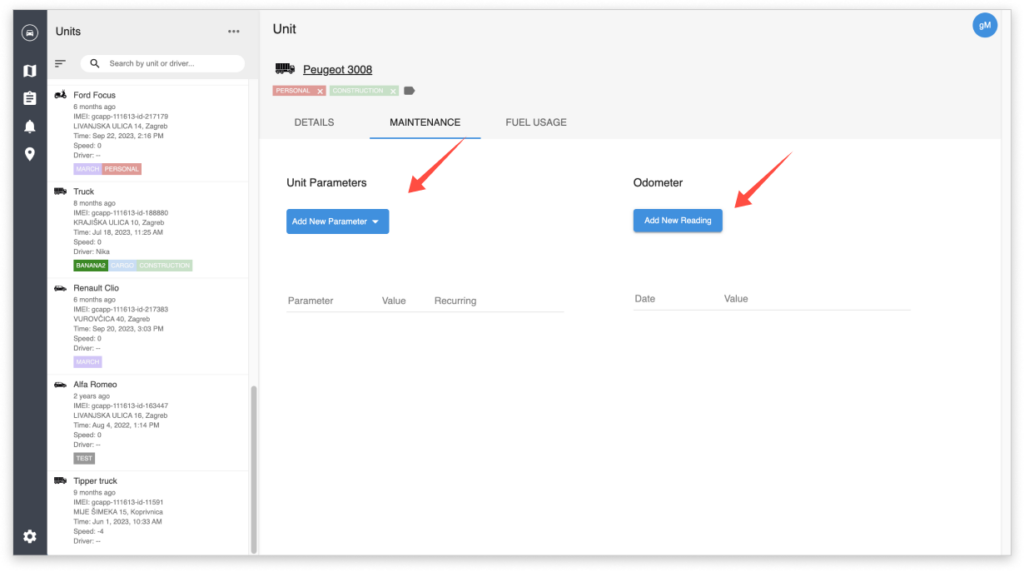
Additionally, in the Maintenance and Fuel Usage tabs, you can define recurring information or view and manage information collected from various other sensors in a tracked vehicle.
In the Maintenance tab, you can define recurring information like vehicle registration renewals, scheduled maintenance, your custom parameters or odometer readings.
In the Fuel Usage tab, you can define basic fuel tank information, get fuel readings, and calibrate the fuel tank of a tracked vehicle.