How to add raster mosaic?
Multiple rasters can be automatically combined and added to the map as a mosaic. This option is useful when adding many rasters to the map. For uploading bigger rasters (size more than 500 MB), please use Secure File Transfer Protocol.
Note: GIS Cloud supports multiband (RGB 8-bit and 16-bit) and single-band rasters. However, if you wish to add 16-bit, then some data preparation is needed. Please look at step 8.
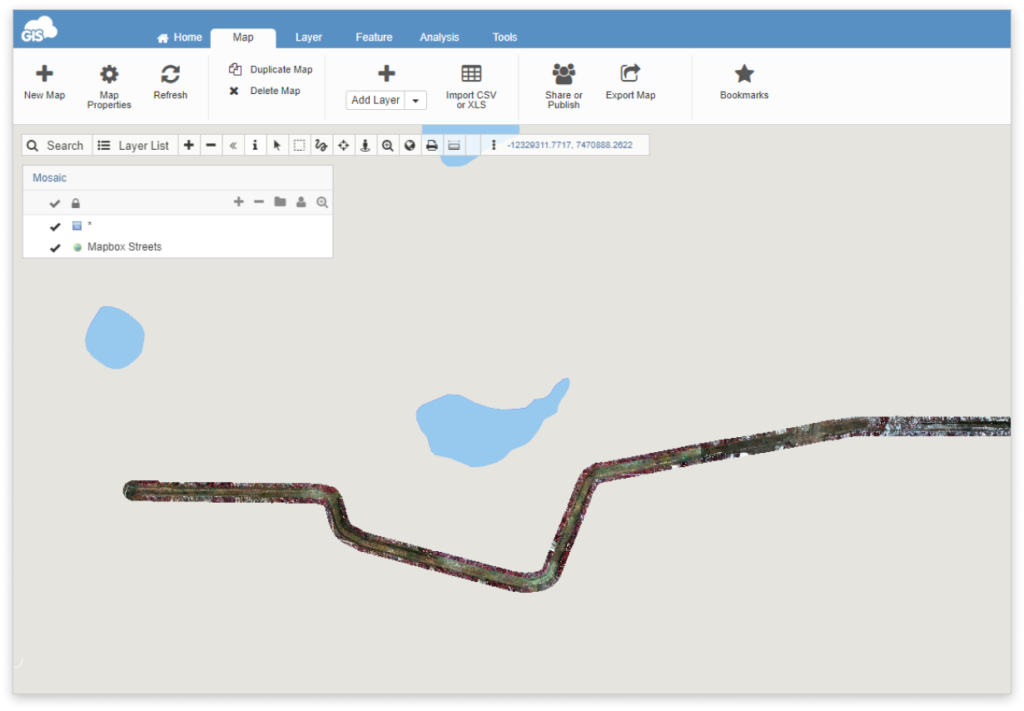
In this example, we will show how to add two TIFF rasters as a mosaic (single layer) to the map. You can upload a single TIFF raster also, just follow the same steps proceeding with a single image.
- Open Map Editor.
- Upload the rasters to File Manager.
- Move all rasters to a single folder.
- Open the map and click Add layer.
- Navigate to the folder where the rasters are stored.
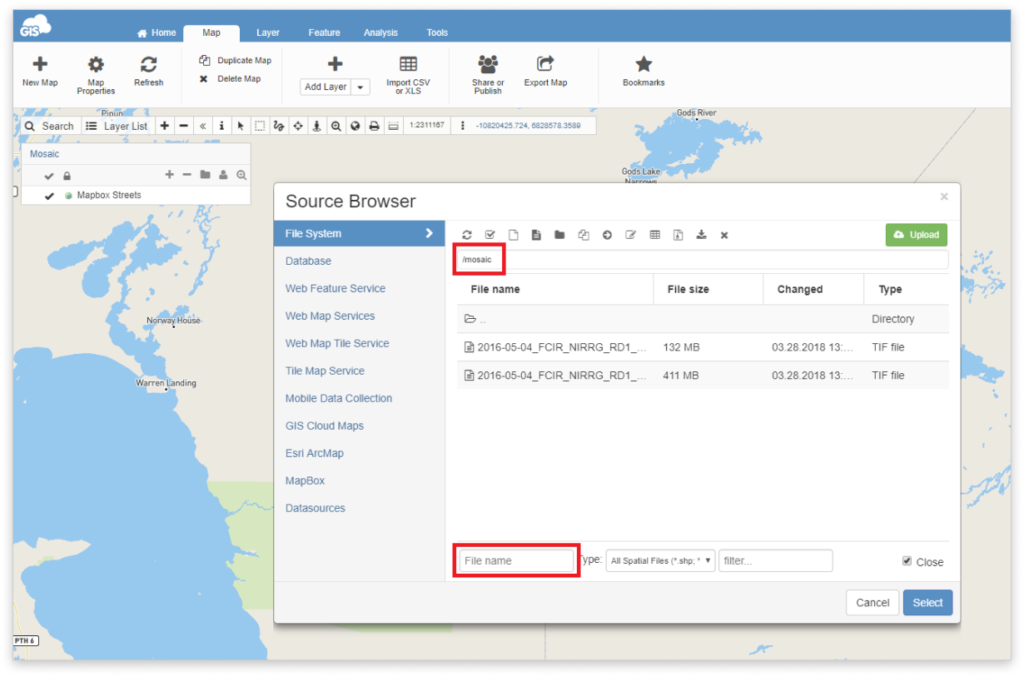
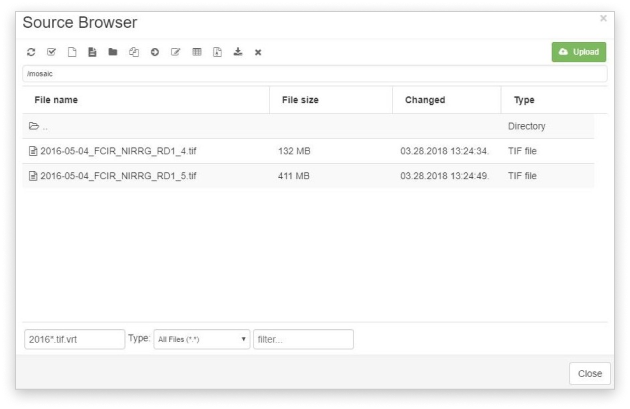
- In File name box enter *.tif
- Click Select. The rasters should be added to the map as a single layer.
- If you added 16-bit raster, then double click on the layer to open Layer Properties and in Appearance window for Source range put from 0 to 65535. If you added 8-bit raster, then ignore this step.
Also, it is possible to remove the black edges on your rasters. Learn more about it in our user guide.
Useful notes on editing your raster layers:
- *.tif will add all the rasters in the folder as a single layer.
- “*” replaces the letters in the name of the raster and it is possible to combine the names of rasters with “*” (e.g., 2016*.tif will add to the map all rasters whose name starts with ‘2016’. This option is useful if only some of the rasters need to be added to the map.)
- NoValue data is usually 0, but it can be different too. Try adjusting NoData Value to 1,2,3, etc.
- If the edges are white, set NoData Value to 255.
- If there are some “crumbs” left in place of black edges, it is necessary to adjust the source range. The source range is by default set from 0 to 255. If there are “crumbs” left, that means that the black edge was not black but a shade different. You can try to adjust the source to e.g. 5 to 255. Values from 0 to 4 will be hidden.
- GIS Cloud also supports 16-bit rasters, but it is needed to adjust its source range from 0 to 65535.