How to add Map Editor buttons to your custom Editor app?
In addition to customizing your Map Viewer and Map Portal apps, you can also customize your Map Editor apps. Your custom Map Editor app can be customized through the App Builder and configuration files (.json).
Add buttons using the App Builder or the configuration file (JSON)
To access the App builder open your custom Editor app and add /builder to the URL, for example; app109168.giscloud.com/builder. You can add Editor buttons to your custom Editor app in the Top Menu section of the App Builder.
Certain buttons like Add, Edit and Delete features can be added through the Features button. Use the Analysis Button to add area, buffer, near, hotspot and spatial filter analysis buttons.
Map Editor buttons can also be added to your custom Editor app by editing the configuration file (app.json). Click here to learn more about customizing your apps through the configuration file.
Editor buttons for spatial selection, and creating new layers from selected features can only be added by using the JavaScript button in the App Builder or editing the app.json configuration file.
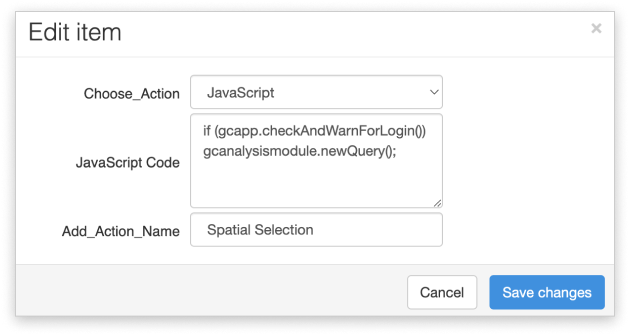
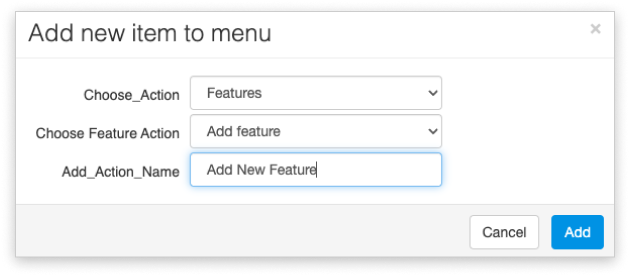
To add these items in the App Builder using the JavaScript button, in the Top Menu section, click on “Add new item” and select JavaScript. In the JavaScript Code section paste the following code:
Spatial Selection
if (gcapp.checkAndWarnForLogin()) gcanalysismodule.newQuery();New Layer from Selection
if (gcapp.checkAndWarnForLogin()) gcapp.gclayer.layerFromSelection()To add these buttons via the JSON, in the GIS Cloud Manager open the app folder of your custom app and open the app.json document to edit it. When the document is open, find the ‘“items”:[]‘ section of the code and paste the code in the square brackets.
Spatial Selection
{
 "label_i18n": "Spatial Selection",
 "href": "javascript:;",
 "onclick": "if (gcapp.checkAndWarnForLogin()) gcanalysismodule.newQuery();"
},
New Layer from Selection
{
  "label_i18n": "New Layer from Selection",
  "href": "javascript:;",
  "onclick": "if (gcapp.checkAndWarnForLogin()) gcapp.gclayer.layerFromSelection()"
},
When you are done, the JSON file for your custom Editor app should look like this:
{
    "responsive": true,
    "sections": {
        "top": {
            "logo": {},
            "menu": {
                "items": [{
                    "label_i18n": "Add Feature",
                    "onclick": "if (gcapp.checkAndWarnForLogin()) giscloud.ui.edit.addFeature();"
                }, {
                    "label_i18n": "Edit Feature",
                    "onclick": "if (gcapp.checkAndWarnForLogin()) giscloud.ui.edit.editFeature();"
                }, {
                    "label_i18n": "Delete Feature",
                    "onclick": "if (gcapp.checkAndWarnForLogin()) giscloud.ui.edit.deleteFeature();"
                }, {
                    "label_i18n": "Report",
                    "href": "javascript:;",
                    "onclick": "gcapp.gclayer.layerReport(); return false;"
                }, {
                    "label_i18n": "Spatial filter",
                    "onclick": "if (gcapp.checkAndWarnForLogin()) gcanalysis.open(gcAnalysisType.SPATIAL_FILTER);"
                }, {
                    "label_i18n": "Spatial Selection",
                    "href": "javascript:;",
                    "onclick": "if (gcapp.checkAndWarnForLogin()) gcanalysismodule.newQuery();"
                }, {

                    "label_i18n": "New Layer from Selection",
                    "href": "javascript:;",
                    "onclick": "if (gcapp.checkAndWarnForLogin()) gcapp.gclayer.layerFromSelection()"
                }]
            }
        }
    },
    "panels": []
}