How to delete data from storage?
Depending on where you’ve stored your data, you can delete those files or tables directly from the File or Database manager.
Remember that if you remove layers from the map, your layers are still available in File Manager and Database Manager and are using up your storage!
Delete data from File Manager
To delete data from File Manager, first, log in to your GIS Cloud Map Editor and follow the steps:
- Choose the Tools tab
- Click on File Manager
- Choose the data/files you wish to delete (Shift/CTRL and click if you want to choose more than one file)
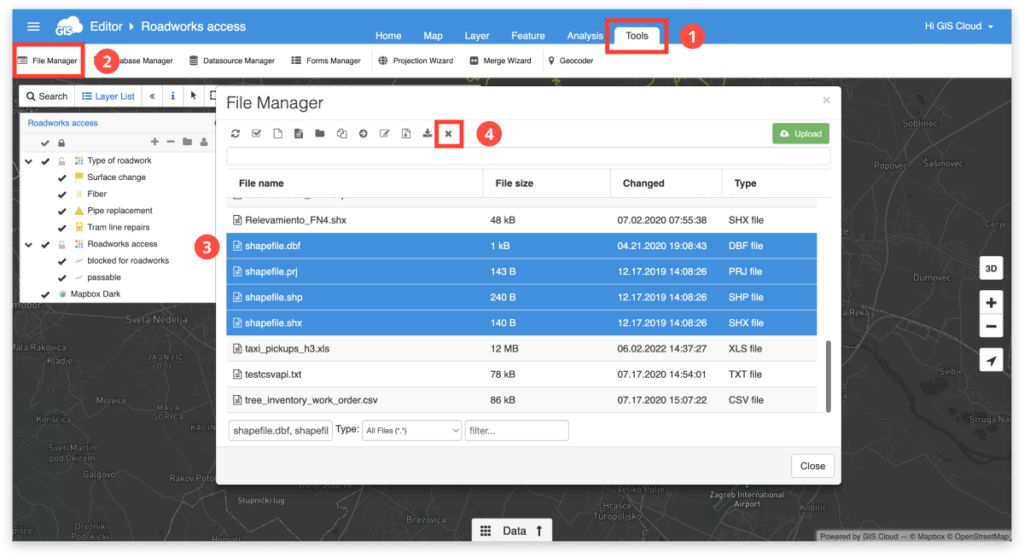
- Once you have selected the files you wish to delete, click the delete button (small “x” button at the top of the toolbar).
- Finally, confirm that you wish to delete these files by pressing the Delete button.
Be careful when you delete files from File Manager, because you won’t be able to retrieve them. However, you can set up data backup to periodically export layers, so you don’t have to worry about losing data. Also, find more info about organizing your data here.
Deleting data in Database Manager
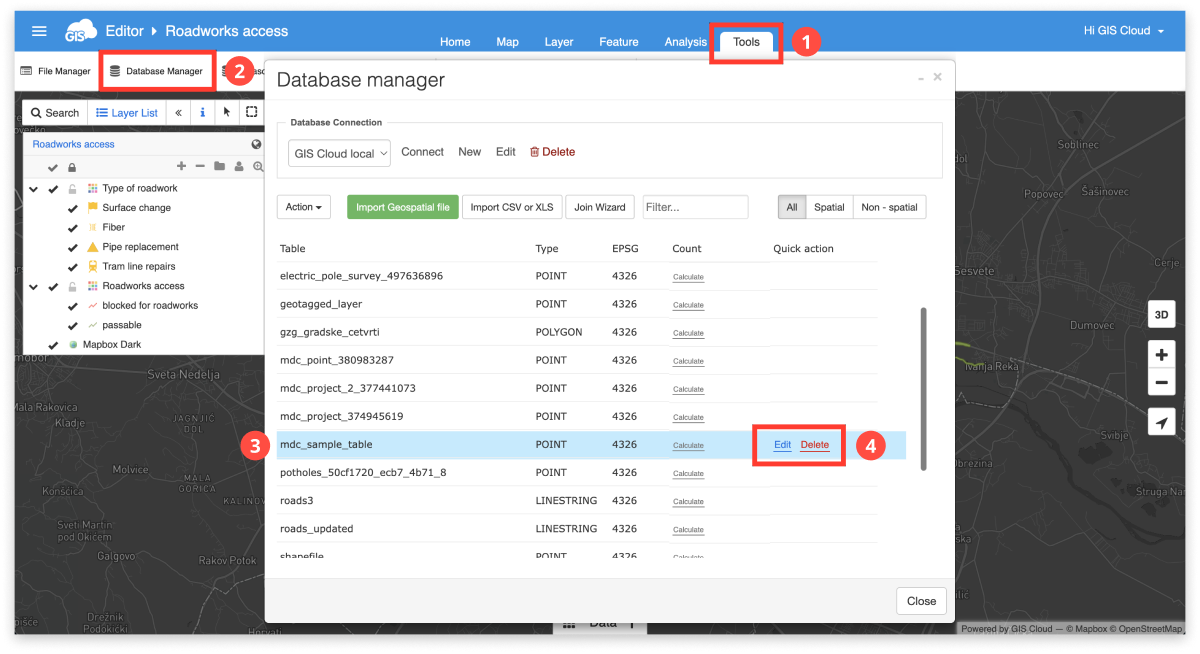
To delete tables from the Database manager, follow these steps:
- Select Tools in Map Editor
- Go to Database Manager
- Select the tables you wish to delete (Shift/CTRL and click if you wish to choose more than one file)
- Click on the Delete button to delete the files
Note that when you delete a feature from the map, it is also automatically deleted from the source table in the Database Manager. Be careful when you delete features because you won’t be able to retrieve them from the Database Manager. However, you can set up data backup to periodically export layers, so you don’t have to worry about losing data. Also, find more info about organizing your data here.