Enable others to edit your data in Map Editor
Once your data is uploaded into your account, you can further edit the layer, whether it refers to editing geometry, attributes, or just the visual representation of the values represented by the attributes.
Note: To perform editing or data analysis, the layers you’re working with must reside in the database. Learn how to import files into the database.
Apart from editing data yourself, you can also set up permissions, so that other users can edit your data. The first step you will have to do it to share the map with another user:
- Open the map in Map Editor
- Under Map tab click on Share or Publish
- In the empty field type in the username of the user you want to share the layer with and hit Enter.
- Set user’s sharing permissions – View
- Next you select a layer from Layer list and under Layer tab click on Share Layer
- In the empty field type in the username of the user you want to share the layer with and hit Enter.
- Set user’s sharing permissions – View and Edit
- Click on Close

Now, when you have shared the map with other users, then other users can log in to their account and start editing your data based on the permissions you gave them!
In this guide you will find more information about:
Visual editing
It is possible to visually edit a layer through Layer Properties and Appearance.
- Double click on a layer to open Layer Properties.
- Click on the colored square and new window will open with three tabs.

- Style – set visual settings: colors, symbology, line width, hatch patterns.
- Labels – set persistent labels.
- Levels – set from which to which zoom level layer will be visible.
Find more information about changing layer style.
Geometry editing
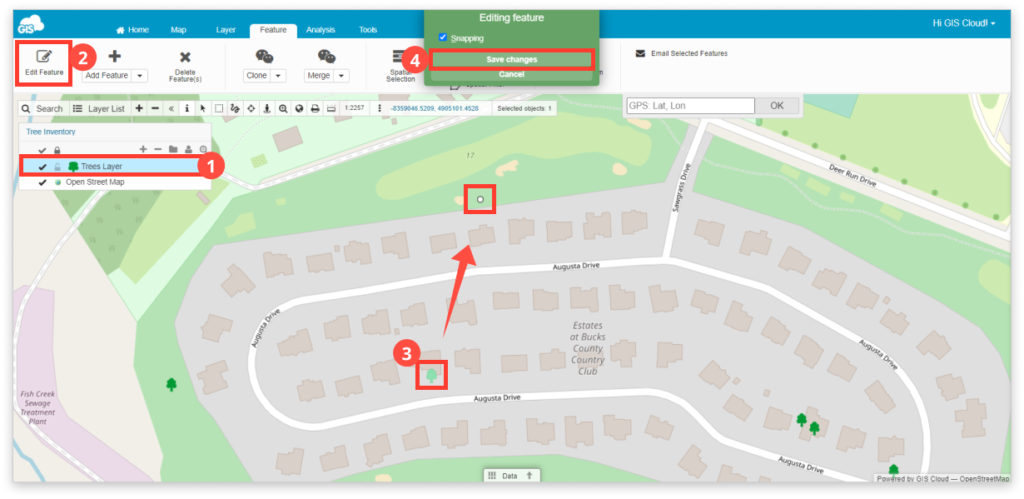
Features in the layer can be edited by following these steps:
- Select a layer on the Layer List.
- Select the Edit feature from the ribbon (in the Feature tab).
- Select the feature which geometry you wish to edit and move the point to the desired location.
- Choose Save to save a new feature location or Cancel to undo editing.
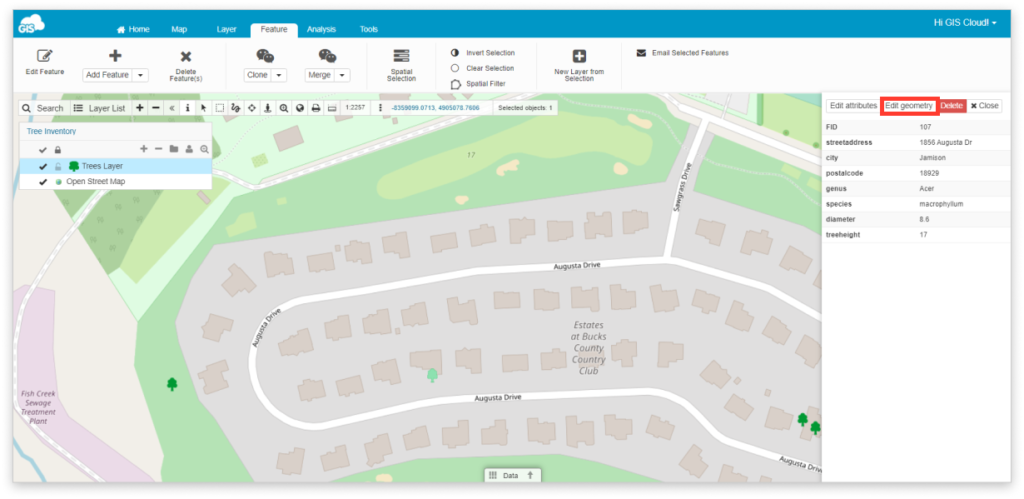
It is also possible to edit feature geometry through the Info Panel:
- Select a feature.
- Choose Edit Geometry from Info Panel.
- Change the location of the feature.
- Click the Save button.
Attribute editing
It is possible to edit attribute data through Datagrid, Info Panel and Info Window.
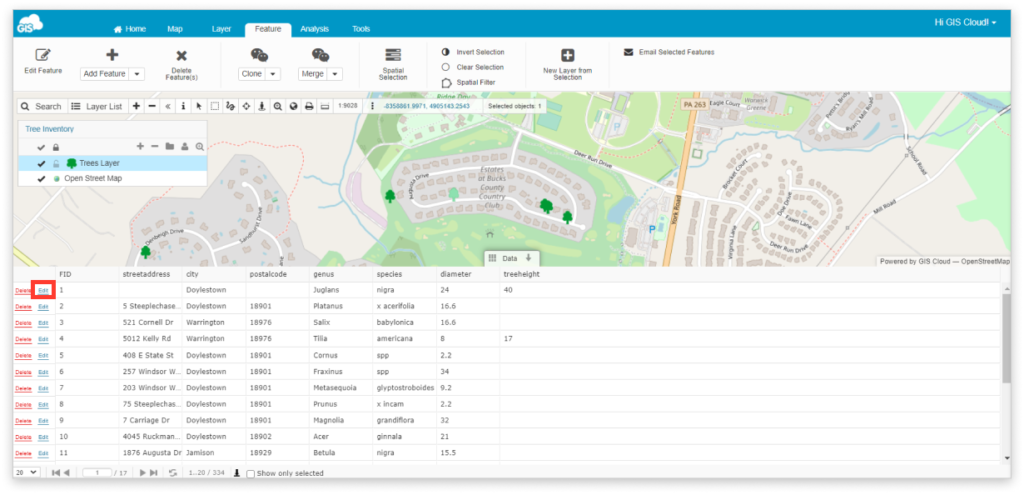
Data Grid
- Select a layer from the Layer List.
- Toggle the Datagrid from the bottom of the page.
- Select feature you wish to edit in Data Grid
- Right-click and select Edit.
- After editing click Save.
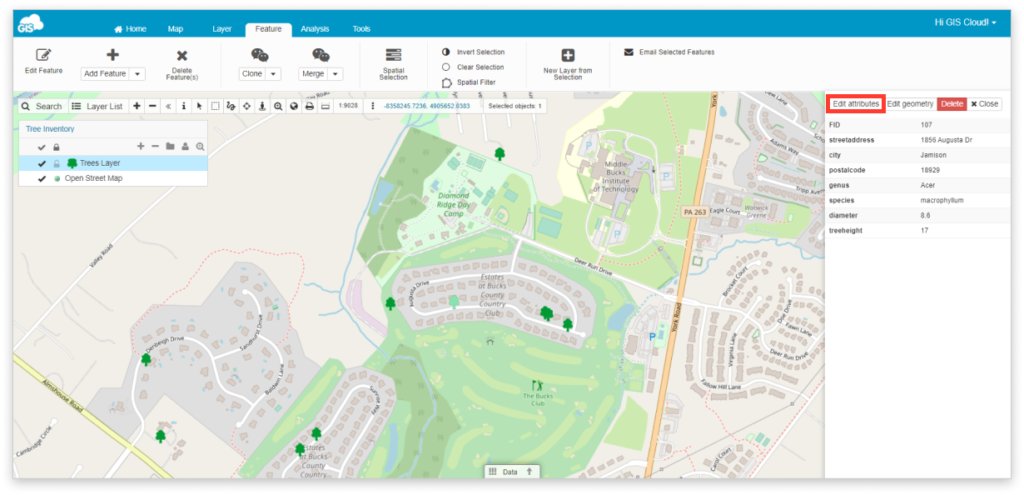
Info Panel
- Select a feature from the map.
- Select Edit attributes from Info Panel.
- Select Save after editing.
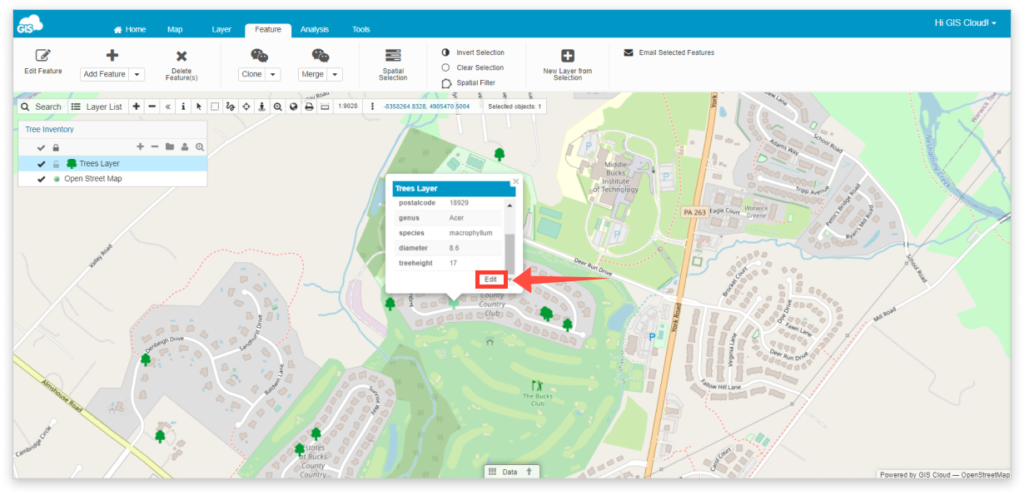
Info window
Note: You can activate Info window to display attributes under the Layer Properties – Attributes tab.
- Select a feature from the map.
- Select Edit button from the Info window.
- Click Save after editing.