How to add rasters on the map?
Apart from using vectors (like points, lines, and polygons) on your maps, in GIS Cloud you can also add and use raster images. Before uploading data, first make sure to check which spatial raster files are supported.
Currently, GIS Cloud supports these raster file types: .tif, .tiff, .jpg, .png, .gif, .img, .ecw, .sid, .jp2
GIS Cloud supports RGB 8-bit and 16-bit rasters. Single-band rasters are also supported, so if you’re interested in seeing how to visualise them, take a look at our guide HERE. If you are unsure how many bits per sample does your raster data have, you can check it under file properties in Microsoft Windows or use some external tool (for example, Metadata2go) for analysis.
If the raster is not georeferenced, don’t forget to upload the projection file too. If the raster doesn’t have the projection file, it won’t fit the map.
The procedure for uploading rasters is simple, but there are some slight differences between uploading 8-bit and 16-bit raster, so make sure to follow them.
How to add 8-bit raster?
Look at these steps if you would like to upload and add 8-bit raster on your map:
- Log in to Map Editor with your credentials
- Upload the data with Drag & Drop, trough File Manager or with SFTP client
Note: For uploading bigger rasters (size more than 500 MB), please use Secure File Transfer Protocol
- Click on Add Layer under Layer or Map tab
- In Source Browser select the raster file from File System that you just uploaded
- Hit Select
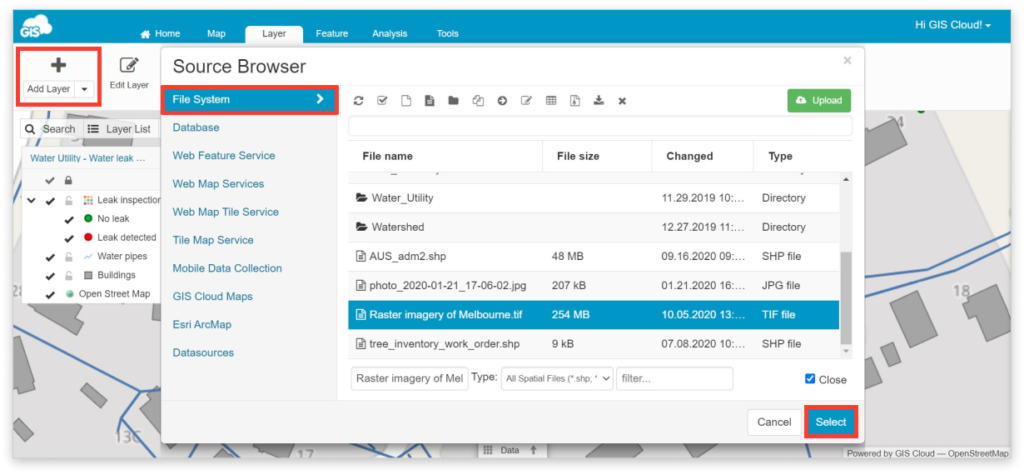
And that’s it. Your raster will appear on the map and as a layer in Layer List.
How to add 16-bit raster?
If you wish to upload 16-bit raster on the map, then follow these steps:
- Log in to Map Editor with your credentials
- Upload the data with Drag & Drop, trough File Manager or with SFTP client
Note: For uploading bigger rasters (size more than 500 MB), please use Secure File Transfer Protocol
- Click on Add Layer under Layer or Map tab
- In Source Browser select the raster file from File System that you just uploaded and hit Select
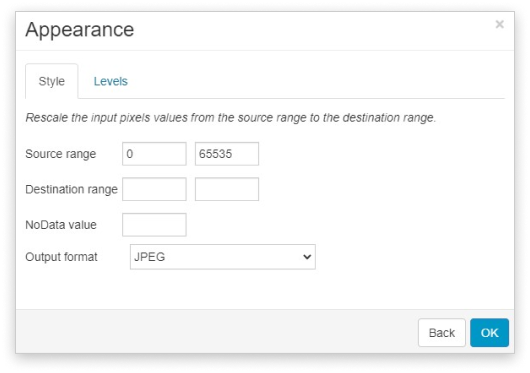
- Raster probably still won’t appear on the map, so just double click on the layer to open Layer Properties and in Appearance window for Source range put from 0 to 65535.
- Lastly, hit OK and Save and your raster should be visible on the map.