How to add new features to an existing layer?
Note: To be able to add new features to a layer, the layer has to be imported into the Database.
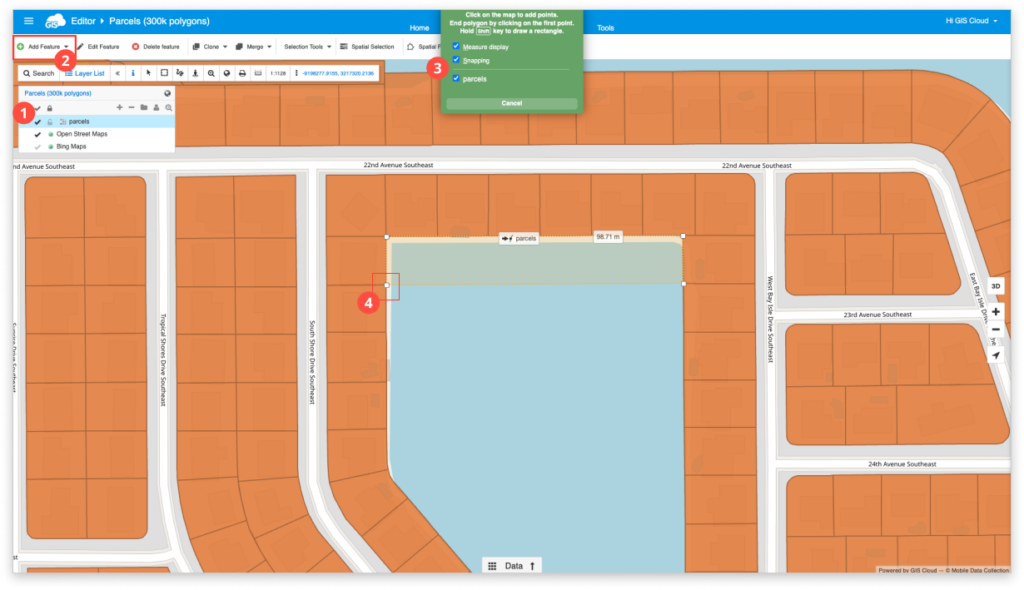
- Select a Database layer from the Layer List.
- Select the Add feature from the ribbon (on the Feature tab).
- Select Snapping and/or Measuring option (optional).
In Map Editor, precise editing and creating new features can be easily done! Turn on the Snapping tool in order to make sure that your new features are properly connected with the existing ones. Find more info here. - Click on the map to add a new feature to the desired location.
- When done editing, press Enter on your keyboard or:
- End line by clicking in the last added point (double-click).
- End polygon by clicking on the first or last polygon point.
- After creating the geometry, the attributes panel pops up.
- Enter attributes in the feature table form and choose Save.
Tip: You can set the exact length of the next segment (in metres) of the feature that you draw by simply typing the number. The numerical values you enter will be in meters or map units, depending on the projection which you use.
Note: To cancel adding features press Esc key on your keyboard.
Note: You can draw a rectangle by holding the Shift button on your keyboard (on Mac, use Shift or Cmd). Works only for polygon layers.
Note: You can use the R and T keys to rotate the feature when editing it.
If some modification of data is needed, then you can edit data geometry and attributes data.