How to upload addresses with Geocoder?
GIS Cloud Geocoder is a fast and simple, but effective tool that enables you to easily translate an address into coordinates and represent data on the map. GIS Cloud Geocoder is in beta phase and available only for Beta customers.
For more info and assigning geocoding credits, please contact us at sales@giscloud.com.
Prepare data
It is necessary to arrange data in the way the system can recognize it.
Only XLS and CSV are supported formats for geocoding.
Table has to have the structure described below, otherwise, it will not be possible to geocode data:
- Make sure that table does not have complex formatting (merged cells, doubleheader, more sheets, font color, etc.). Export your table as .csv and open table in common text editor (e.g. Notepad++).
- Make sure that the column separator is a comma (,) and not semicolon (;).
- The first row (header) has to be column title and all other rows have to contain data.
- The header must not contain any spaces.
- For the header use only English alphabet letters, digits and underscores (_).
- The table has to have UTF-8 encoding.
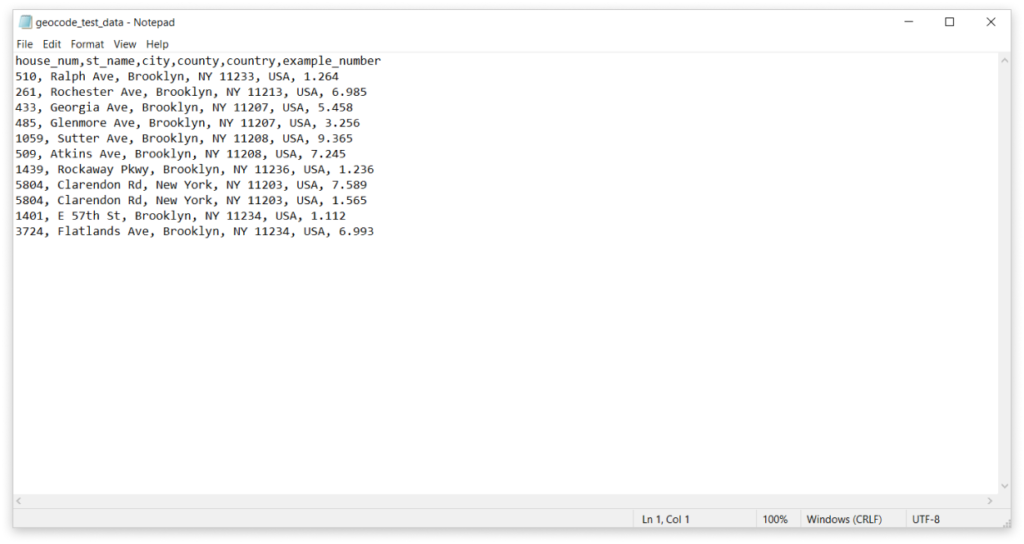
Header example: house_num,st_name,city,county,country,example_number
- Separate address in different columns: house_number,street_name,city,country
- Use full-stop as a delimiter for decimal numbers.
Here you can download an example geocoding table: Example table.
Geocode data
- Open geocoding.giscloud.com and login with your GIS Cloud credentials.
- Drag and drop a file or select the file from the File Manager.
- Browse the file and click the Select button.
- Match all address fields (e.g. house number with house_number column, a street name with street_name column, etc.).
- Click the Start Geocoding button.
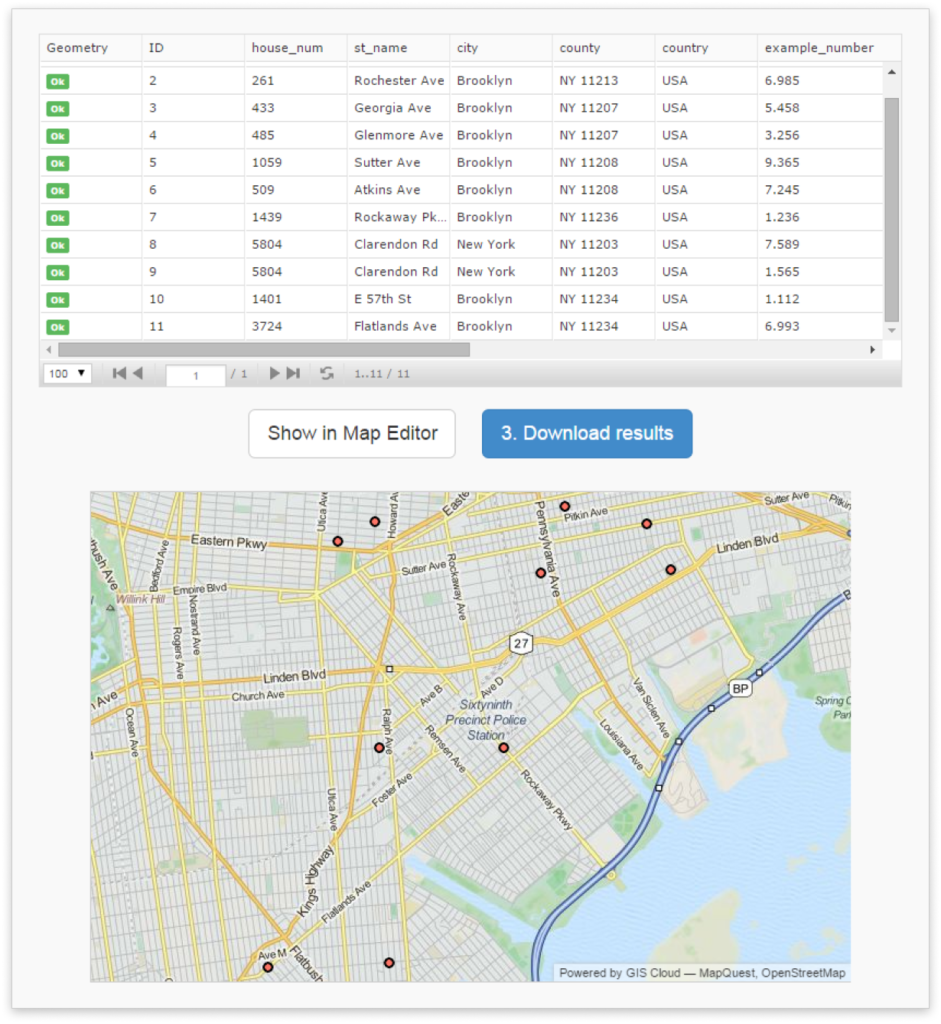
- To see the results in our app, click Show in Map Editor. To get the coordinates from the data, click on the Download results button and export them in the wanted format.
Note: After geocoding a batch of your data, we recommend duplicating the resulting database table and renaming it so that you can repeat the process later with new data if needed.
To duplicate the result, open the map in Map Editor, click on the Results layer, and then on Duplicate layer (can be found in the Layer tab, or by clicking the three dots next to the layer name. Make sure to click Yes, when asked whether you want to duplicate the layers source as well.
Afterwards, open the Database manager and rename the copied table. Learn more about that step here.