How to create a form for data collection in Map Editor?
Another way to define your custom form is through the Forms Manager in the Map Editor app and then attach it to the table in which collected data will be stored. The creation of the form itself works in the same manner as in the MDC Portal but the form remains independent until you connect it to a layer with adequate columns. Also, data collection projects in Map Editor allow a bit more tweaking and you can utilize all the benefits of the app for data editing and visualization.
Forms created in this way are listed in the mobile app under the Maps tab and the layer in which data will be collected under the Layer tab.
To create a form in Map Editor follow these steps:
Table of Contents
Create a Map or Layer
Before you start collecting data you need to create a map and a database layer (table) where you will send your data from the field. You can create a new layer or prepare an existing one for attaching the custom MDC form. Most importantly the layer table must contain columns of adequate type to connect to each form item to enable saving the correct data format sent through the form; check which field (column) types (string, integer or real) are required for which form fields here.
Data collection is supported for all three geometries: point, line and polygon.
Note: The layer you’re working with has to be imported into the Database; otherwise, the data is not editable, and data collection with the MDC application will not be possible (neither collecting new data nor editing existing features).
Find more info on how to create a map and layer and how to edit the table structure (column types) to set it up for data collection.
Create a new form
After the layer is created, it is necessary to create a custom form that will be displayed on the mobile device and make the data collection easier. The form transfers the data you wish to collect, and connecting the form to a layer sends the data to the adequate column of the table. Take a look at the Forms Manager overview for additional details. Create a new form by following these steps:
- Open the Tools tab.
- Open Forms Manager.
- Build new form will be the automatically selected option.
- Write a form name and title. The form name will appear in Map Editor, and the form title will appear in MDC on the mobile device.
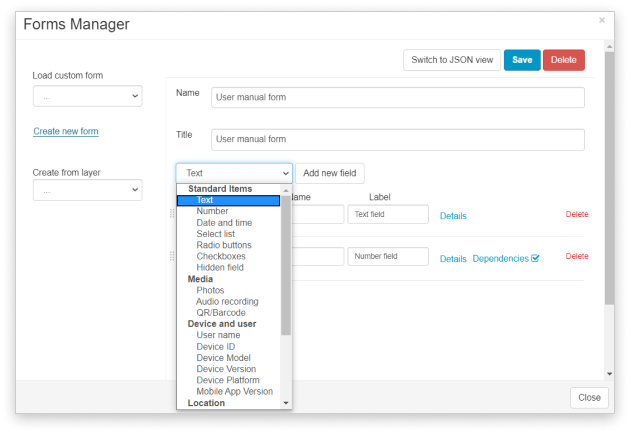
- Add form items by clicking Add new field.
- Choose the type of form item from the drop-down list, and choose the field name and (optionally) label. Find the form items overview.
- Once you’re done with the form, click the Save button.
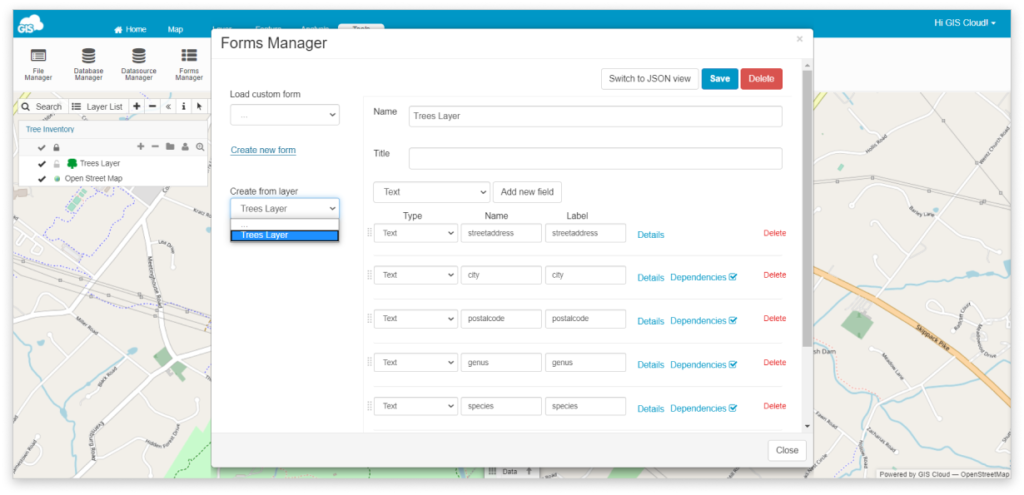
Note: When you add or create a layer on your map, you can choose to use that layer as a template for the form creation. The layer you wish to use must be an editable layer, ie. the source needs to be the Database manager. In the Create from layer option, choose the layer, and the form with the attribute fields will automatically appear. All columns will be listed, and all you have to do is modify the form field types and labels, if needed. Note – leave the field name as is, as that means that you will automatically connect the form field and table field once you choose to use that form with your layer. See below for more details on that option.
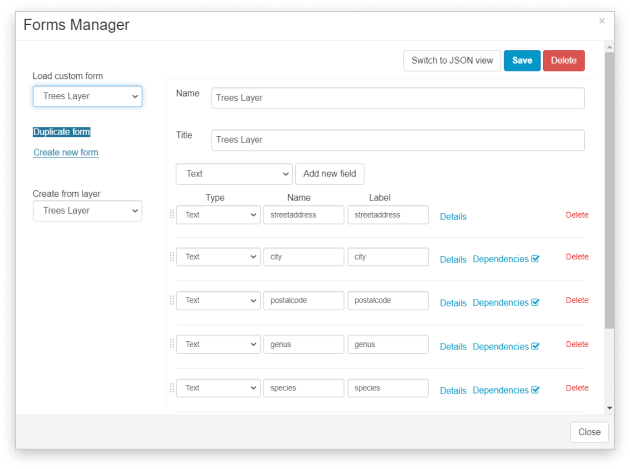
You can also duplicate and additionally update an existing form to simplify the creation of a new data collection project.
In case you are the visual type, check out the video tutorial below which covers all options available in the Forms Manager:
Connect form and layer
To collect data with the Mobile Data Collection, the database layer has to be connected with the form. If you’ve created the form based on a layer, and the form field and table field names are identical, this step is not required. However, if there’s any difference in the name (ie. not an exact match), then this step is crucial for the data to store properly in the proper field.
Note: Projects created with the Mobile Data Collection Portal, have an automatically connected form and layer, and the columns can not be edited through Map Editor.
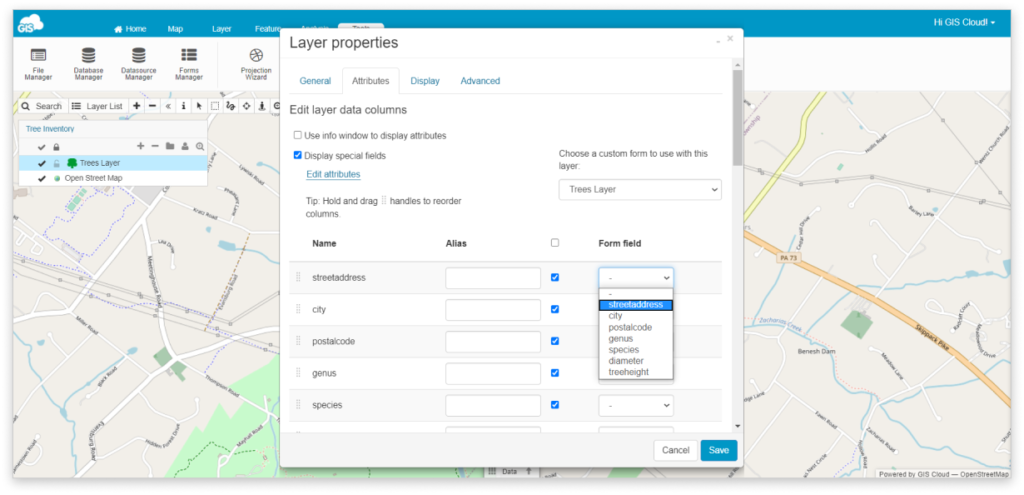
To connect a form with the layer, follow these steps:
- Open Layer Properties by clicking on the Layer tab and Edit Layer button.
- Click on the Attributes tab.
- Choose a custom form to use with the layer from the drop down list.
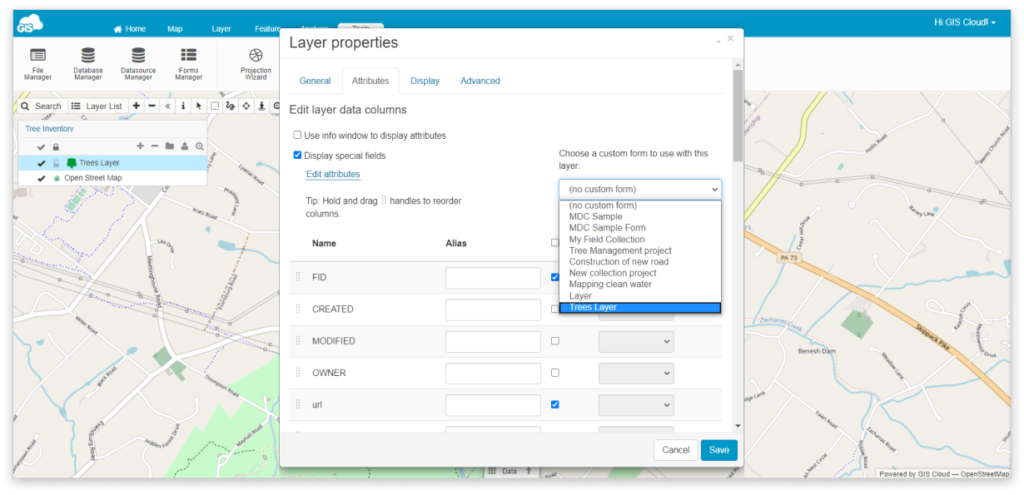
- Join each column with the corresponding form field from the drop down list e.g. column name is text_field, then from the drop down list Text field should be chosen. Make sure the column type is set properly for each form item.
- Click Save button.
You can also add some additional fields into the form but note that after that, you need to add these fields in your layer as well (this can be done in the Layer Properties) and attach it accordingly.
You can also add additional columns to the layer without an attached form item. These columns will only be visible in the Map Editor to the project owner.
There are two ways to create a project for collecting data with our Mobile Data Collection app: through Mobile Data Collection Portal and through Map Editor.
Learn how to create a project through Mobile Data Collection Portal in this guide!
Now that you have made a form, learn how to share the form with collectors and how to start collecting data from the field.