Customize your Map Portal with App Builder
Table of Contents
Overview and general information
With our App builder, you can easily customize your Map Portal according to your needs. You can create a user-friendly interface all by yourself, easily and quickly, without any programming knowledge.
Firstly, you need to install Map Portal through GIS Cloud Manager. Learn more about it here. After installing the Map Portal app, you can edit your custom app in three different ways:
- by adding App Options in the Advanced tab (you can find the available app options and instructions here)
- through the App Builder (learn more about this option below),
- or by editing the app.json file.
These options offer somewhat different customisation possibilities, and we recommend starting out with the first two (App options and App builder) – they’ll allow you to change the app logo, theme color, logo links, top menu and toolbar elements, set up filters, panels, etc. If you’re looking for more advanced customisations, custom tools, or a fully customisable interface, you can achieve that by editing the app.json file.
If you want to change your app domain from the default, e.g. from app103168.giscloud.com to some other domain, feel free to contact us at support@giscloud.com.
Find out how to use the App Builder below, or if you are more of a visual type, feel free to check out our video guide!
You can find the code snippets we used in the video below:
- Centralize panel snippet. Goes into the CSS file.
- Filters & filter builder. Goes to the JSON file.
- Info pop-up customization. Goes into the CSS file.
How to use the App Builder
To start the App Builder, open your custom app and add /builder in the URL bar, e.g. app109168.giscloud.com/builder.
Log in with your GIS Cloud credentials. The App builder interface will open on the left side.
The Preview button can be used to review changes made on a custom app before they are published to other users or the public. Changes will be saved after hitting the Save button. We recommend waiting a few seconds after saving for the app to refresh.
After all the changes are made and saved, delete the ‘/builder‘ ending from the app URL to exit the App Builder and see how your Map Portal looks to the public.
Customisation options in the App Builder
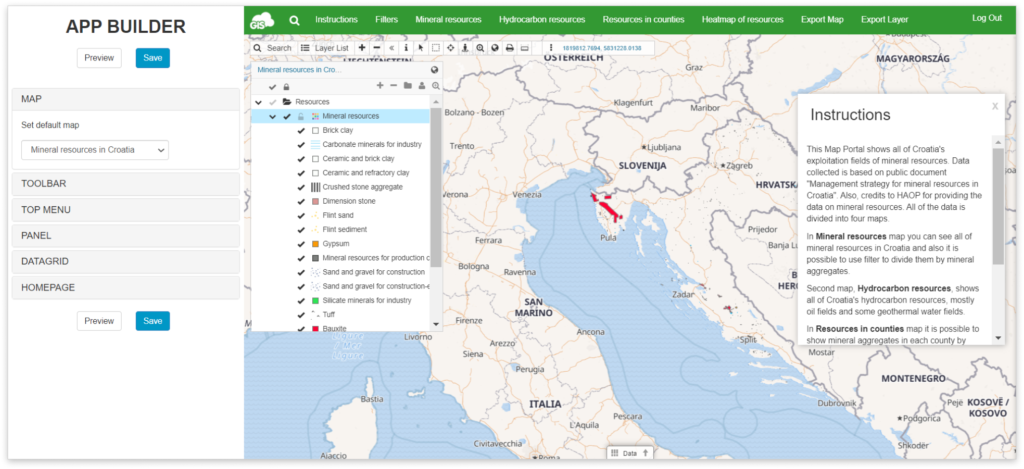
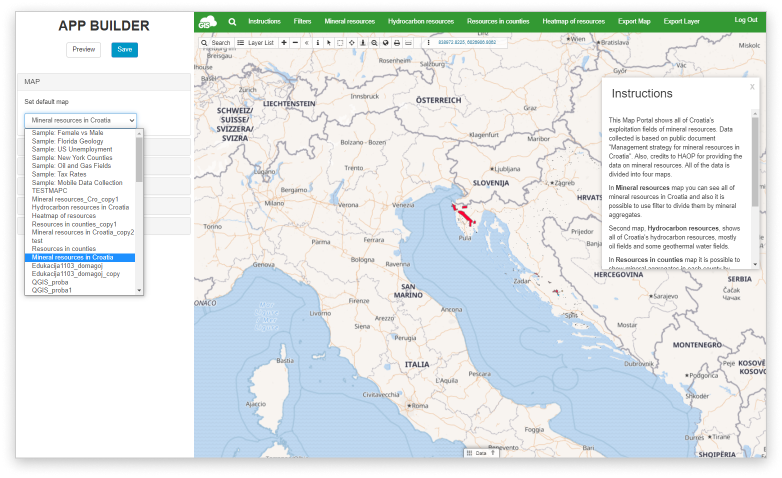
Map Section
Select the default map from the drop-down menu. This map will open by default when the app is refreshed. You can also set it up by adding an advanced option called DEFAULT_MAP_ID with the map ID as the value. You can find the map ID in the direct URL link to your map – look for the link in the Share and publish tool, or by clicking the map name in the Layer list (this refreshes the map and provides the direct link in the URL bar).
Note: Make sure that the map is public, as otherwise, it will not be visible in your Map Portal. You can set your map publicly available in the Map Editor through the Share tool.
Toolbar Section
Select the tools that will appear on the custom app.

- Search
- Layer list
- Zoom in
- Zoom out
- Show/hide the toolbar
- Info
- Select
- Area selection
- Zoom to current
- Google Street View
- Zoom
- Zoom to Full Map Extent
- Print tool
- Measuring tools
- Map Scale
- Change units projection
- Jump to Coordinates
- Number of Selected Objects on the Map
Top Menu Section
In the top menu section, it is possible to add buttons (connected to specific actions), set the background color, hide and show search (magnifying glass) and set your custom logo.
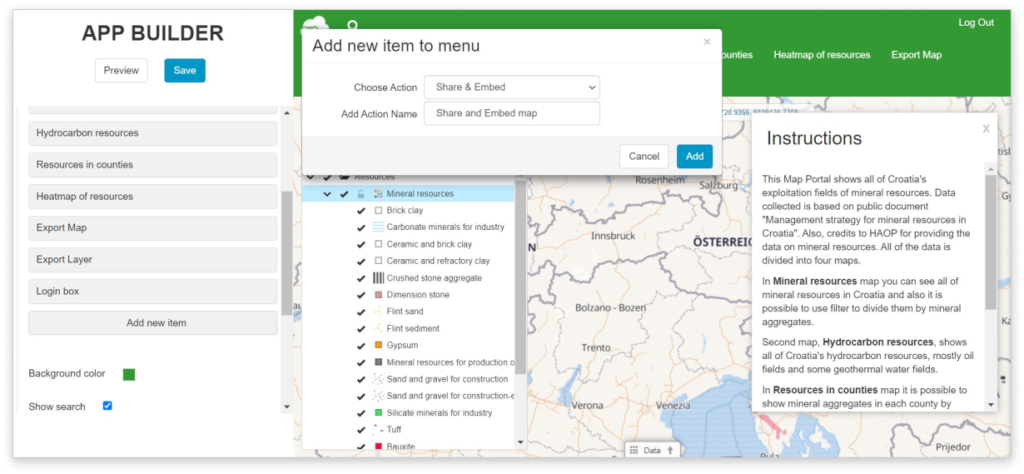
When adding buttons (Add new item), you can choose between:
- Switch map – clicking on the button will load another map in the Map View
- Share and Embed – share option opens up an active map in the Map Portal at the previously selected zoom level and the precise location on the map at the moment of link creation. Embed Option allows you to embed the map on your website, but not the whole Map Portal. Find more about this tool here.
- Export map – export the map as an image in the same manner as in Map Editor
- Export layer – export the layers in the same manner as in Map Editor
- Features – add, edit or delete feature(s). Note that this feature will only work on custom Map Editor apps, not the Map Portal.
- Homepage – opens Homepage (only if homepage is set – in the Homepage tab)
- Analysis – area, buffer, near, hotspot, spatial filter. Note that this feature will only work on custom Map Editor apps, not the Map Portal.
- Panel – set a button that will open one of the panels. Make sure to create the panel first in the Panel section
- Link – button will link to a web page e.g., www.giscloud.com
- JavaScript – add JavaScript code for additional customization
How to add a new button
- Click Add new item
- Select one of the available actions
- Add button name
- If necessary, add additional info for button
- Click Add
- Save!
How to set the background color
Select the color or add the hex color code to change the top ribbon color. You can do that through Advanced options as well by entering THEME_COLOR with the hex color code as value. (e.g., for green the hex color code is #26f217)
Search
Check the Search box to show Search from the Top Menu (magnifying glass). You can additionally set up a custom search for an optimized and more precise search tool.
Logo
You can upload and add your custom logo. The recommended size of the logo is 140*43 pixels.
- Click the Logo button.
- Hit Browse and find your previously uploaded logo or upload it now through the File Manager.
- Click Save.
- Preview&Close.
Panel Section
In panels, you can add advanced filters, open static text or open another web page within a panel.
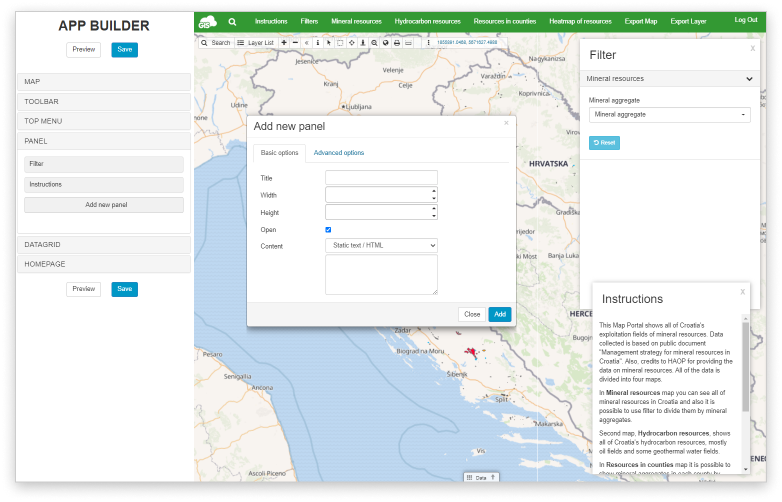
How to add static text/HTML
- Select Add a new panel
- Add Title, height and width in pixels
- Check or uncheck Open by default option
- You can add the Close button in the Advanced tab
- From the Content dropdown select Static text/HTML
- Write the text in the box below
- Edit the text by following the HTML text formatting rules (or you can use any handy tool that converts your formatted text to HTML!)
- Click Add
- Preview&Save
How to add a URL
- Select Add a new panel
- Add Title, height and width in pixels
- Check or uncheck Open by default option
- From the Content Dropdown list select Url
- In the box add URL
- Preview&Save
Note: Please be aware of http/https protocol, if your app is open with https, then your url must use the same protocol!
Local file content
If you have a text file stored in your File Manager, you can display it on a panel.
- Add Title, height and width in pixels
- Check or uncheck Open by default option
- From the Content Dropdown list select Local file content
- Browse file and click Add
- Preview&Save
GIS Cloud Filter
Filters are used for extracting data both in the data grid and map view.
- Select Add a new panel
- Add Title, height and width in pixels
- Check or uncheck Open by default option
- From the Content Dropdown select filters. Note that only layers imported in the Database can be filtered
- Click Filter button
- Select one of the available filters from the Dropdown list. Here you can find detailed information about filters
- Click Forward configuration to App Builder button
- Click Add button
- Preview&Save
Learn more how you can set up filters in Map Portal.
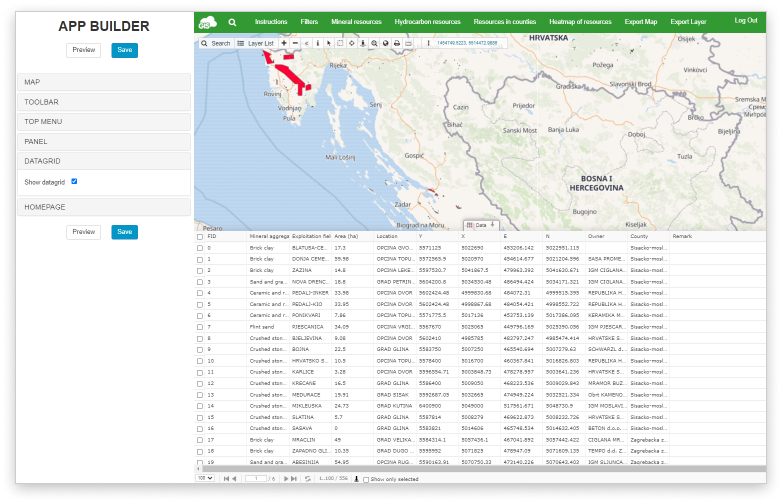
Datagrid Section
Check or uncheck the box to show or hide the data grid on the bottom of the page. Hit Preview&Save.
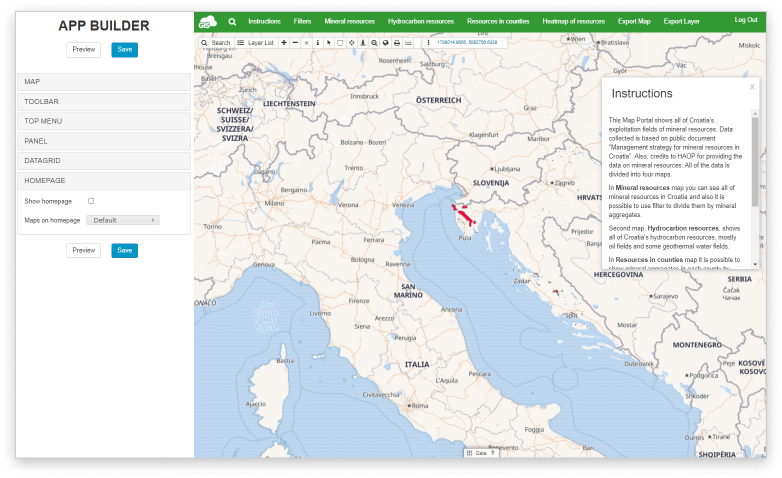
Homepage Section
Check Show homepage box to show the Map Editor homepage. Select Default, All, My and/or Shared maps, hit Preview&Save.
How to customise the Map Portal using app options
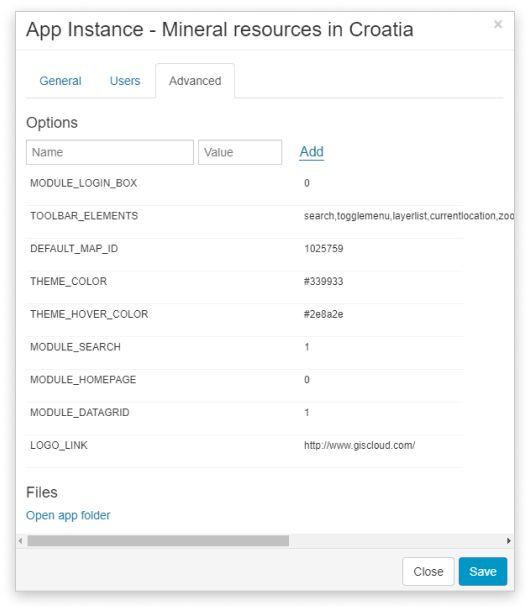
As mentioned, the custom apps can also be edited by adding adequate advanced options.
In the App instance options, under the Advanced tab, it is possible to add various app, map or layer options for customization purposes. For example setting the default map, tools and features which will be incorporated, changing the visual identity of your Map Portal (Map Editor/Map Viewer) and many more.
Write option in the Name box and value in the Value box then click Add.
Here you can find full list of the supported options – App instance options, apps, map portal, custom settings!
How to customise the Map Portal using app.json
For additional, more complex customization, you can include a custom javascript script and CSS styling, templating.
- In your Manager app, find the desired custom app, choose Edit and under the Advanced tab of the App Instance, click Create/Open app folder.
- After opening the App folder, Source Browser will be shown. Then click on the Create new file icon and name it app.json.
- Open the newly created app.json file, edit the text file or just add your custom script.

Here is an example of setting custom panels and buttons:
{
    "responsive": true,
    "sections": {
        "top": {
            "logo": {},
            "menu": {
                "items": [
                    {
                        "label_i18n": "Switch Map",
                        "href": "javascript:;",
                        "items": [
                            {
                                "label_i18n": "Find Your Space",
                                "onclick": "gcproject.mapChange(199540);"
                            },
                            {
                                "label_i18n": "Road Closure Application",
                                "onclick": "gcproject.mapChange(166950);"
                            },
                            {
                                "label_i18n": "City of Canton",
                                "onclick": "gcproject.mapChange(150872);"
                            }
                        ]
                    },
                    {
                        "label_i18n": "Export Map",
                        "onclick": "gcproject.exportMap();"
                    },
                    {
                        "label_i18n": "Export Layer",
                        "onclick": "gcapp.gclayer.exportLayer(); return false;"
                    }
                ]
            }
        }
    }
}
Here is an example of setting custom javascript scripts and CSS styling and templating:
{
    "scripts": {
        "namespace": "gc",
        "init": [
            "assets/js/init.js"
        ],
        "app": [
            "assets/js/app.js"
        ],
        "setup": []
    },
    "styles": [
        "assets/css/style.css"
    ],
    "images": [],
    "html_tag_attributes": "xml:lang='en' lang='en'"
}
Here you can find more information about the app configuration format: App configuration format.