How Collected Media is Stored in the File Manager
If you’ve used GIS Cloud for a bit, you’ll know that when you took a photo for your data collection project, we stored it in a folder in your File Manager called “uploads”.
With the introduction of Collected Media Folders, we’ve made organising and accessing your project-specific files easier. The guide below explains how media collected using the Mobile Data Collection (MDC) app is stored in the File Manager. If you want some more details on accessing media through API or direct link, take a look at the guide here.
To ensure the functionality of the Collected Media Folders feature, there was one major prerequisite: all collected and attached media files are now saved and logged in the same format – a JSON object/string. More information is available here.
Table of Contents
Where Your Collected Media is Stored
When working with MDC projects or custom forms on Map Editor map layers, any media collected in this way is automatically stored in project-specific folders. Here’s how the Collected Media folder is structured:
When you create a new data collection project in MDC Portal or Map Editor and collect media (e.g., a photo), the system automatically creates a dedicated folder in your File Manager. This is where all media from the project is stored.
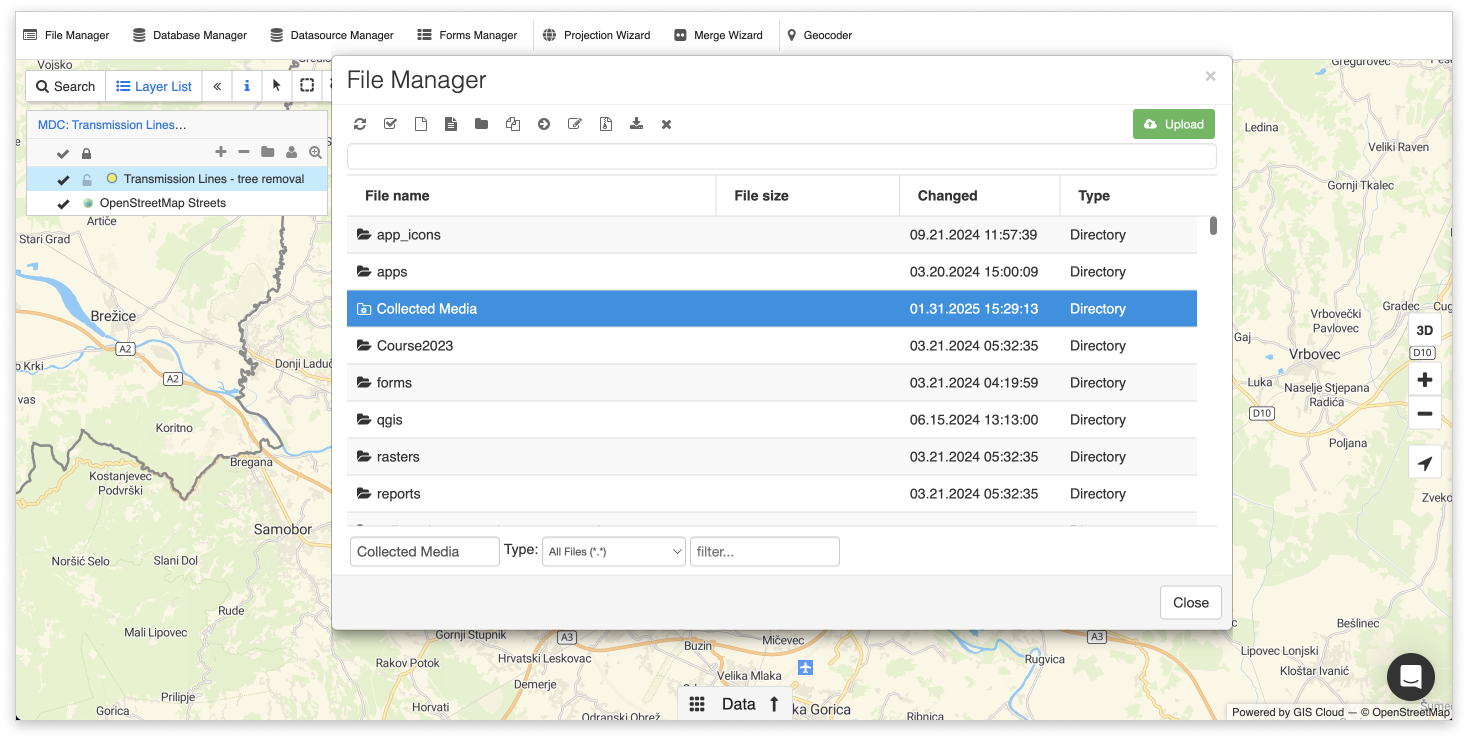
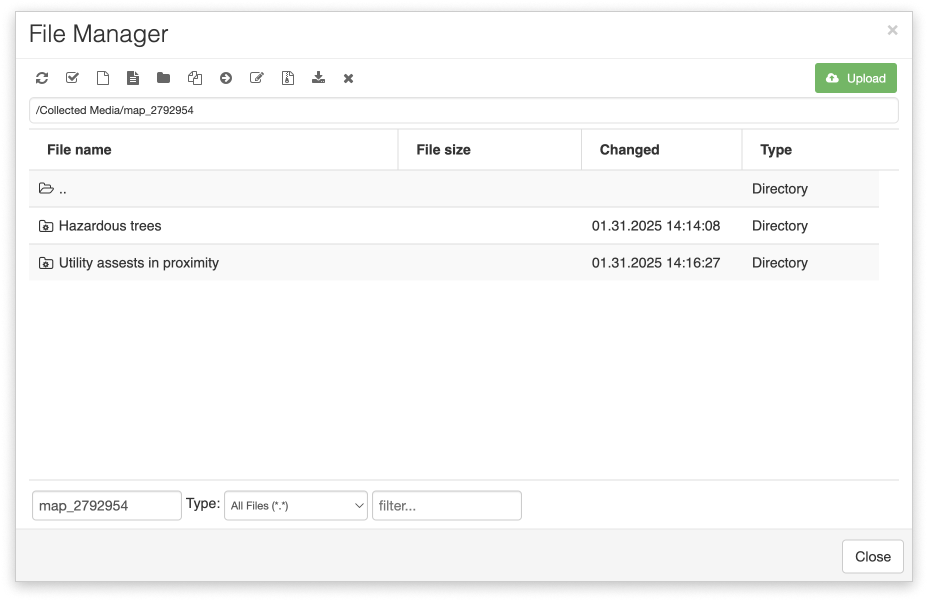
The main folder is called Collected Media, and it contains additional folders named after your data collection projects and maps. If you’re working on a project with multiple layers, each layer with a form with a media field will have its subfolder.
Folders will be created and organised automatically, so there’s no need to do anything on your end!
How the folders are named (folder paths and display names)
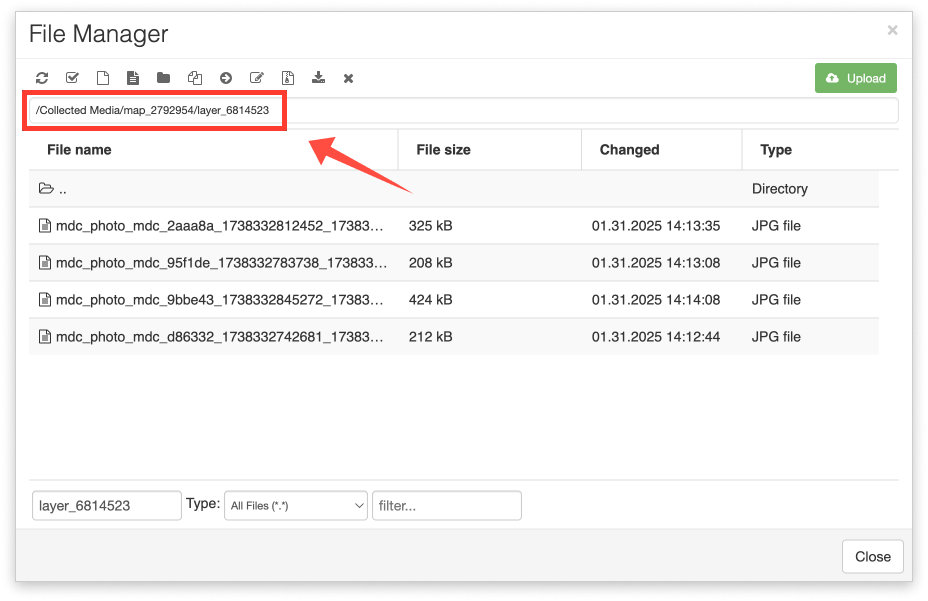
Folders within the Collected Media folders are named after your map or MDC project, and contain layer subfolders named after the layers themselves. Specifically, if you want to find the correct path for your folder, you’ll need the map and layer IDs.
Here’s an example of the folder naming structure for data collection projects:
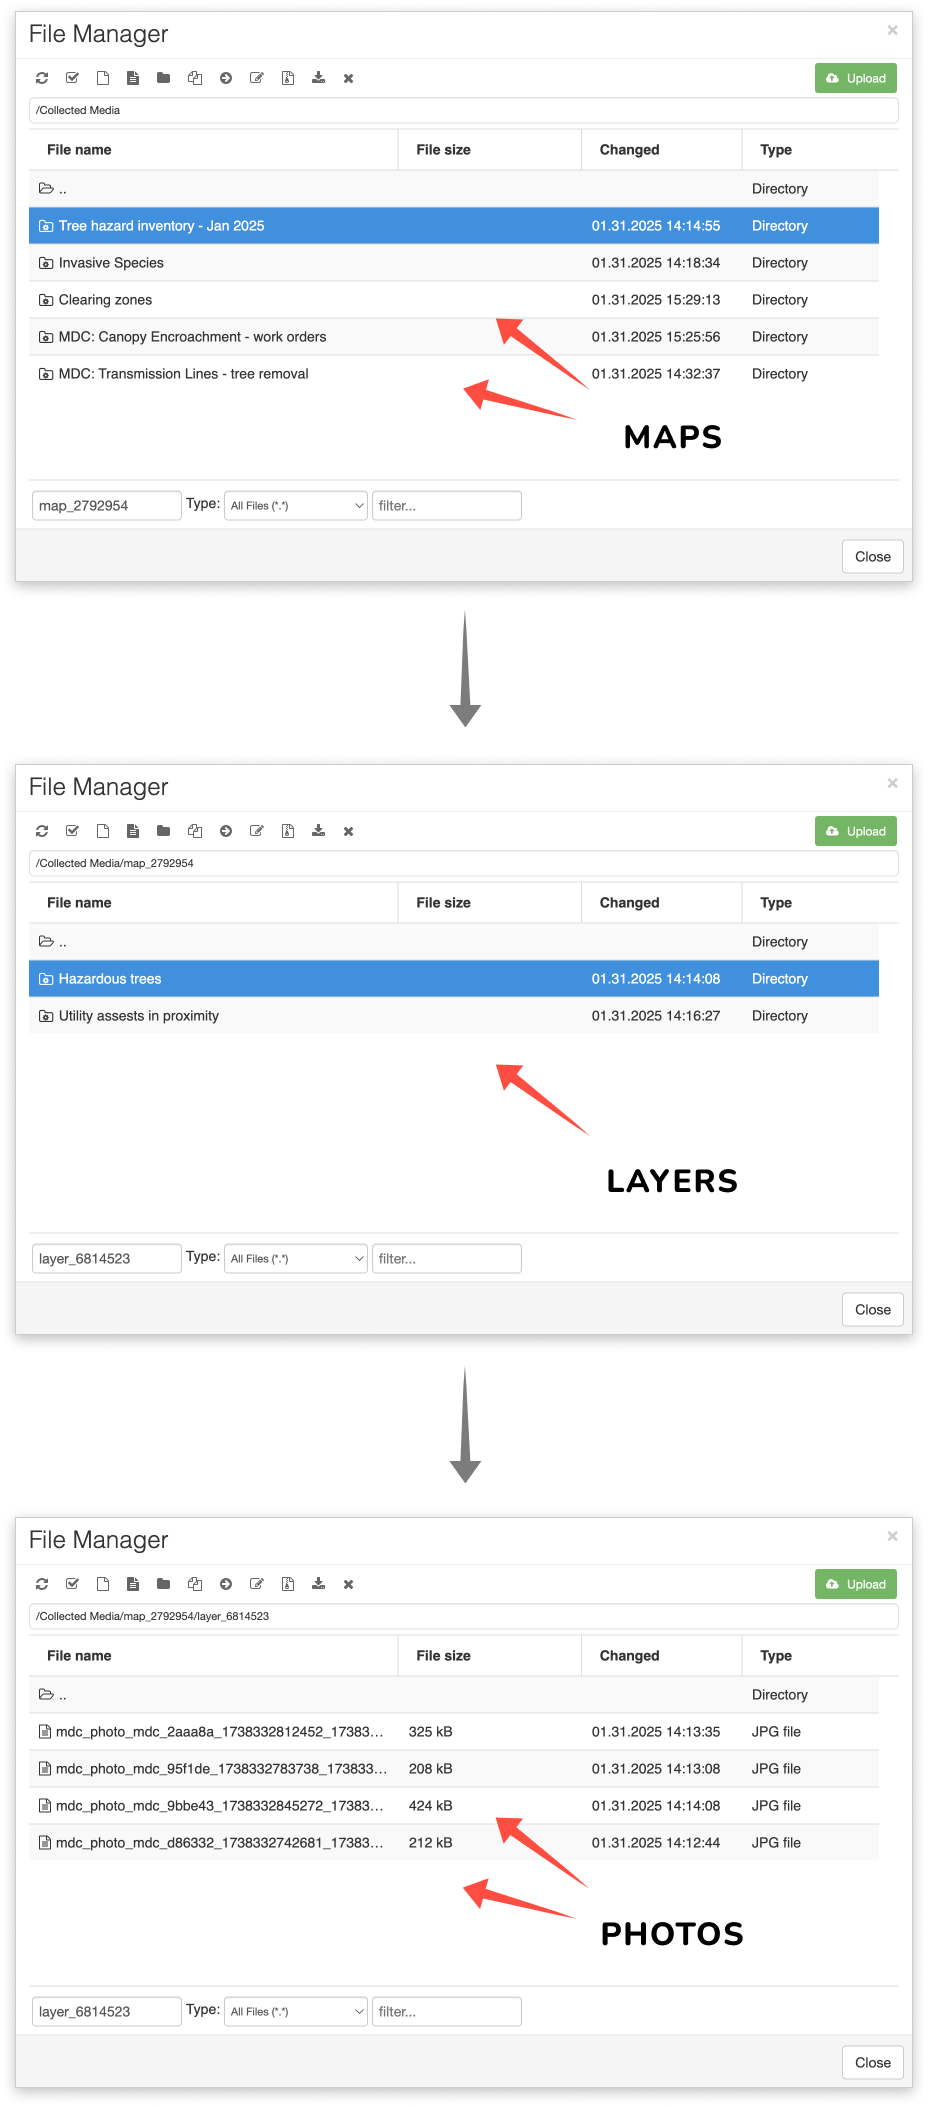
The map folders might contain several additional layer subfolders within. Notice that the path uses the map ID and layer ID(for example, /Collected Media/map_2792954), while still displaying the map and layer name in the File manager for easier navigation.
In the end, a photo might have a path that looks like this:
/Collected Media/map_2792958/layer_6814533/mdc_photo_mdc_16d607_1738336986514_1738336988696.jpg
where 2792958 is the map ID, and 6814533 is the layer ID.
In general, we can say that the path follows this structure: /Collected Media/map_mapID/layer_layerID/filename
How do you find the map and layer IDs? Take a look here!
If you’re setting up any kind of automation to access the files, need to access your media through API (if using a method that uses path instead of resource ID) or are working with SFTP, you might need to use the path with the map/layer ID.
Managing Media Files and Deleting Folders
The Collected Media folder is system-reserved to ensure your project files remain safe and organized. This folder cannot be deleted, renamed, or moved.
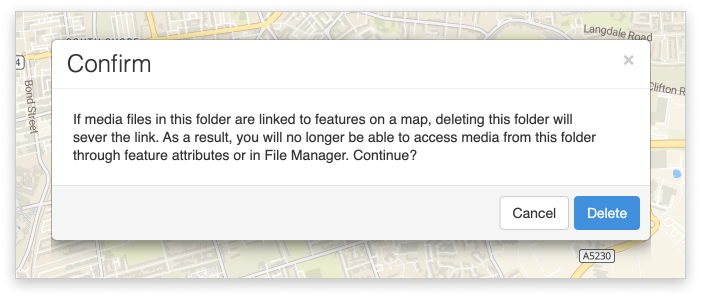
You can delete map and layer folders within the Collected Media folder. However, deleting those folders will break these links if media files are linked to map features, making the media inaccessible via feature attributes.
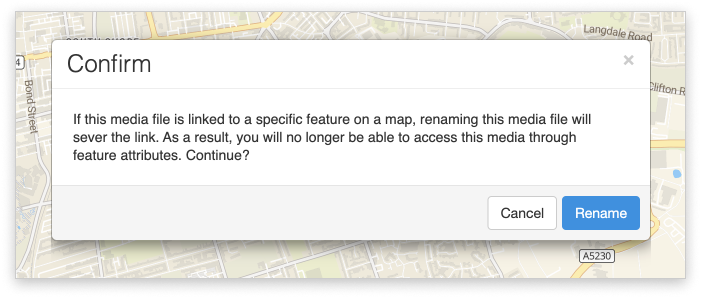
You can also rename the files within those folders, but as with the folders, this action will break these links if media files are linked to map features, making the media inaccessible via feature attributes.
Managing Existing Media
All media collected before the update remains in the Uploads folder for now. This folder holds media from all projects that include Photo form fields.
If you need to export photos from a specific project and they are still in the Uploads folder, use the Report tool – see here for more details.
These files will be automatically sorted into project-specific folders in an upcoming update. We’ll notify you once this change takes effect – so keep an eye out for our news!