How to add an autocomplete text field?
An autocomplete text field can hold a list of fixed values and can work offline. The values can be searched in the form using a keyboard.
This option can only be set in Map Editor using JSON form structure (Tools tab – Forms Manager – Switch to JSON view)
To add a field with autocomplete list of countries follow these steps:
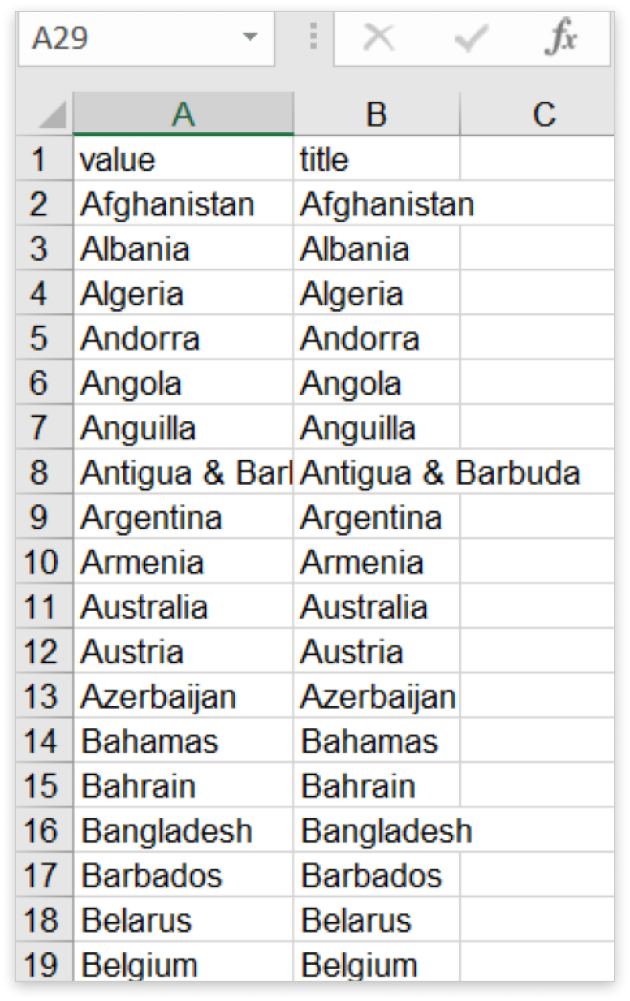
- Prepare the data you want to add to a select list. List the items in an Excel file in two columns named ‘value’ and ‘title,’ as shown in the picture below.

- The next step is to turn the Excel file to JSON format. You will need an online Excel to JSON generator. Upload the Excel file to the generator to get the JSON code.
The result should look like this example:
[{
		"value": "Afganistan",
		"title": "Afganistan"
	},
	{
		"value": "Albania",
		"title": "Albania"
	},
	{
		"value": "Algeria",
		"title": "Algeria"
	},
	{
		"value": "Andorra",
		"title": "Andorra"
	}
]- When the data is ready, create a new form or load an existing one in Forms Manager. In this example, we have named the form Countries. Click ‘Add new field’ and choose a ‘Text’ type. Name the field ‘Autocomplete_countries’ and click ‘Save.’
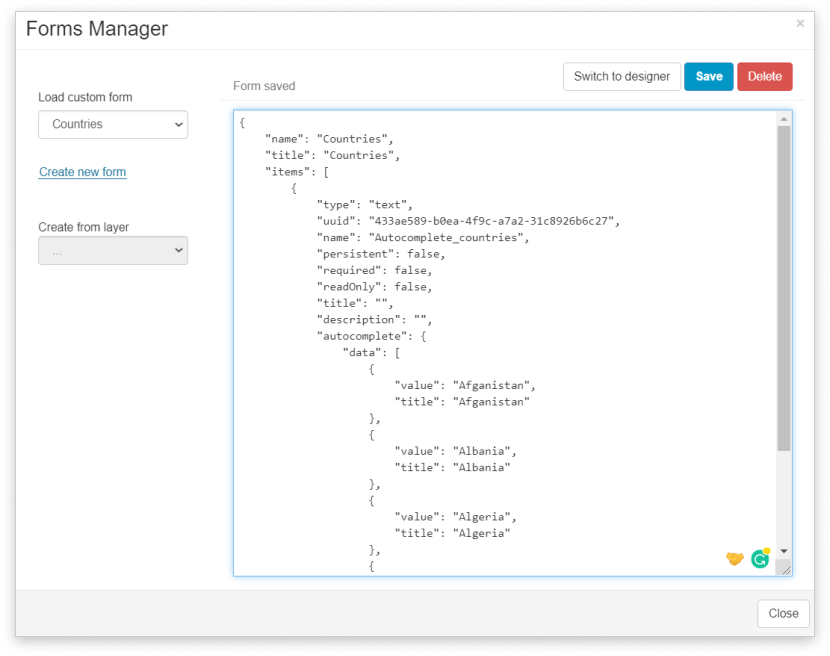
Now click ‘Switch to JSON view.’
Find the part with your newly created text field called ‘Autocomplete_countries’:
{
	"type": "text",
	"uuid": "433ae589-b0ea-4f9c-a7a2-31c8926b6c27",
	"name": "Autocomplete_countries",
	"persistent": false,
	"required": false,
	"readOnly": false,
	"title": "",
	"description": ""
}
Under the part ‘’description’’ add:
“autocomplete”: {
“data”: Paste the JSON code containing the items here
- The final result should look like this:
{
	"name": "Countries",
	"title": "Countries",
	"items": [{
		"type": "text",
		"uuid": "433ae589-b0ea-4f9c-a7a2-31c8926b6c27",
		"name": "Autocomplete_countries",
		"persistent": false,
		"required": false,
		"readOnly": false,
		"title": "",
		"description": "",
		"autocomplete": {
			"data": [{
					"value": "Afganistan",
					"title": "Afganistan"
				},
				{
					"value": "Albania",
					"title": "Albania"
				},
				{
					"value": "Algeria",
					"title": "Algeria"
				},
				{
					"value": "Andorra",
					"title": "Andorra"
				}
			]
		}
	}]
}
Don’t forget to click Save.
The next step is to connect the form fields to columns in a layer. Open the Layers Properties in Map Editor and connect the layer and the new form.
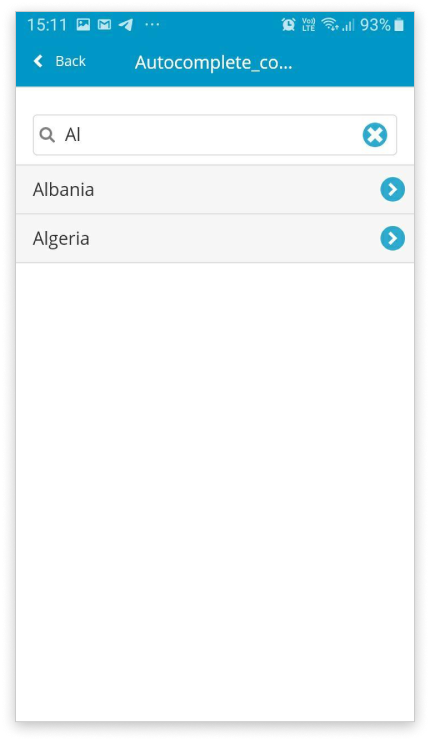
Now you can start collecting field data. Open your MDC mobile app and under the tab ‘Maps & Layers’ find your map. When you open the form and start typing, results should appear as in this picture:

You can find the autocomplete form field with the explanations below:
{
“type”: “text”, — defines form field type, for autocomplete field, only text is supported
“uuid”: “field1”, — unique identifier for each form field. It doesn’t have to be complicated, it only has to be unique in the form
“name”: “designation”, — the name of the form field as stored in the database (spaces, capital letters are not allowed)
“persistent”: false, — defines if the last sent value will be preserved in the form
“required”: false, — defines if the field is required to be filled to be able to send the data
“title”: “Designation”, — the title of the form field that will be visible in the form
“description”: “This is an autocomplete field with a fixed list of values. It can work offline.”, — the description of the field that will appear in the form
“autocomplete”: { — starts the definition of the list of attributes
“data”: [ — starts a list of the values which will appear as a list of autocomplete values
{ “value”: “alpha”, — the value of the form field which will be stored in the database
“title”: “Alpha (α)” }, — the title of the form field which will appear in the form
{ “value”: “beta”,
“title”: “Beta (β)” },
{ “value”: “gamma”,
“title”: “Gamma (γ)”},
{“value”: “delta”,
“title”: “Delta (δ)”}]}}
Find a full example of this form field which can be pasted to any user form.
