How to add labels to your map?
Labels are an essential part of every map. That is why it is necessary to know how to set them up properly. In this guide, you will learn how to add labels and how to display tooltips on your map!
Table of Contents
How to add labels?
To add the labels to your map, follow the steps below. If you are more of a visual type, scroll to the bottom of the section to take a look at our short video.
- Double-click on the layer in the Layer List to open Layer properties.
- Under Appearance, click on the icon you have chosen to visualize your features. Appearance window will open.
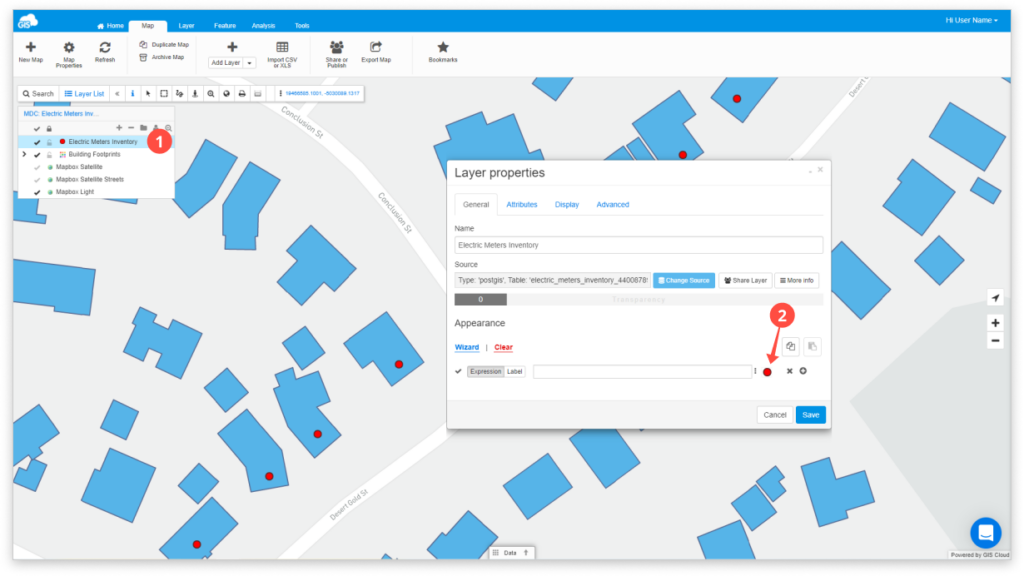
- Click on the Label tab and modify your label options!
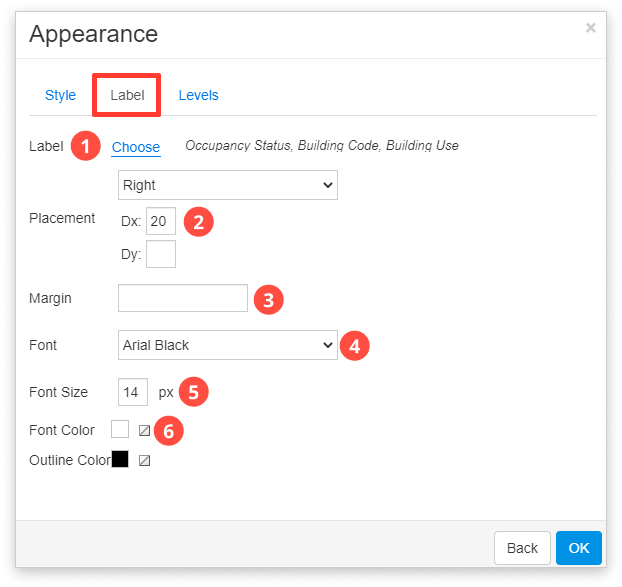
- Choose the attributes which will be used for visualizing your labels and modify the label position.
- Placement – You can input values from in range between -100 and 100. The values express the number of pixels. The default value is 0.
- Dx – Placement on x axis (left – right).
- Dy – Placement on y axis (up – down).
- Margin – You can input values from in range between -100 and 100. The values express the number of pixels. The default value is 0.
- Margin is set to -100: Labels can overlap in 100px.
- Margin is set to 100: Minimal distance between two labels is 100px.
- Font – Choose the wanted font.
- Font size – Choose the font size.
- Pick font and outline color.
- Click OK and your work is done!
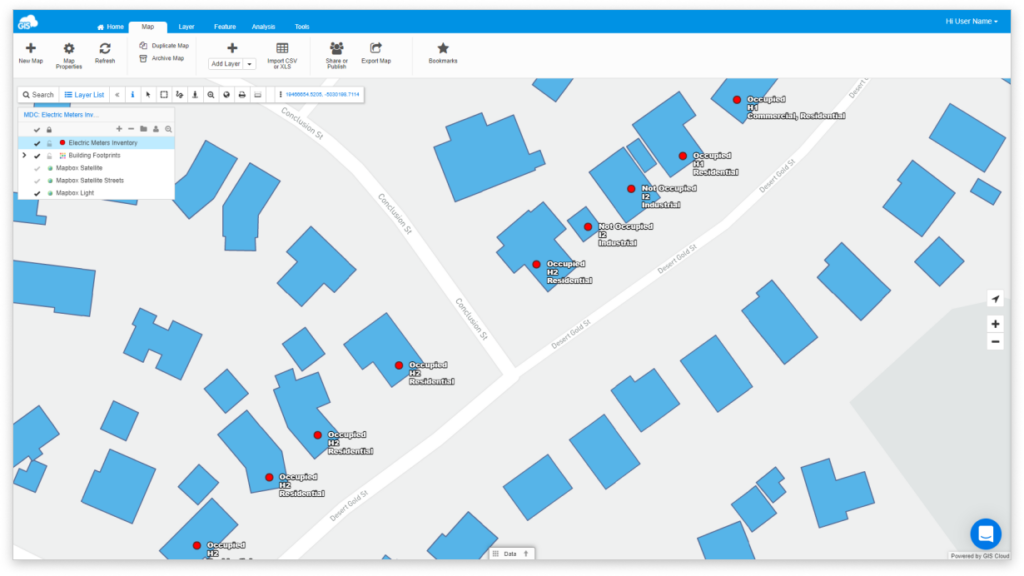
Note: If you want to hide layers’ geometry but keep the labels, you can do it by ticking the Hide geometry box in the Advanced tab of Layer properties!
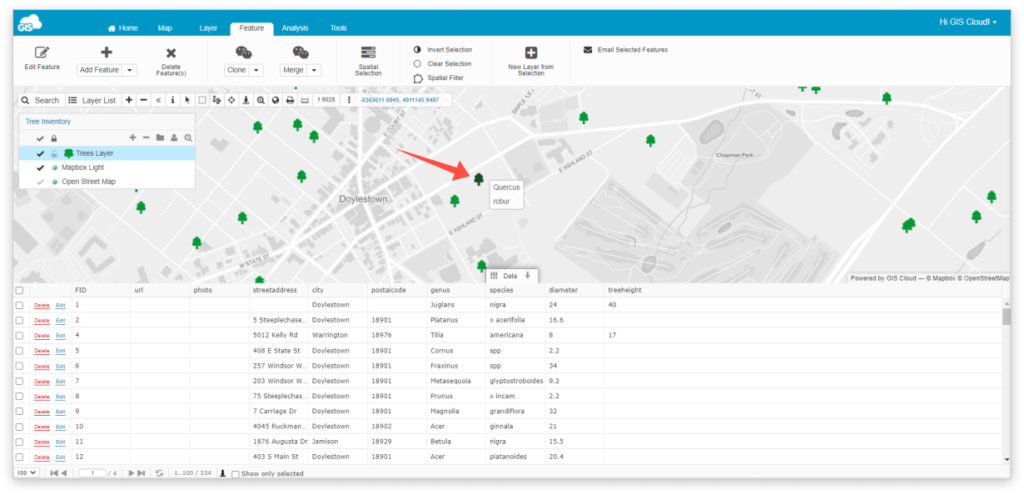
How to display tooltips?
The Tooltip option can be very useful if you do not want your map to be too cluttered with the labels.
To display it, please follow these steps:
- Double-click on a layer in the Layer list.
- Open the Advanced tab.
- In the Tooltip box write the name of the column you want to show. You can choose as many as you like, however, we advise not to select too many so your map would stay neat.
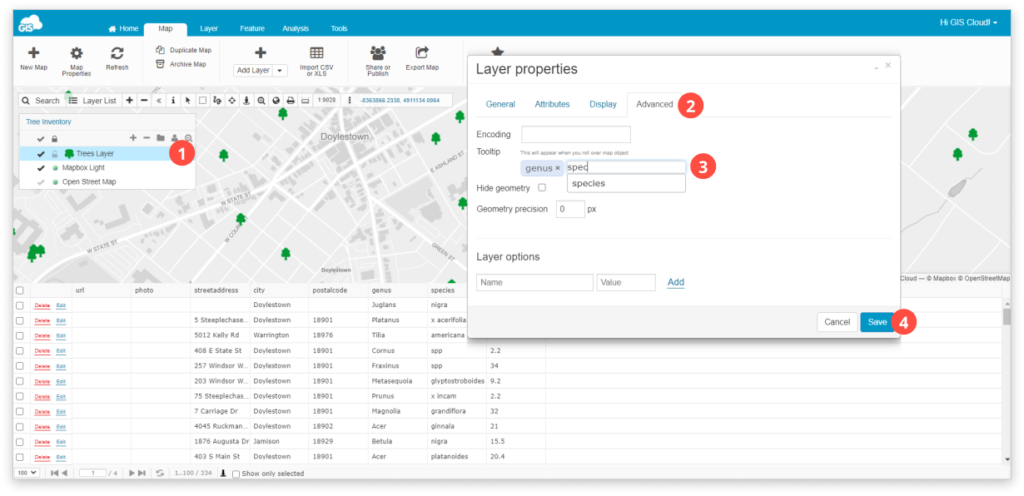
- Click Save.
- To see the Tooltips hover over any feature on your map!
