Report in MDC Portal
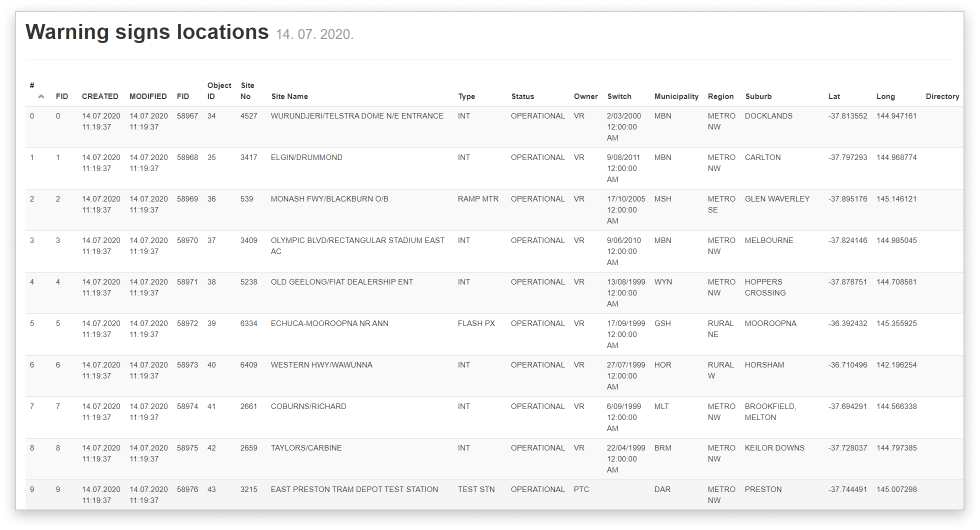
Collected spatial data can be exported in various formats. Report is one of them. This option displays all attribute data together with photos in the form of the report. You can save it locally on the computer.
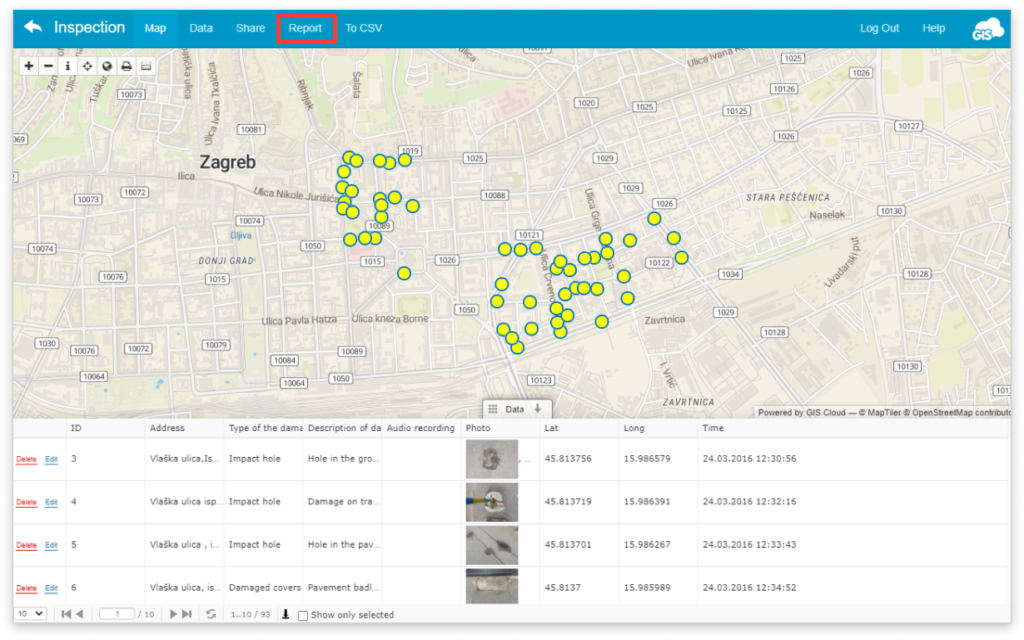
Find the Report option:
- under Layer tab
- in the open project in MDC Portal

To create a report, follow the next steps:
- Select a layer for which you want to create a report
- Click on Report button
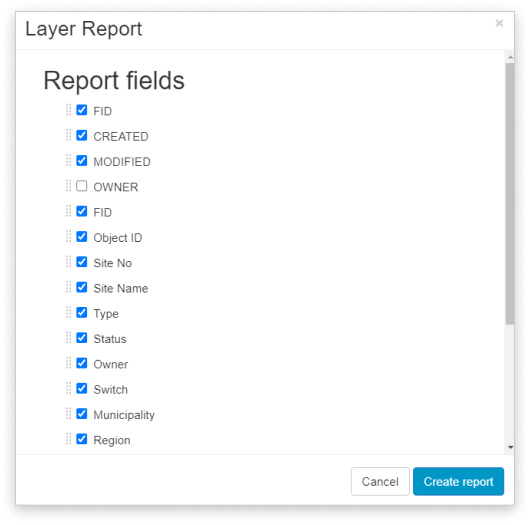
- Choose the fields which you wish to include in the report. Pressing and holding the ribbon next to the field name, you can change the order of the field.

- Click Create Report

- Click Create Report
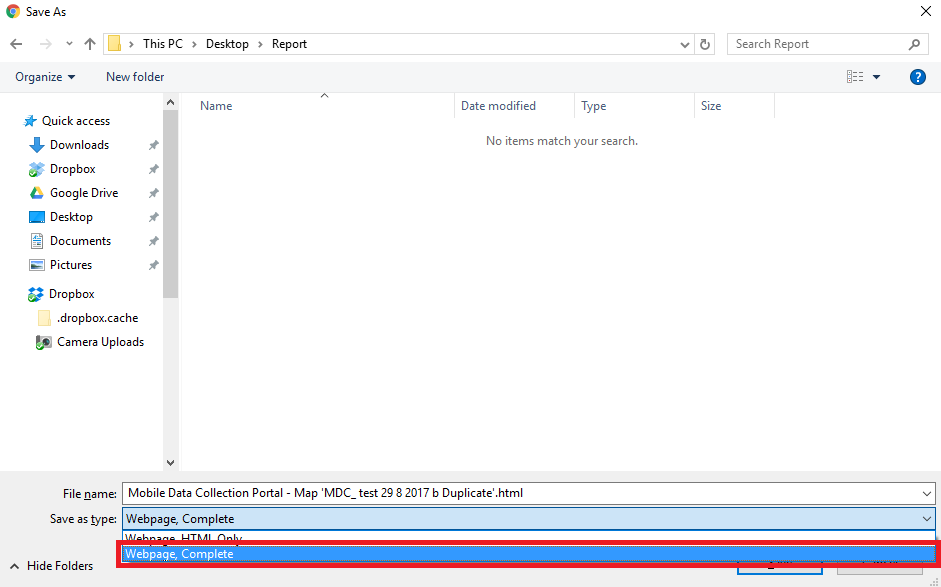
- Press CTRL + S on the keyboard and a dialogue will open. Select the location where the report will be saved and select ‘Webpage, complete’ option. If you press CTRL+P a new dialogue will open to save your report as a PDF document.

- Click Save
