Share and Publish
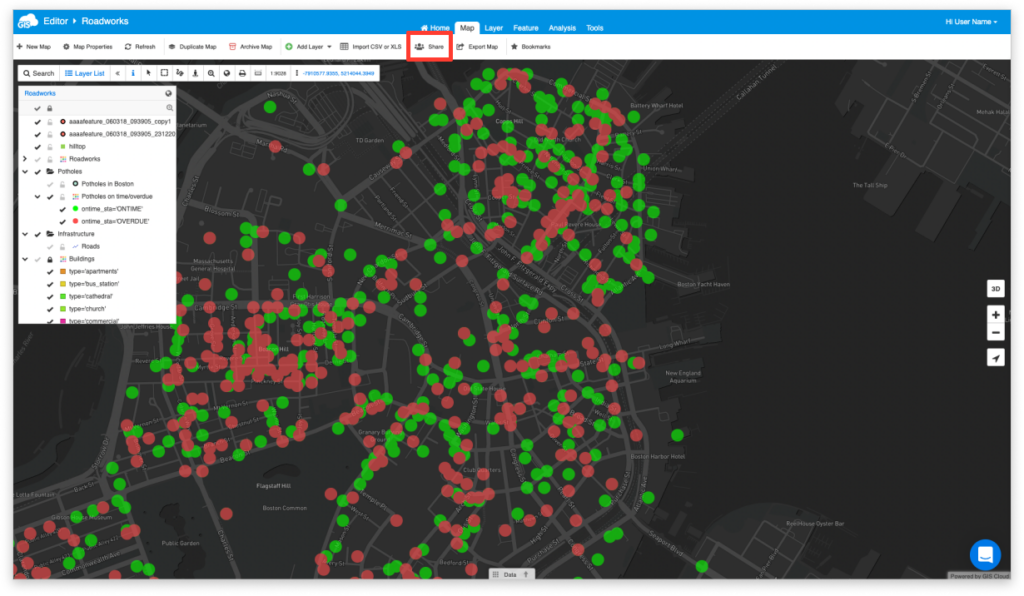
To share or publish map, select the Map tab and then click Share or Publish button.

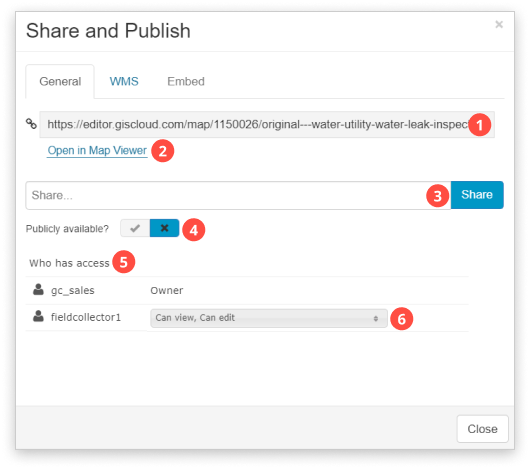
A Share and Publish window will open.
General tab

List of Share or Publish form functions:
- Permalink – The URL appearing in the permalink field allows you to share a direct link to your project from any browser.
- Open in Map Viewer – Opens a map in the Map Viewer application.
- Share With the User – Write the username of the user you want to share a map with. Click Share and start assigning Permissions to the user.
- Publicly available – If the box is checked maps are visible to everyone on the Home tab under Public Maps, whether they are registered or non-registered GIS Cloud users.
- Who has access – List of other GIS Cloud users who have some access to your map.
- Permissions
- Can view – will provide only viewing privileges to the person you have shared your map with.
- Can share – will provide sharing privileges to the person you have shared your map with.
- Can edit – will provide complete editing privileges to the person you have shared your map with.
- Can export – will allow the person to export the map you have shared with him.
- Can collect – will allow the person in the field to send new data, without the possibility to make changes to existing data or the one that he has already sent through the Mobile Data Collection application.
- Can update – will allow the person in the field to make attribute and geometry changes, without possibility to send new data through Mobile Data Collection application.
You can also set these permissions to layer only. Learn more about layer permissions here.
WMS tab
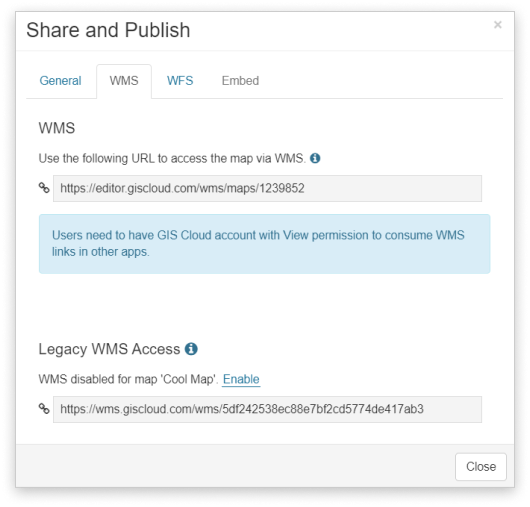
One of many sharing possibilities is also sharing a map as a WMS.

Learn more about sharing map as WMS in our user guide.
Embed tab
GIS Cloud allows embedding the public maps in a third party website trough Iframe and JavaScript.
Keep in mind that you can only embed Public maps.
Learn more about embedding maps on your website in our user guide.
