WFS as data source
While WMS refers to the sending and receiving of geographic information after it has been rendered as a digital image, WFS (Web Feature Service) can be described as the “source code” to the maps that one would view via WMS.
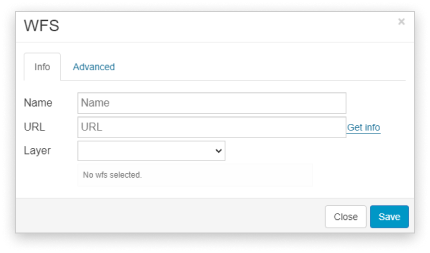
To add Web Feature Service into the Datasource Manager:
- Select the Datasource Manager from the Tools tab.
- Click Add WFS in the Source Browser.
- Write a WFS name and URL of the dataset.
- Select Get Info.
- Select a layer.
- Click the Save button.

Note: when adding a WFS from an ESRI source, add the following to the end of the URL: ?version=1.0.0
Adding layers
WFS is added to a project as shown below:
- Select Add Layer from the Layer tab or Map tab.
- Select Web Feature Service in the Source Browser.
- Select the WFS layer.
- Click the Select button.
Apart from adding WFS to your maps, you can also share your GIS Cloud map on a third-party software as a Web Feature Service (WFS).
Add password-protected WFS
It is possible to add password-protected WFS layers in GIS Cloud, but it has to be organized in a way the system can recognize them. The username and password must be included in the WFS URL and saved in the GIS Cloud Source Browser.
- Open Map Editor and Source browser.
- Click add WFS.
- In the URL box, add the WFS URL together with the username and password. The URL has to have a structure like this:
- http://username:password@wfs_url_example.com
- “username” username of the user who has access to WFS
- “:” delimiter
- “password” password of the user who has access to WFS
- “@” delimiter
- “wfs_url_example.com” URL of the WFS
- Click the Get info button.
- Save the layer and add it to the map.
Note: Some WFS services that require username and password credentials can contain special characters that need to be entered in a more URL-friendly format, for example:
- instead of @ use %40
- instead of ! use %21
Apart from adding WFS to your maps, you can also share your GIS Cloud map on a third-party software as a Web Feature Service (WFS).
