How to bulk edit feature attributes?
Table of Contents
Bulk editing allows you to apply the same attribute changes to multiple features simultaneously, saving time when updating one or several attribute values across a selection (whether that’s 2, 10, or 50 000 features!). Previously, attributes could only be edited one feature at a time.
To get started with bulk editing, you’ll first need to select the features you’d like to edit. Note that editing attributes and geometry is generally enabled only for layers imported into the database, so make sure you’ve covered that step.
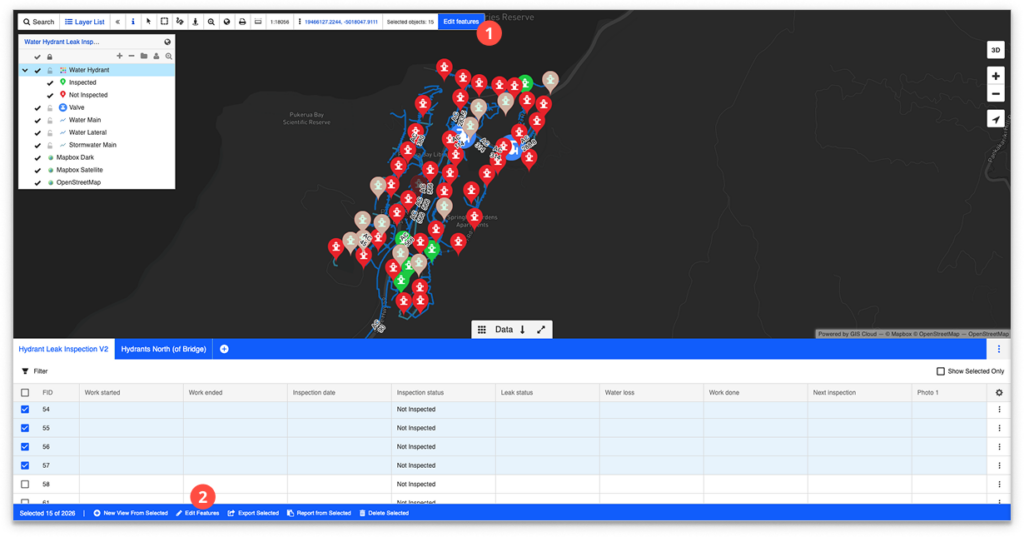
You can select the features directly from the map or by checking the checkboxes in the datagrid. Other ways to select features from a layer on the map can be explored here.
After you’ve selected the features from a layer on the map, to start editing, click on the “Edit Features” button in the toolbar (1) or the Edit Selected (2) button in the datagrid.
Editing attributes
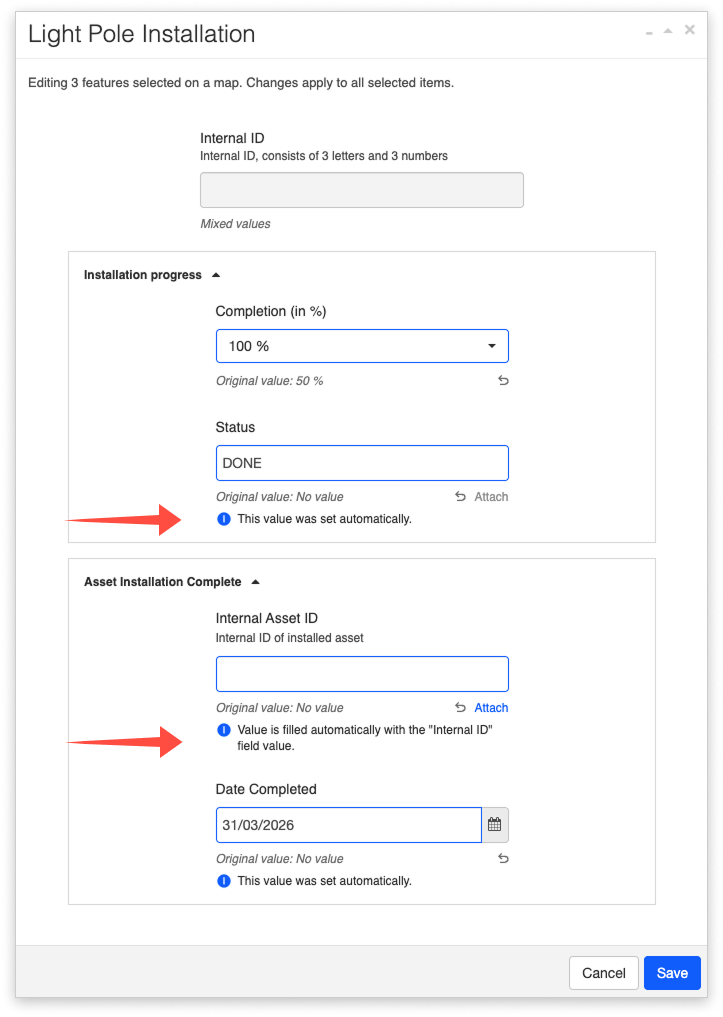
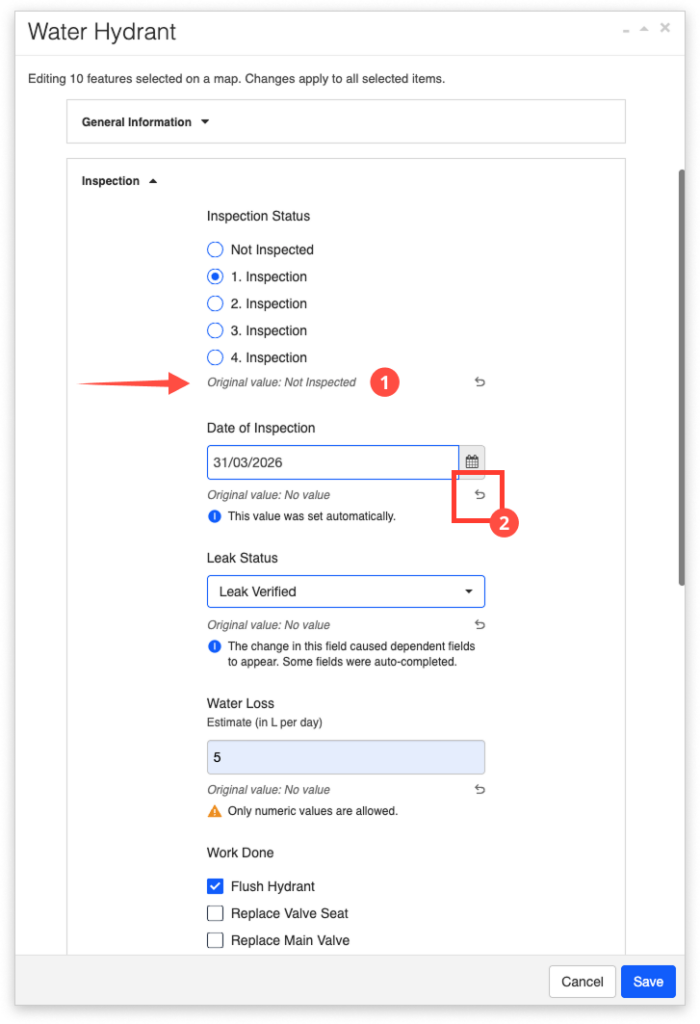
When changing the value of an existing attribute or adding a new attribute, you will see the original value listed below (1). If the selected features have different values for the same field, “Mixed values” will be displayed instead. If you enter a new value and save, that new value will overwrite the existing values in that field across all selected features.
You can click the “return” arrow (2) to revert a field back to its original value at any time before saving. Note that this reverts only that individual field — it does not reset the entire form.
Once you are done making changes, click on “Save”. Before saving, you will be prompted to confirm the changes in a separate window. In this window, you will see:
- how many features are selected,
- which fields were edited,
- the original and the new values,
- and in case your actions are deleting values from certain fields, this will be labeled clearly as well.
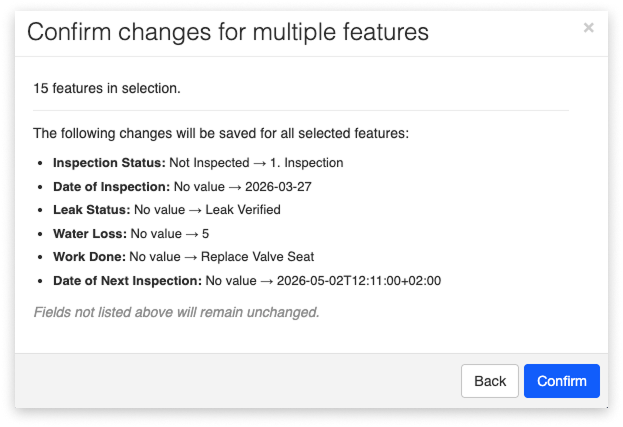
Changes are only made for the fields that are listed – other fields retain their old values.
Excluding fields from bulk editing
By default, most fields are available for bulk editing. However, individual fields can be excluded from bulk editing through the Forms Manager or the Mobile Data Collection Portal. This setting is configured per field, similar to other field options such as Required or Persistent.
If a field is excluded, it will still be visible in the form, but it cannot be modified when editing multiple features at once. These fields can still be edited in single-edit mode (when editing features one by one).
To view or change this setting, open the field’s configuration in the Forms Manager or in the Mobile Data Collection Portal. To exclude a field from bulk editing, enable this option by ticking the box next . If working in JSON, the setting is defined as: "multiEditDisabled": true
This setting can only be changed by the form owner.

Note: If you want to completely prevent users from editing a field (in both single and bulk editing), use the Read only option.
Keep in mind that automations will still run on read-only fields — meaning they can automatically populate values even though users cannot edit them manually.
Working with media files and attachments
When working with media files and attachments during bulk editing, check out the guidelines for possible scenarios in the table below:
| Scenario | Can you add new media? | Can you remove existing media? |
| Selected features have the same media type and the same file attached | Yes | Yes |
| Selected features have the same media type but different files attached | Yes | No |
| Selected features have a mix of media types and/or values in the field | No | No |
Working with dependent fields
When working with dependencies during bulk edits, the following actions will apply:
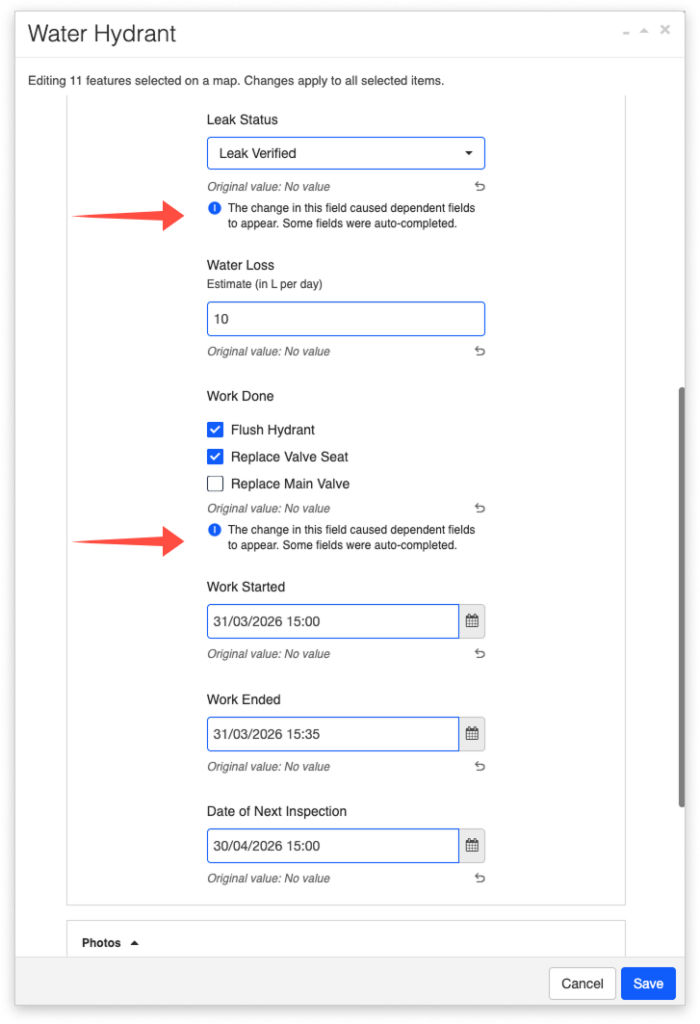
If you make an edit to a field that opens a dependent field, you will be notified that the change has caused dependent fields to appear, and you will be able to make changes to those fields as well.
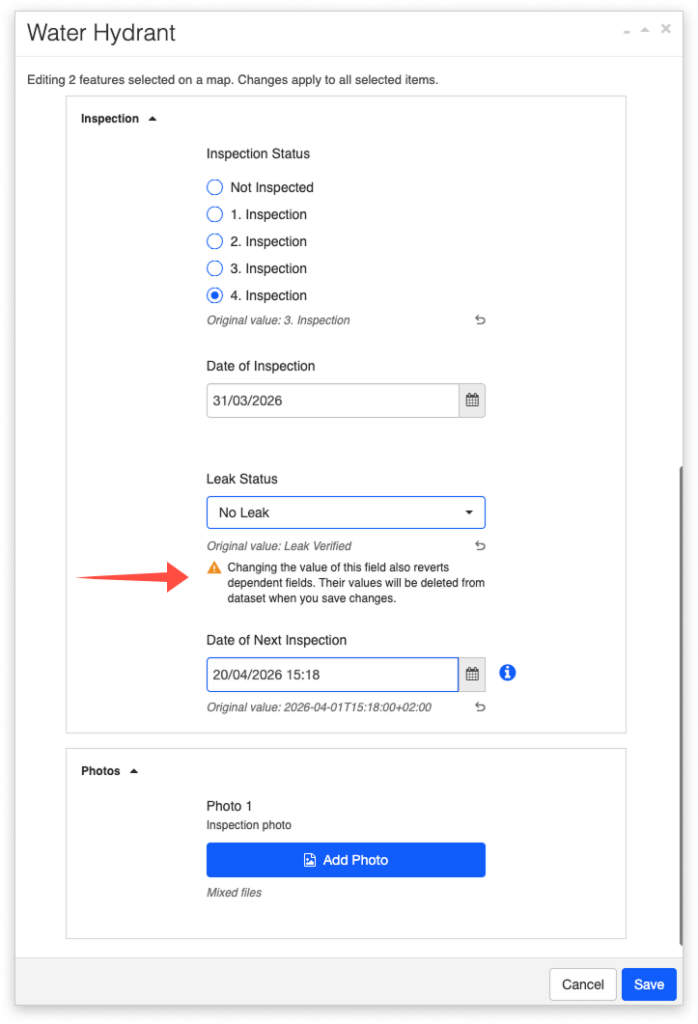
If you make an edit that hides dependent fields, you will be notified that this action will remove values from the dependent field(s).
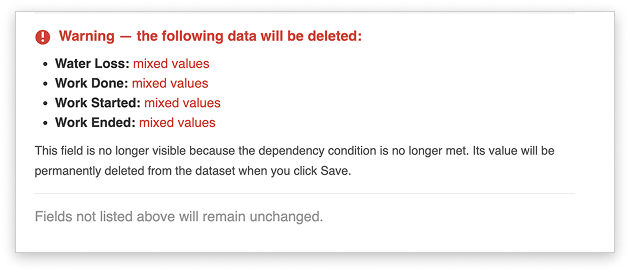
When applying changes to dependent fields which will be hidden, and their values removed, you will also be notified by an additional warning in the confirmation window, where the removed values will be highlighted in red.
Working with form automations
When working with form automations, there are no constraints or additional actions. Form automations work the same as for single-feature edits. You will be notified when an automated field is populated.
Bulk editing will also populate Read-Only fields that have automation rules set for them.