
How to bulk edit features in the Mobile Data Collection app?
Bulk editing in the Mobile Data Collection (MDC) app allows you to apply the same attribute changes to multiple features at once, directly from the field. Instead of opening and updating features one by one, you select them on the map or with an attribute filter, fill in the form once, and send the changes to the whole selection in a single step (whether that’s 5 assets on one street or 500 across an entire district!).
Bulk editing takes five steps:
Table of Contents
If you’d like to bulk edit features from the browser instead, check out How to bulk edit feature attributes?
Before you start
To bulk edit, you’ll need:
- edit or update permission to the layer,
- the layer selected in Settings, since bulk edit works only on that layer,
- an internet connection, as bulk editing isn’t available offline.
Starting the bulk edit
Open your project and tap the Bulk Edit (1) button in the menu at the bottom of the map screen.
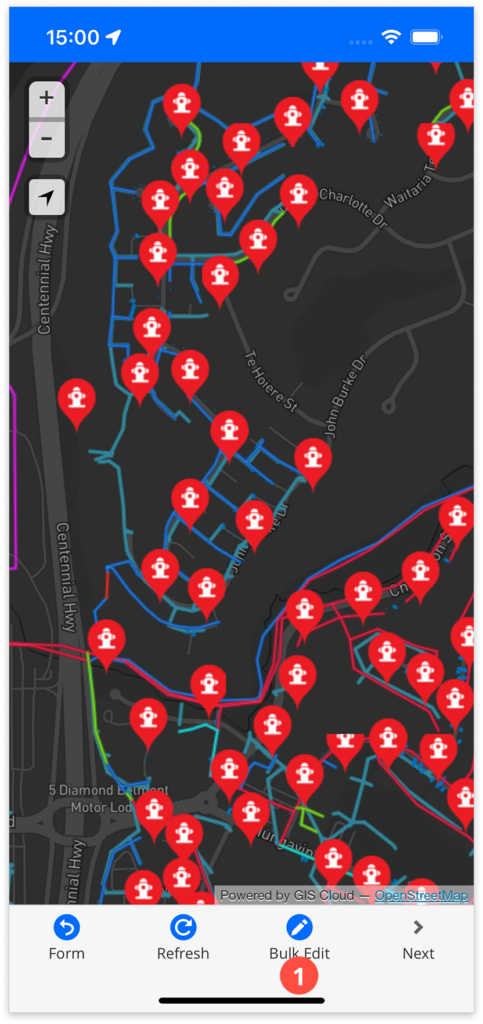
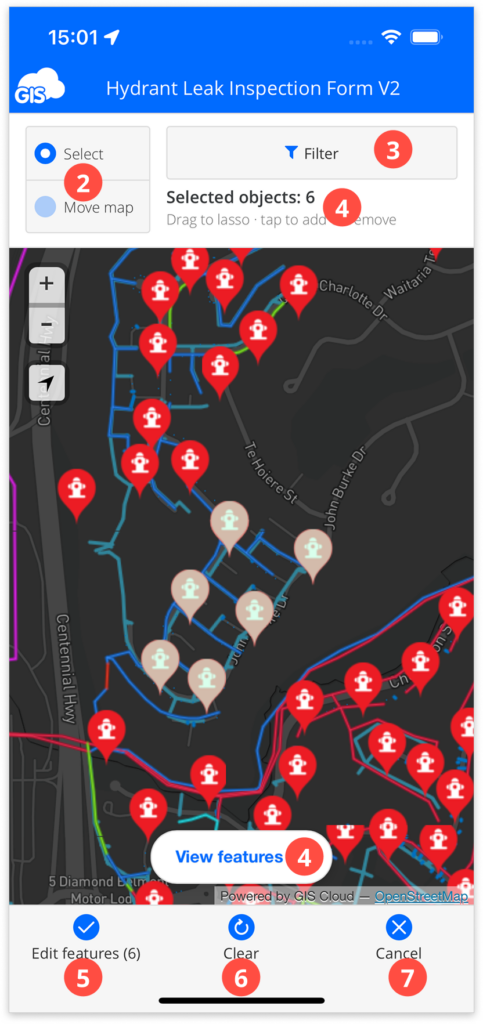
The app switches to selection mode, where you’ll find:
- Select / Move map (2): with Select on, you can draw a lasso and tap features to select them. Switch to Move map when you need to pan or zoom, so dragging moves the map instead of drawing a lasso.
- Filter (3): selects features by attribute value instead.
- Selected objects (4): shows how many features are selected.
- Edit features (5): opens the form for the selected features. It’s greyed out until at least one feature is selected.
- Clear (6): removes all features from the selection, but keeps you in bulk edit.
- Cancel (7): exits bulk edit and discards the selection.
Select features
You can select features directly on the map or with an attribute filter.
On the map
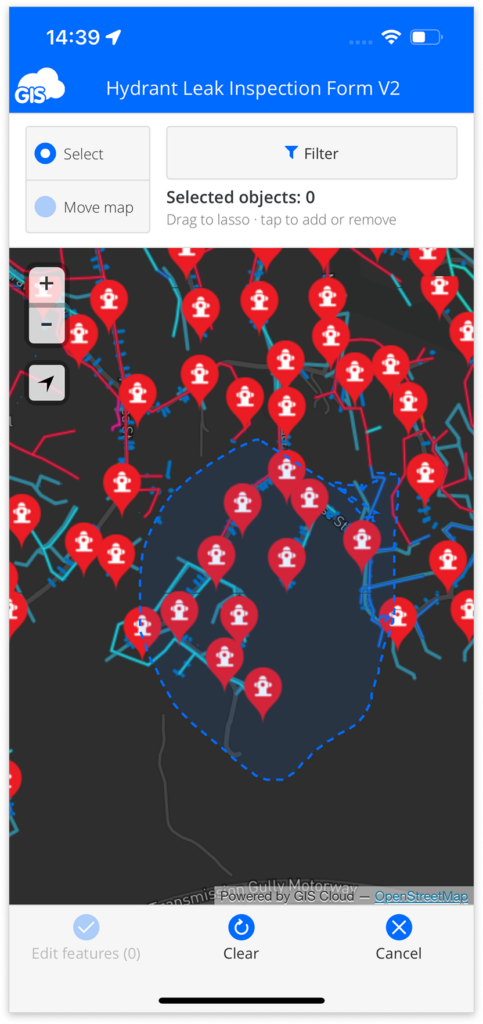
With Select on, drag your finger around the features you’d like to edit to draw a lasso, or tap individual features to add them. To remove a feature from the selection, tap it again. The lasso only adds features, so you can draw as many lassos as you need.
Selected features are highlighted on the map), and the Selected objects counter shows how many you’ve selected. A lasso selection can take a few seconds to appear, especially when it covers many features.
When you’re done, tap View features to review the selection, or Edit features to go straight to the form.
Tip: To reach features in another part of the map, switch to Move map, pan or zoom, then switch back to Select.
With a filter
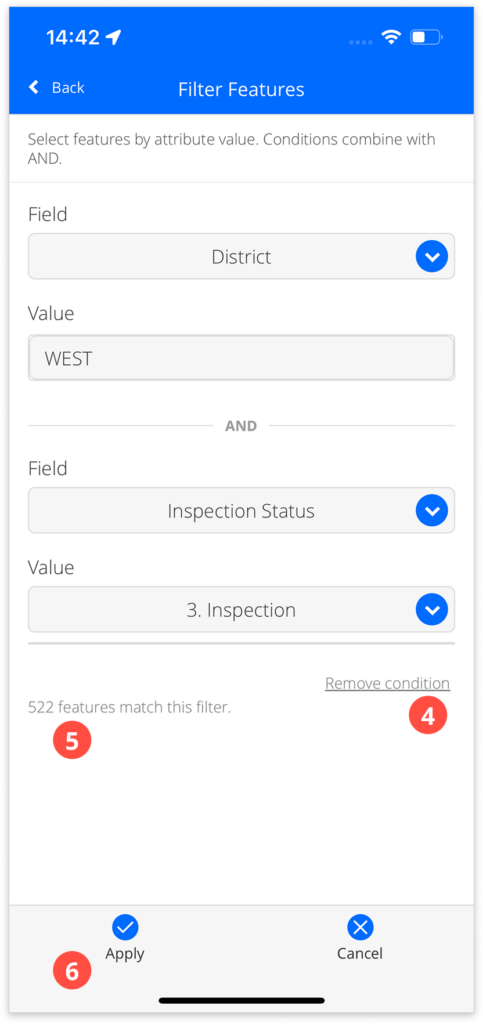
To select features that share a value, like all assets in one district, tap Filter. On the Filter Features screen:
- Choose an attribute from the Field (1) dropdown.
- Enter the Value (2), or choose it from a dropdown for fields with predefined options. The filter matches complete values.
- Optionally, tap Add condition (3) to add a second field and value.
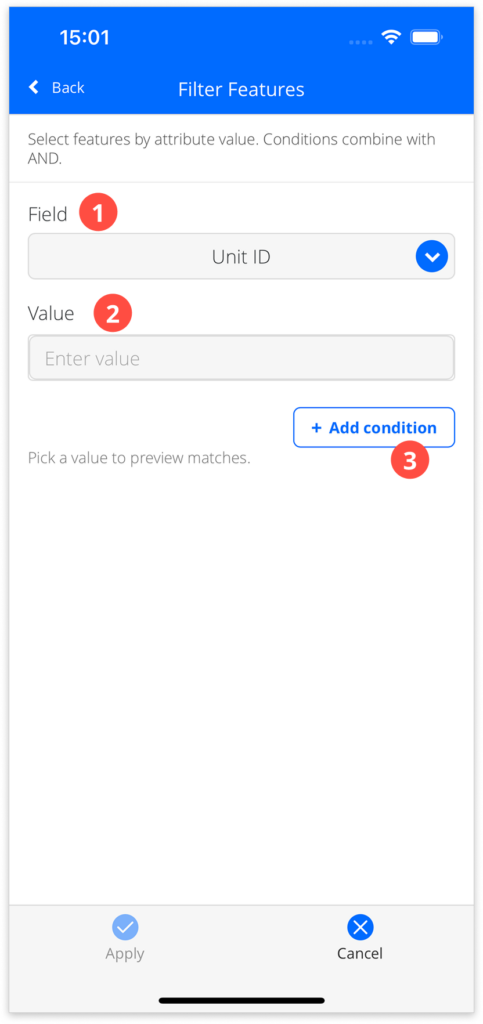
- Features must match both conditions. You can use up to two conditions, and remove the second one with Remove condition (4).
- The number of how many features match your filter will be displayed under the conditions (5).
- Tap Apply (6). The matching features are selected and their list opens.
Review the selected features
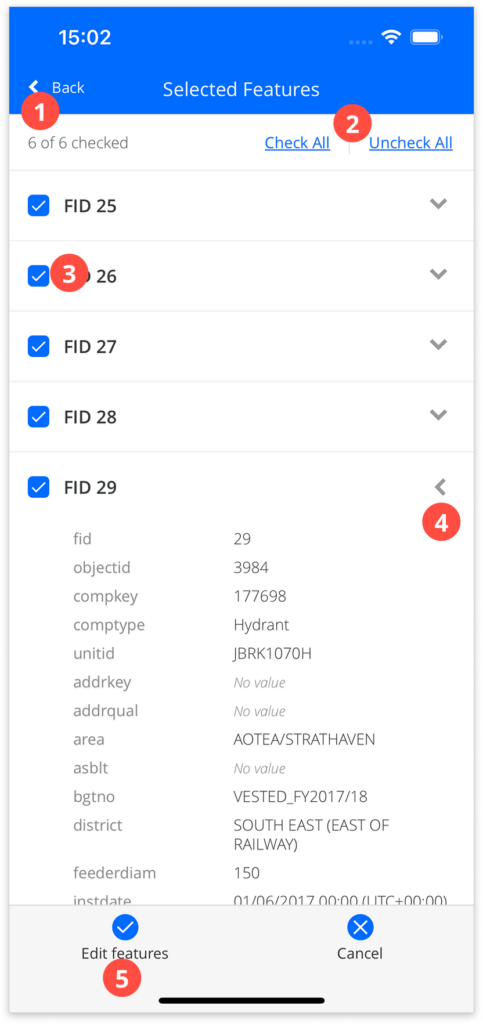
The Selected Features (1) list shows the selected features by their FID, with the number of checked features at the top. Only checked features are edited.
- Tap Check All or Uncheck All to change all checkboxes at once (2).
- Untick a feature’s checkbox to leave it out of the edit (3).
- Tap the arrow to expand a feature and see its attribute values (4).
Then tap Edit features (5) to open the form.
Edit the attributes
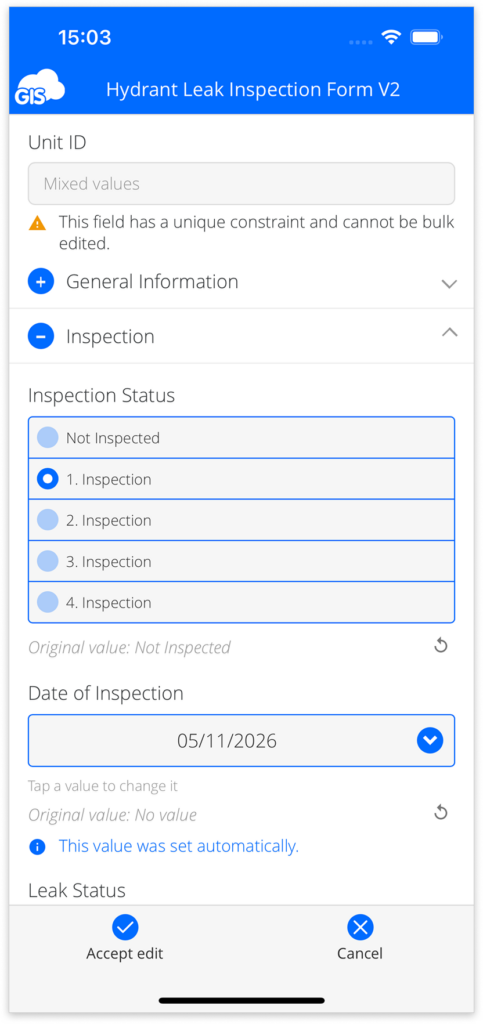
The bulk edit form is your regular form, with a note at the top that changes apply to all selected features. Fill the form the same way as you would when editing a single feature, and fill in only the fields you want to change. All other fields stay as they are.
Below each changed field, you’ll see its original value, or “Mixed values” if the selected features differ. To undo a change, tap the arrow next to it.
Some fields work differently in bulk edit: fields with a unique constraint or excluded by the form owner can’t be edited, while automated and dependent fields update as they would for a single feature. For details, check out How to bulk edit feature attributes?
In the MDC app, you can also:
- add media to all selected features
- let AI fill in the form from a photo or a voice description, using Take a photo or Describe. Learn more in AI Form fill.
When you’re done, tap Accept edit.
Confirm the changes
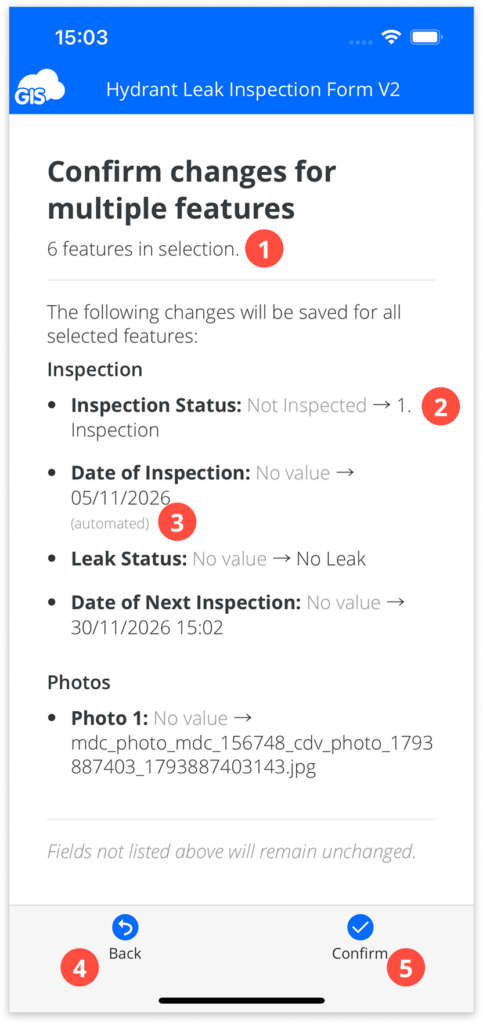
Before anything is saved, you’ll be prompted to confirm the changes in the Confirm changes for multiple features window. It shows:
- how many features are in the selection (1),
- the edited fields, with their original and new values (2),
- and values filled in by an automation, labeled “(automated)”(3).
Fields that aren’t listed keep their existing values. Tap Back (4) to return to the form, or Confirm (5) to save. The app returns to the map, where the features are shown with their new values.
Good to know
- Overlapping features: tapping where features overlap selects all of them. You can untick the ones you don’t need in the list of selected features.
- Lines and polygons: if the lasso touches any part of a line or polygon, the whole feature is selected. Bulk Edit isn’t available while you’re drawing a feature.
- Filtering a selection: if features are already selected when you open Filter, the filter narrows down that selection, and the screen shows “Filtering selected features.”
- Update-only layers: if you can only update existing features in a layer, you can still select it in Settings. The app then opens on the map, the form shows “You can only update existing features in this layer.” and Bulk Edit works normally.
- Layers without a form: all fields are shown as plain text or number inputs, and “Mixed values” still marks fields that differ.
- Locations: bulk editing changes attributes only, so feature locations can’t be changed.
- Saving: changes are saved for all selected features or for none. If saving fails, the form stays open with your changes and error messages.